Barbie Spirals

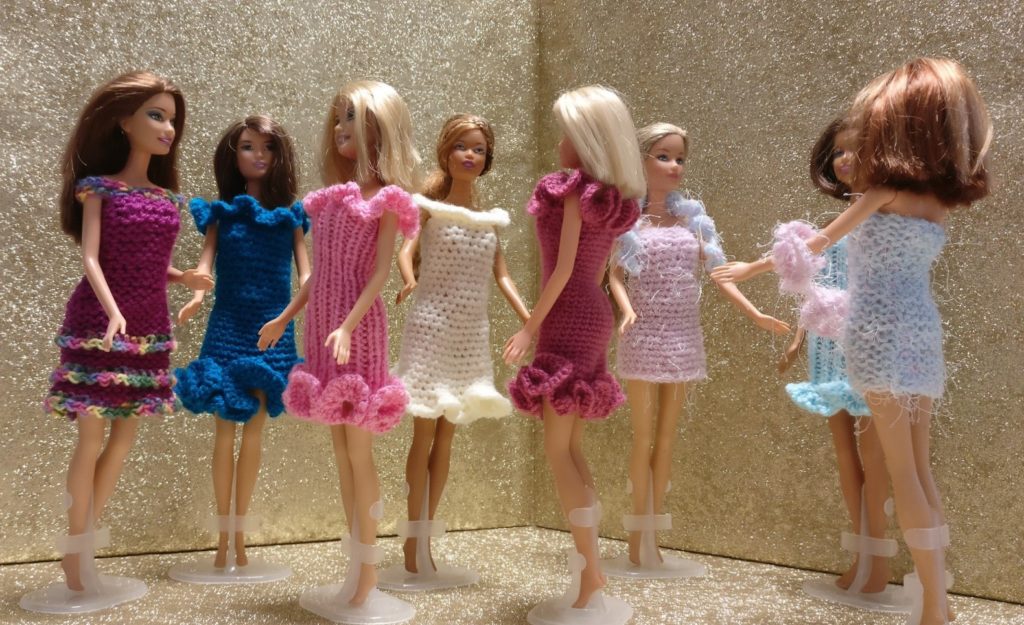
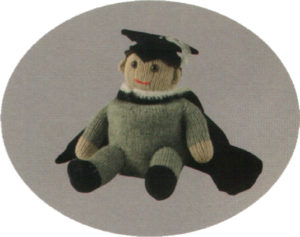
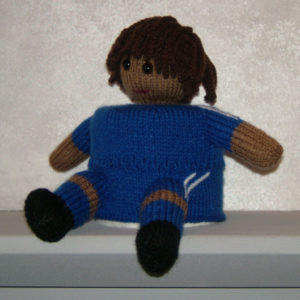
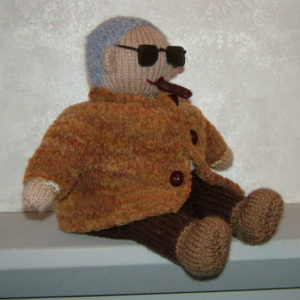
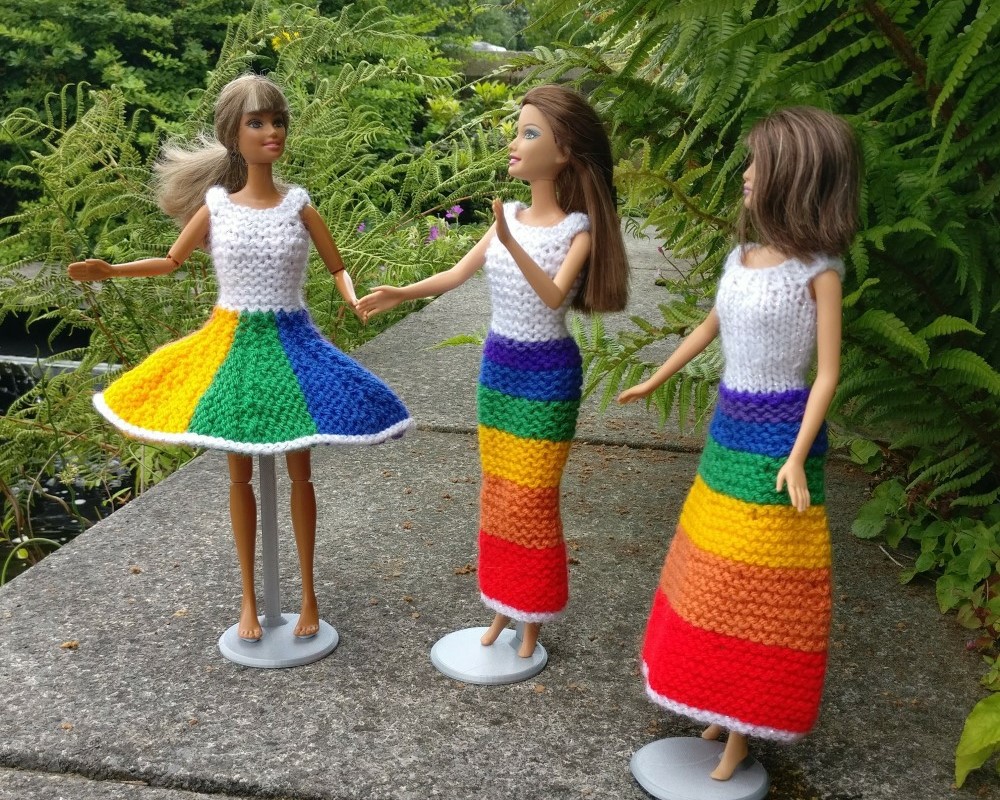
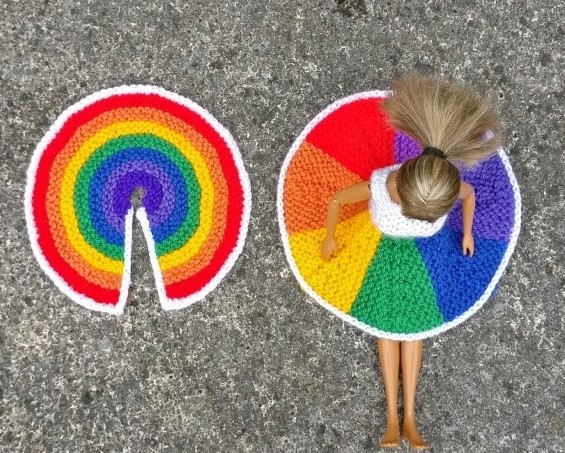
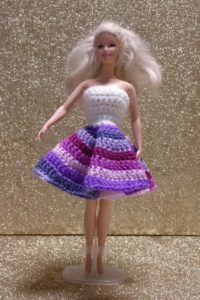
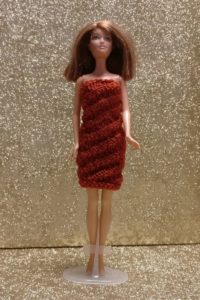
Barbie has lots of new knit and crochet spiral dresses.

In maths there are very specific definitions for some kinds of spirals. You can find lots of information about mathematical spirals on the internet. Some of them refer to ‘circling round a centre point’ but you will also find square, hexagonal and other shaped spirals. In everyday language we refer to anything that goes round and round as a spiral – even though it may not be round.

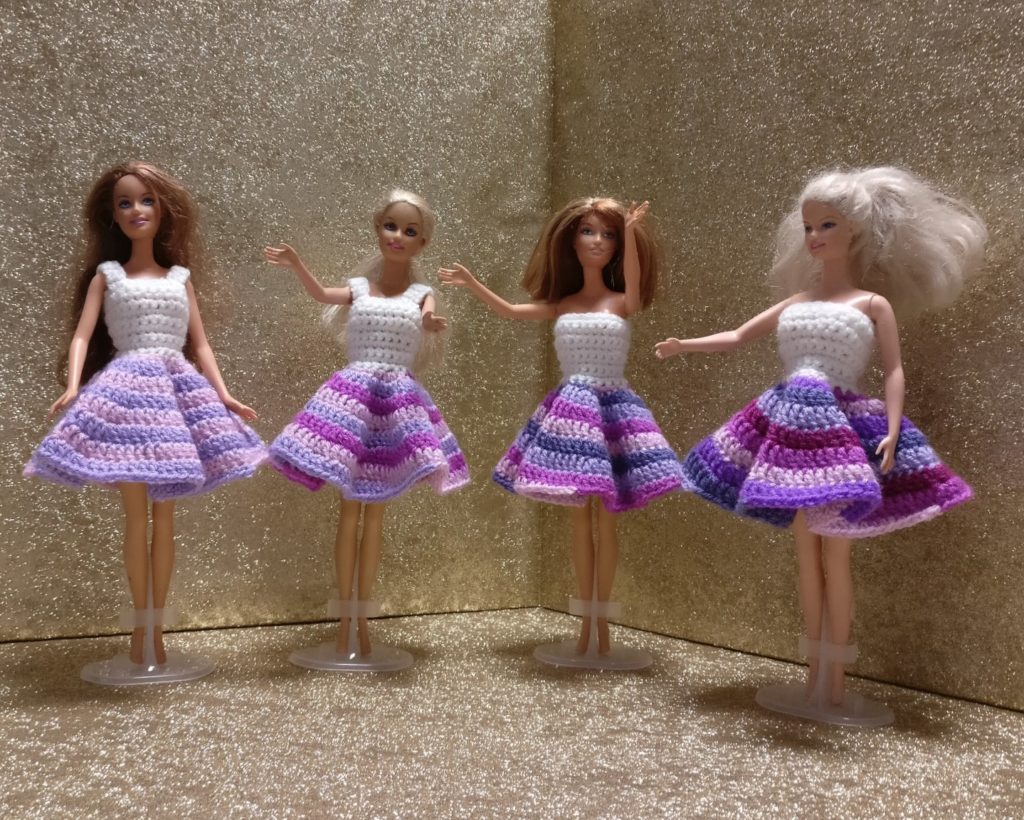
Barbie’s dresses are different kinds of ’round spirals’. They fall into two main categories – those that are flat and spread outwards to form a shape very like a circle, and those that go upwards to form a cylinder shape. Barbie dresses are small so they are perfect for experimenting with new ideas that could then be used on bigger things like hats, bags, cushions, sweaters, etc.
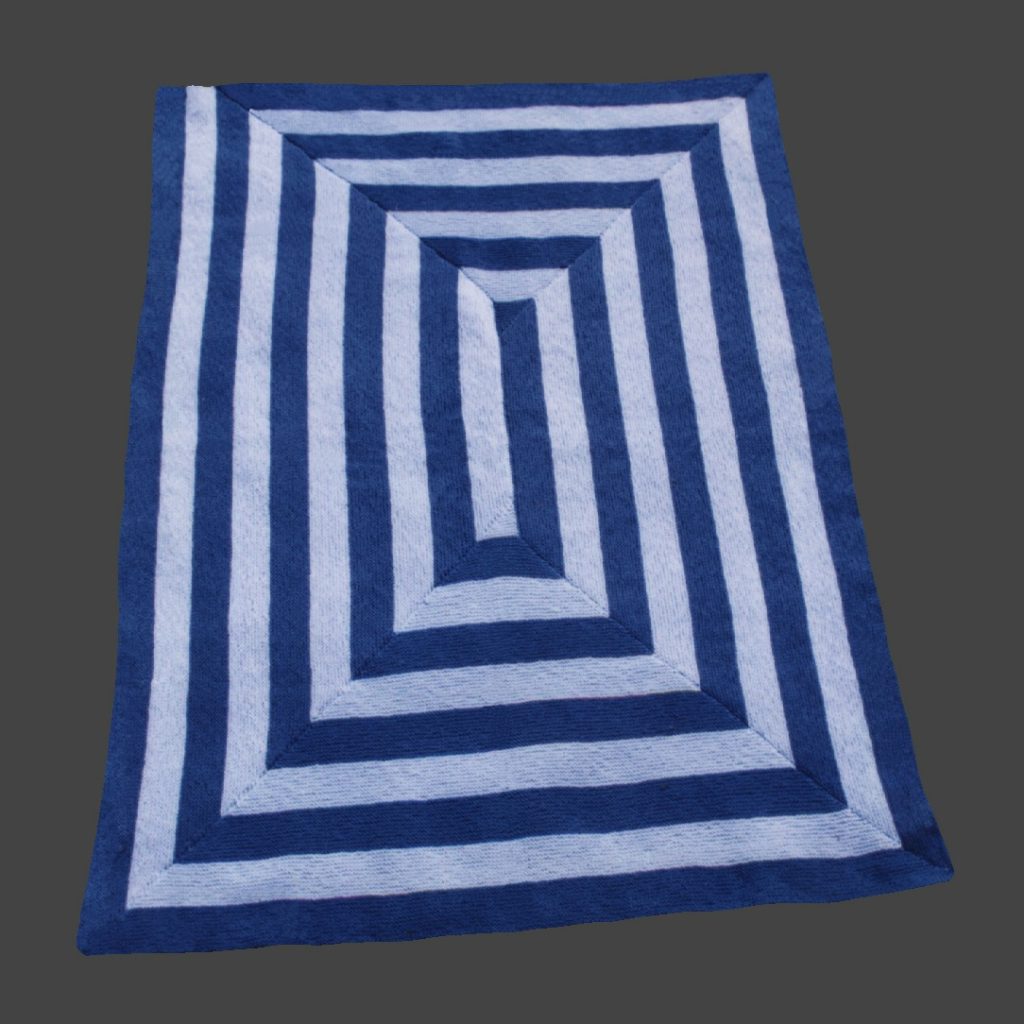
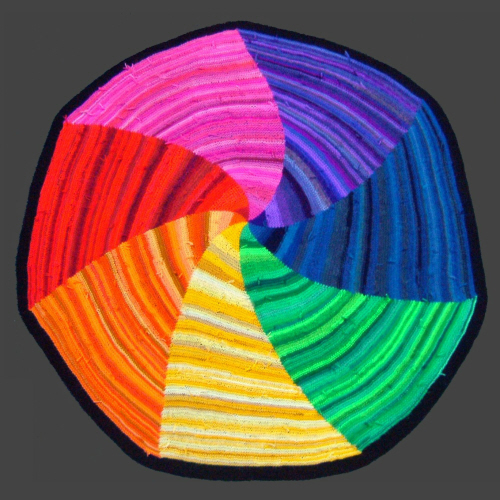
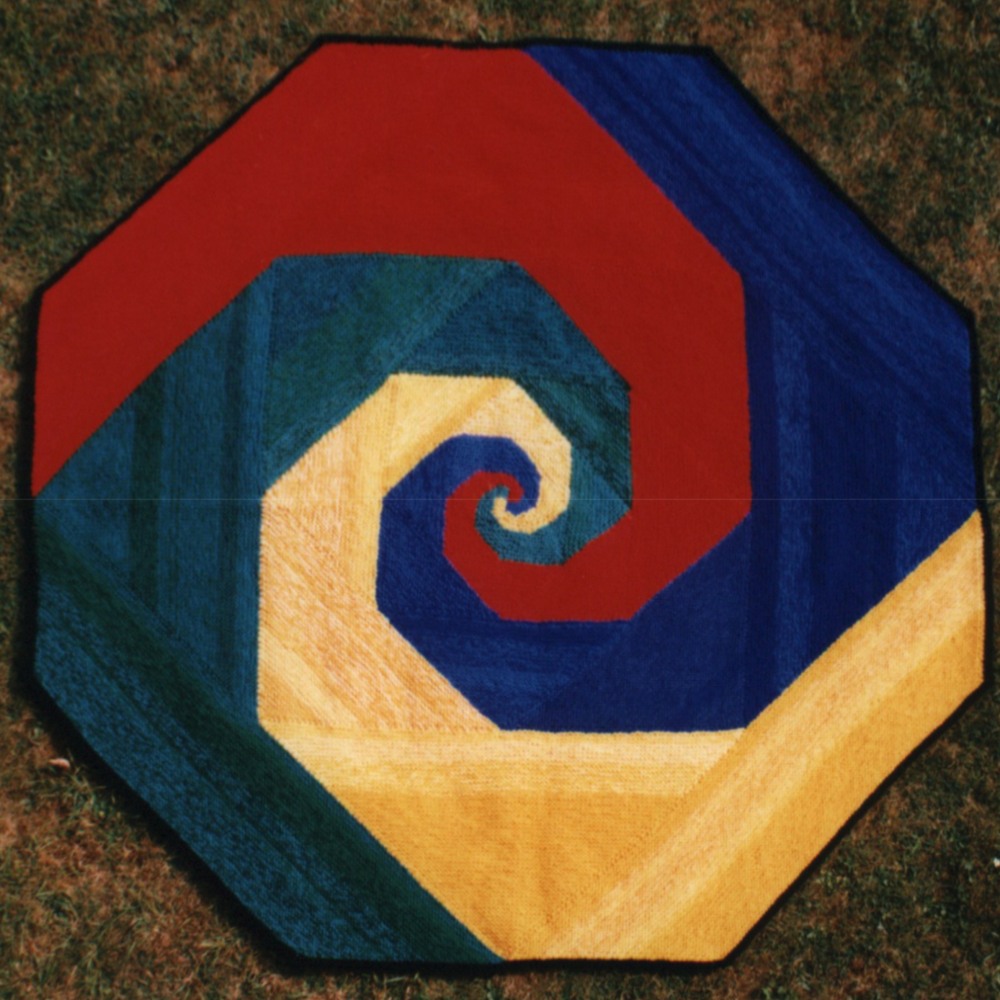
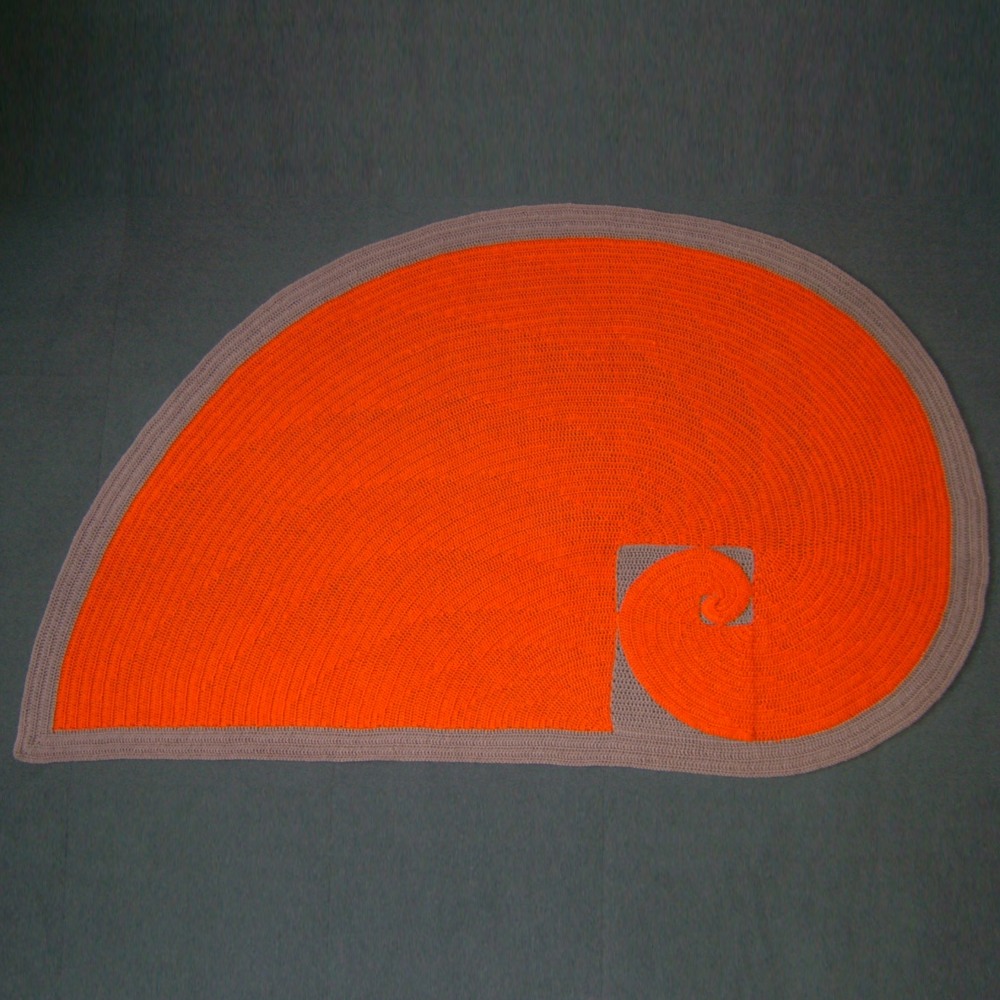
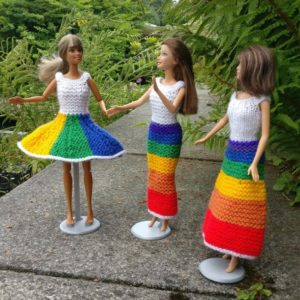
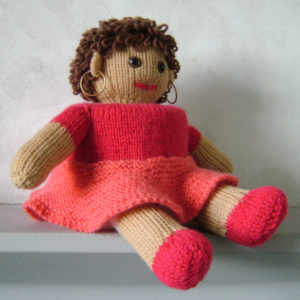
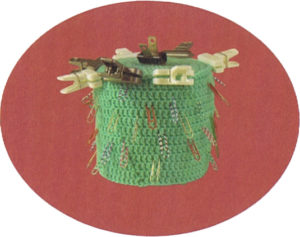
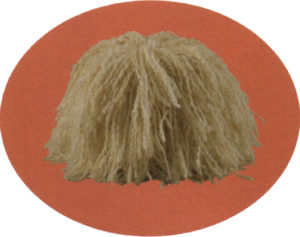
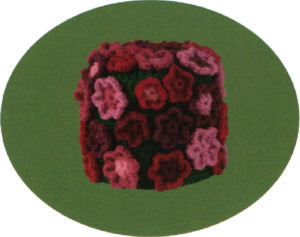
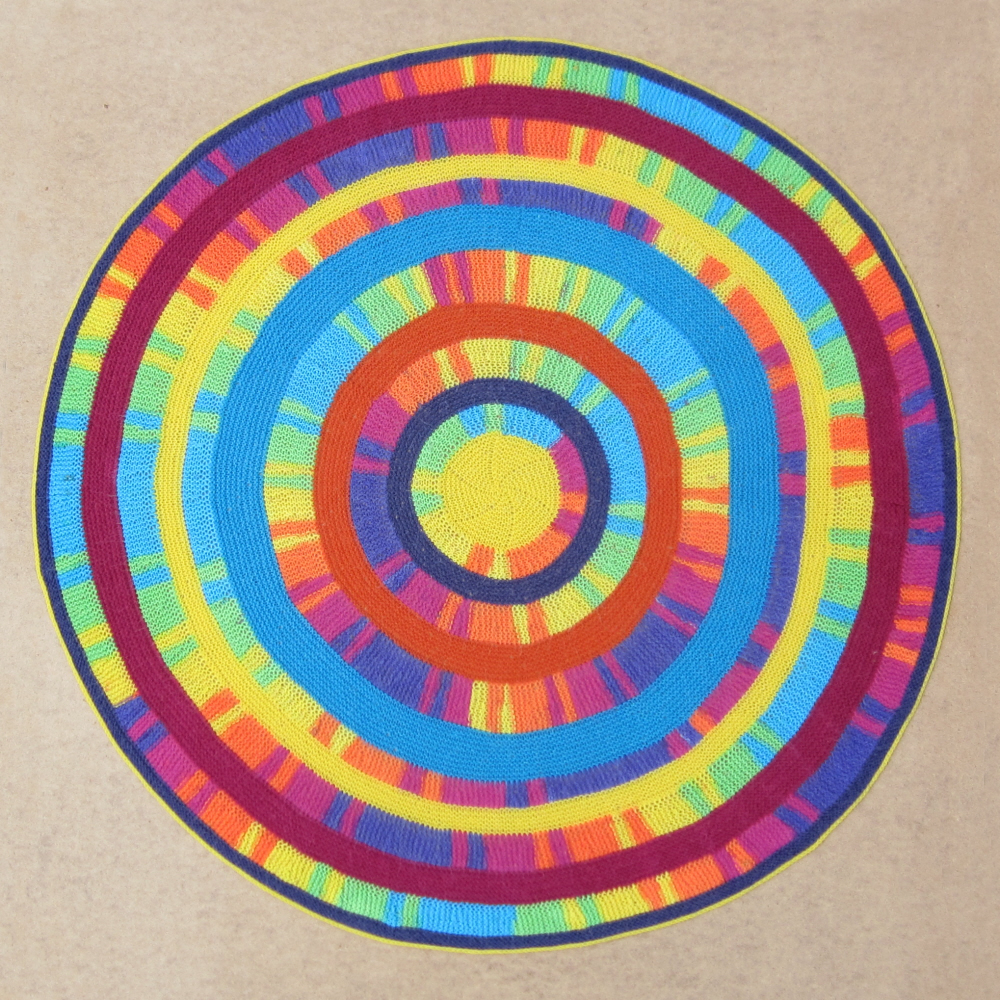
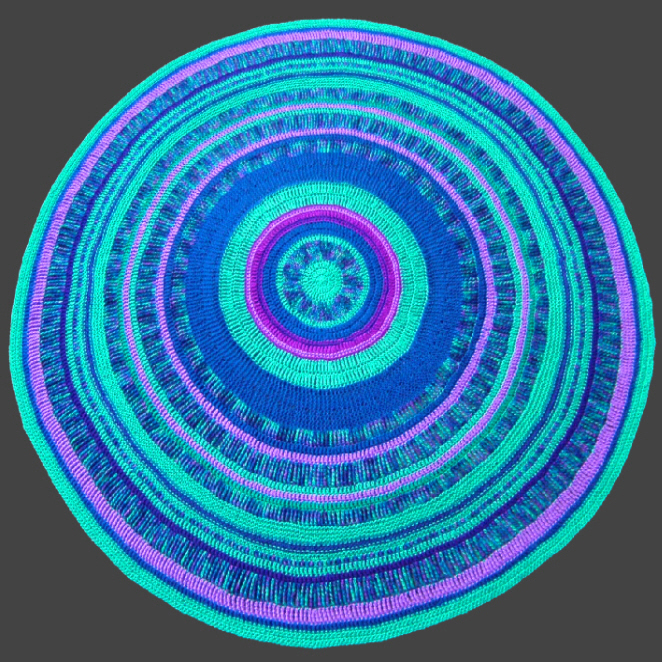
Flat spirals

2 colours
3 colours
4 colours
6 colours

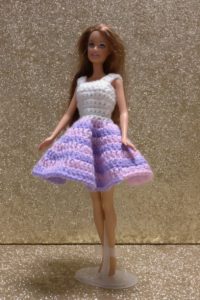
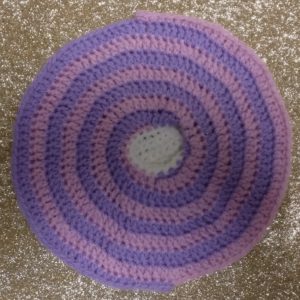
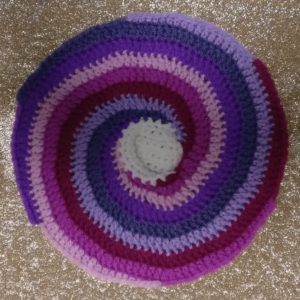
These dresses are worked in treble crochet. When you work in trebles you need to add 12 trebles in each round to keep the shape flat. If you want to make a hat, coaster, or something similar, you would begin with 12 stitches worked into a ring then keep adding 12 stitches on every round. Barbie’s spirals begin at her waist with 24 stitches. It is best to use 2, 3, 4 or 6 colours because the stitches can be divided easily into these numbers of sections.

Many people think you need to add more and more stitches as the circle gets bigger. This is not true. You only ever need 12 extra stitches even if you are making something as big as a blanket. To make a large circle look ’rounder’, stagger the extra stitches so they don’t lie in lines above each other. Barbie’s dress is not big enough to worry about this.

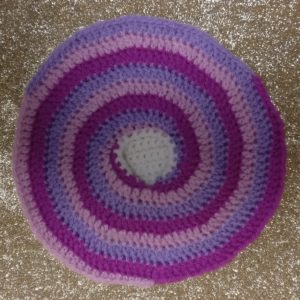
Treble stitches are quite tall so, as each colour is introduced, the heights of the stitches need to be gradually increased so they can wrap over each other. Start with a few double crochet, then some half-trebles and, eventually, the trebles.

To make Barbie’s skirts softer and more floppy, use a bigger hook but don’t change the stitches.

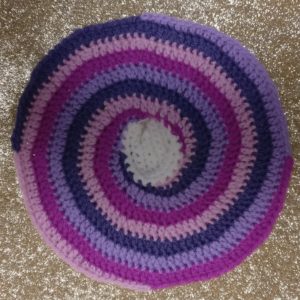
Spirals don’t have to be in trebles. If you use other stitches the number to add on each round is different:
Double crochet – add 6 stitches on each round
Half trebles – add 8 stitches on each round
Double trebles – add 18 stitches on each round.

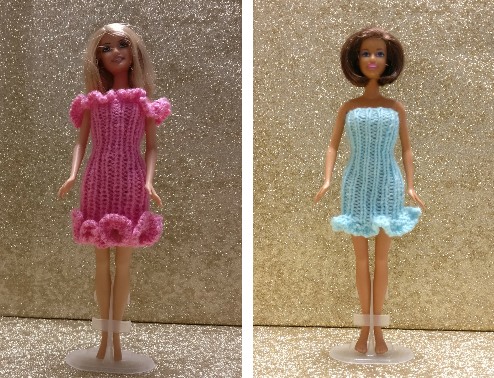
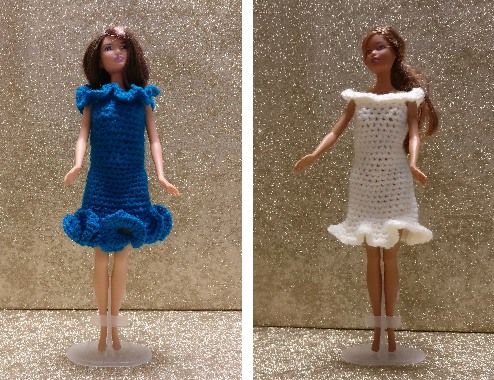
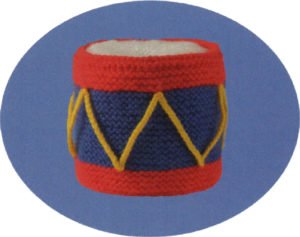
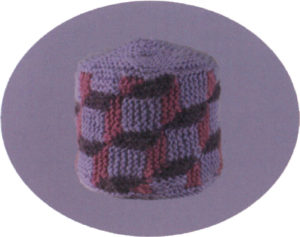
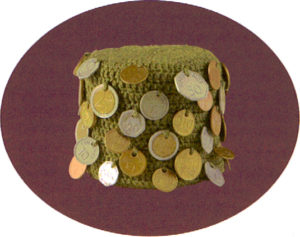
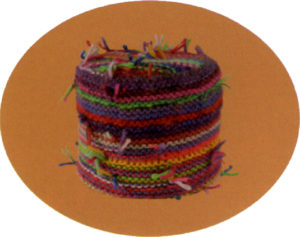
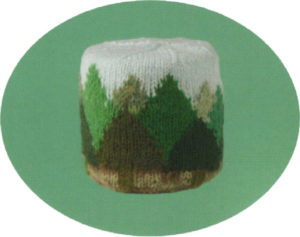
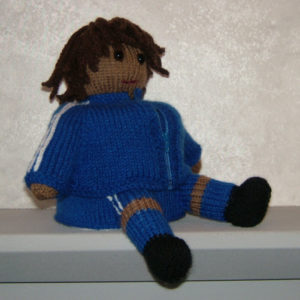
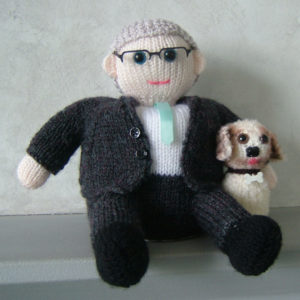
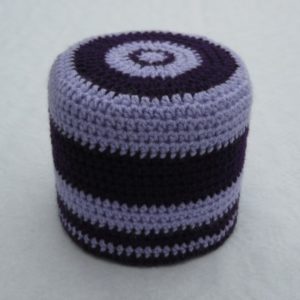
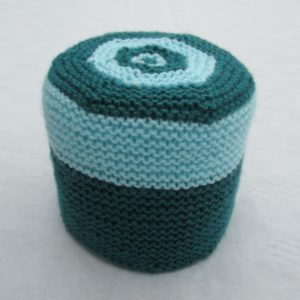
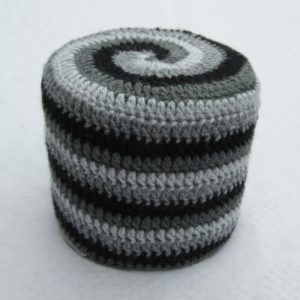
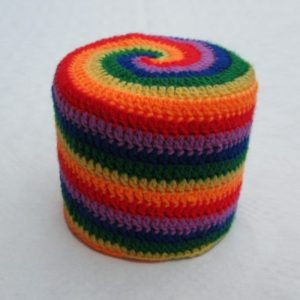
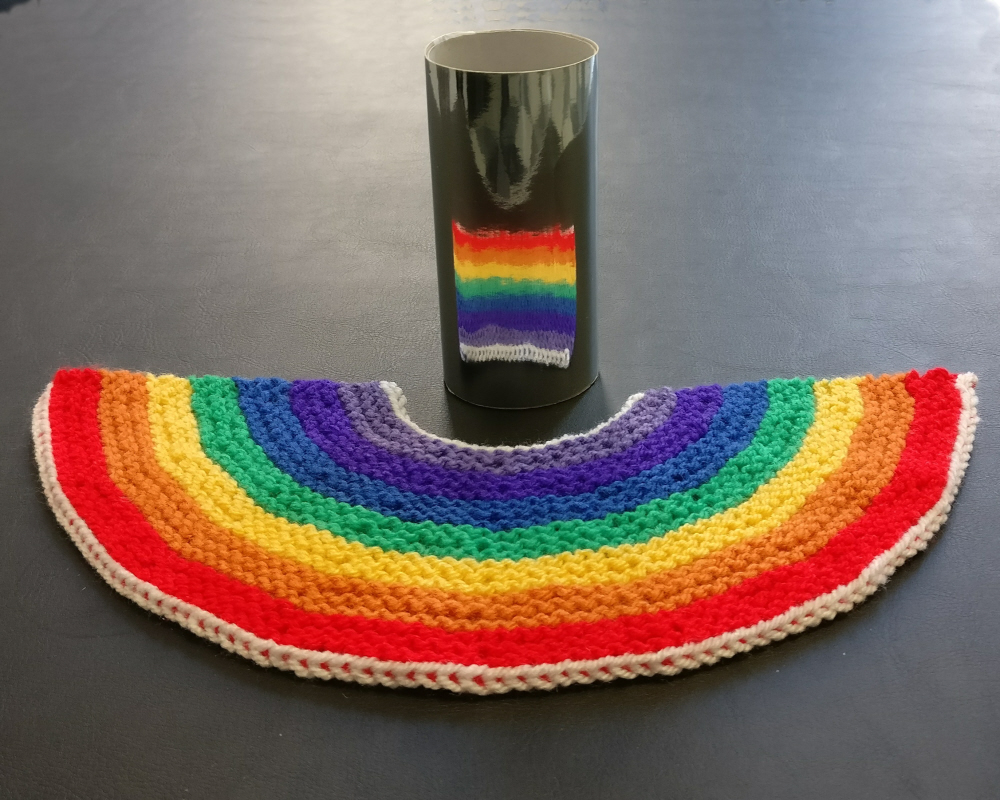
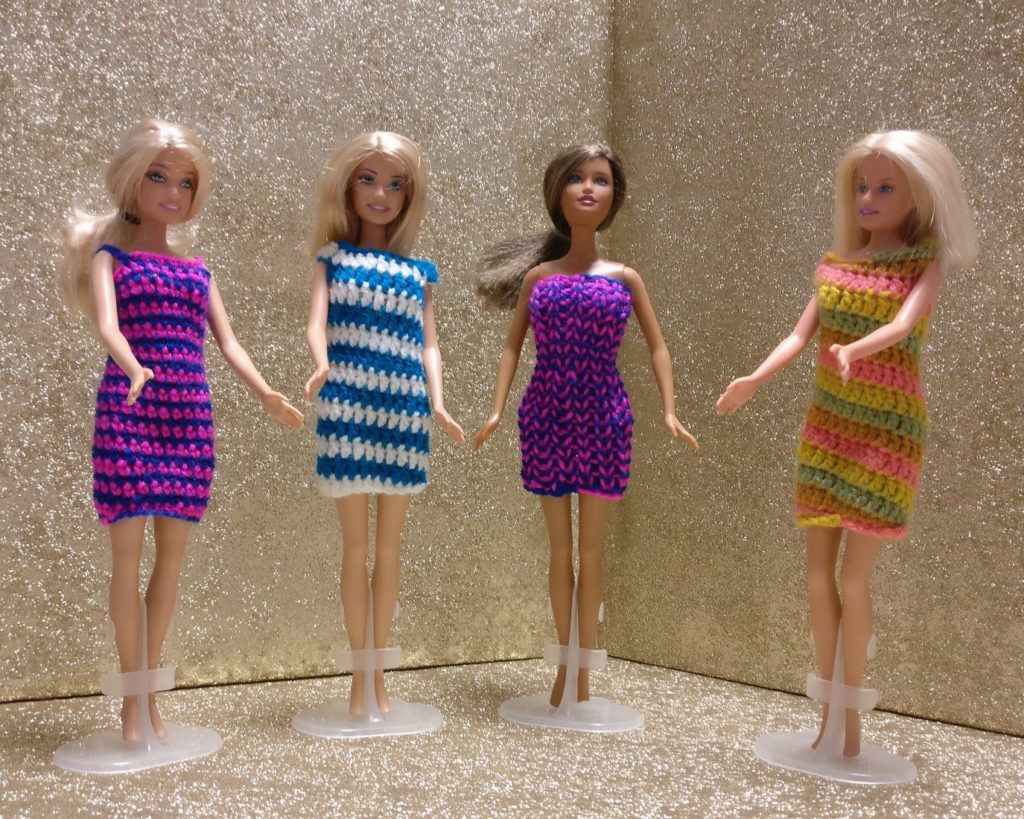
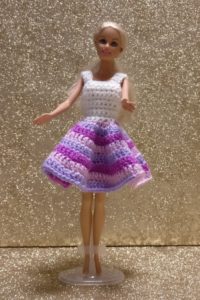
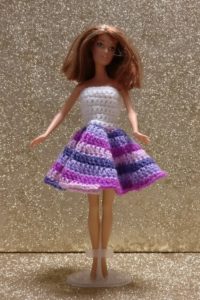
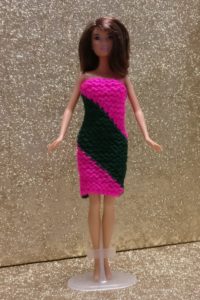
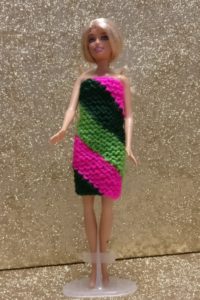
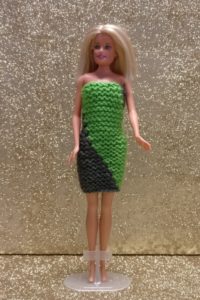
Multi-colour cylinder spirals

2-colour treble crochet
3-colour treble crochet
2-colour double crochet
2-colour rib knit

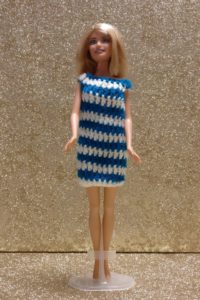
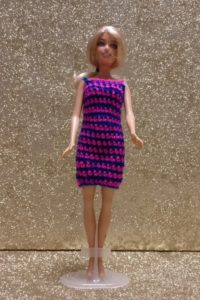
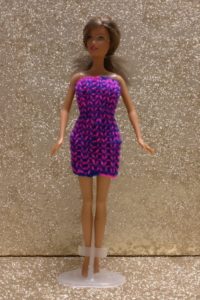
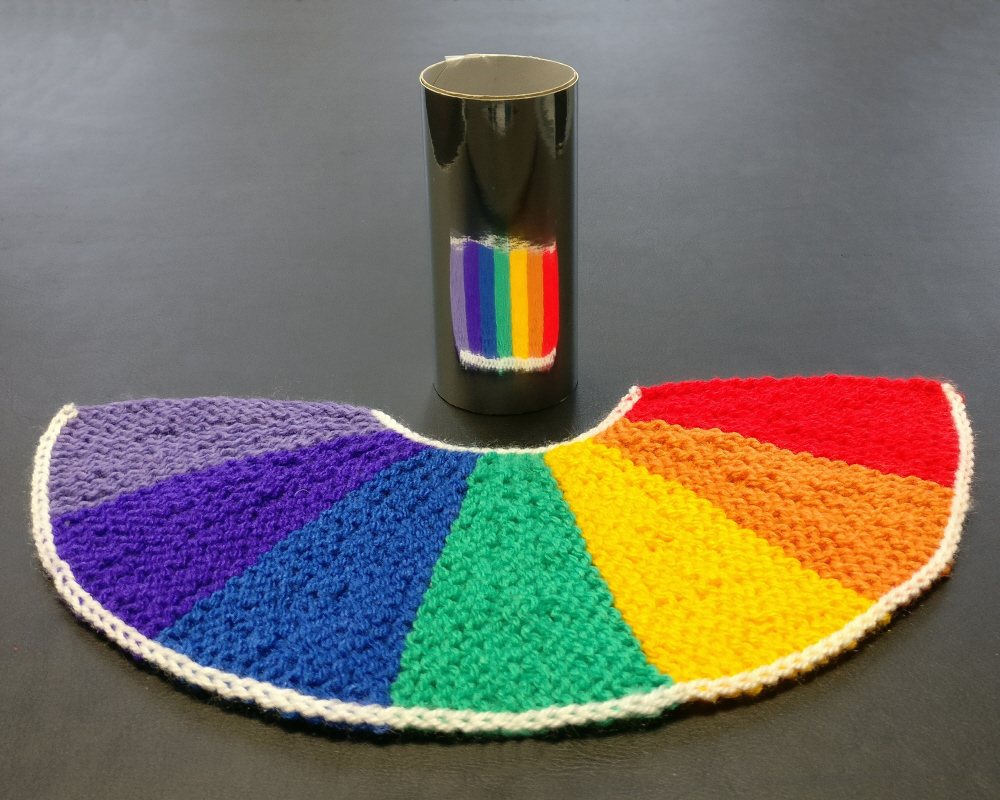
Making a spiral cylinder isn’t much different from making a plain cylinder. The number of stitches for the cylinder has to be a multiple of the number of colours so the stitches can be divided evenly. The 2-colour spiral begins with 11 stitches of each colour (22 in total). The 3-colour spiral begins with 7 in each colour (21 in total). However many colours you use you need to begin with small stitches and gradually change to taller stitches, similar to the beginning of the flat spirals. This would also apply if you were only using one colour. Once the stitches are the right height, just keep going round and round, always working into stitches of the previous colour.

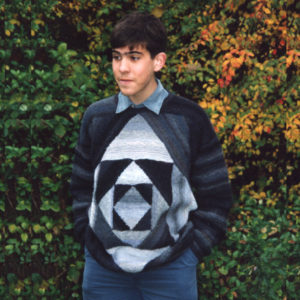
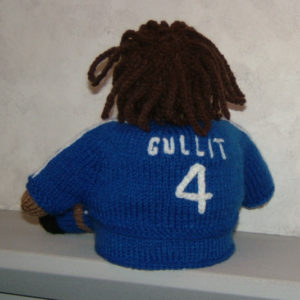
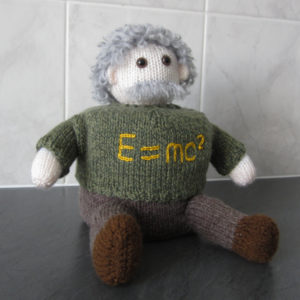
The 2-colour dress worked in double crochet has less obvious spirals because the stitches are smaller. The knitted dress is even less obvious.

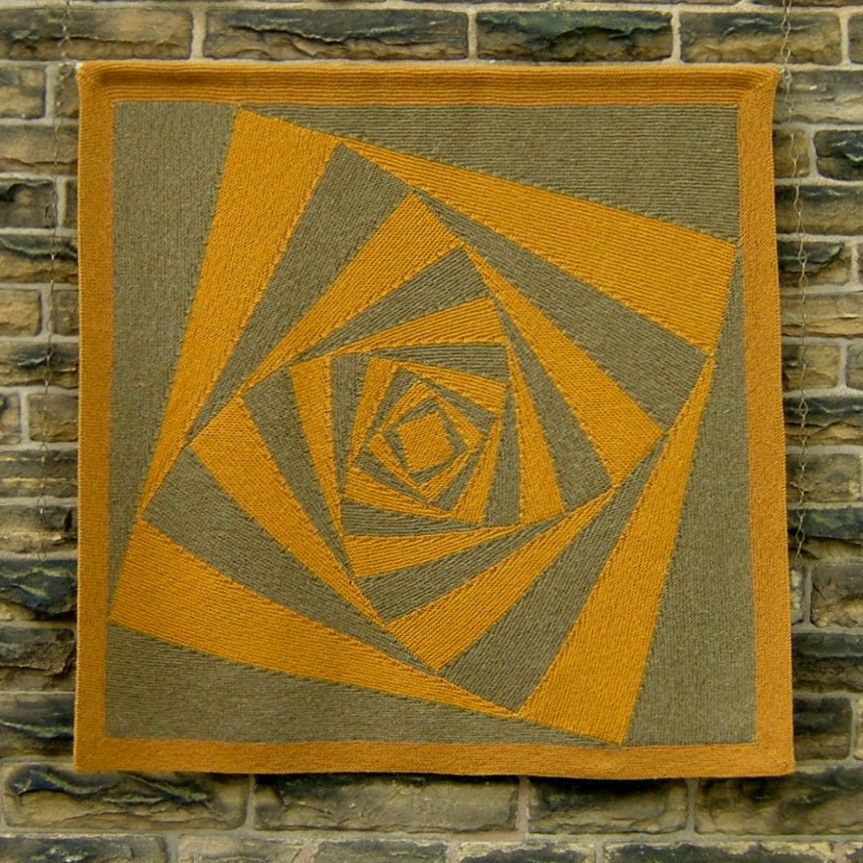
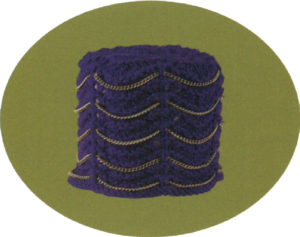
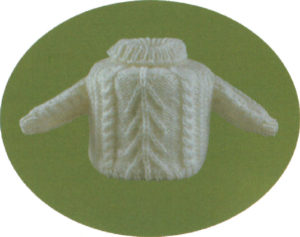
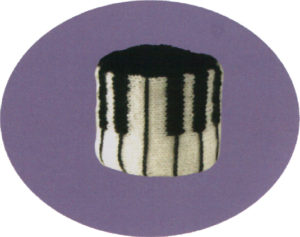
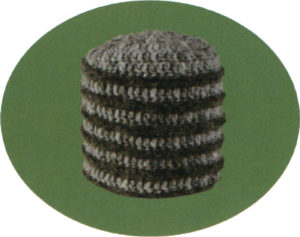
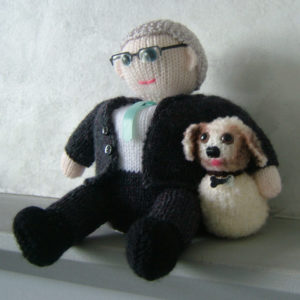
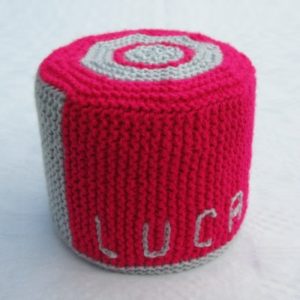
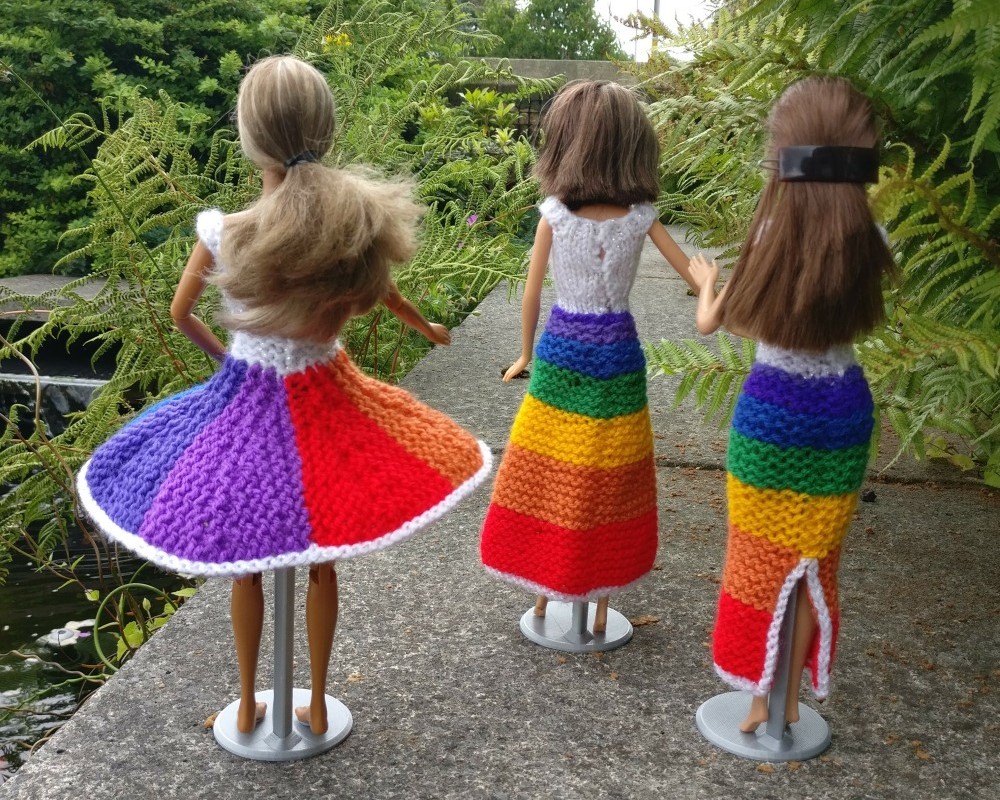
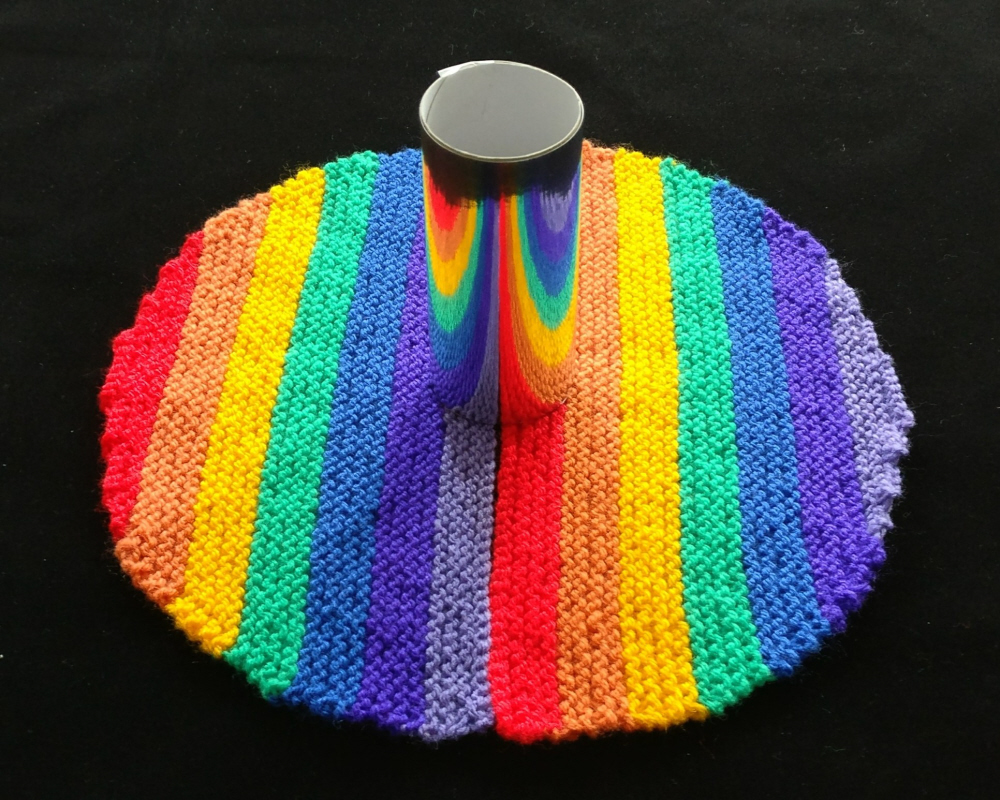
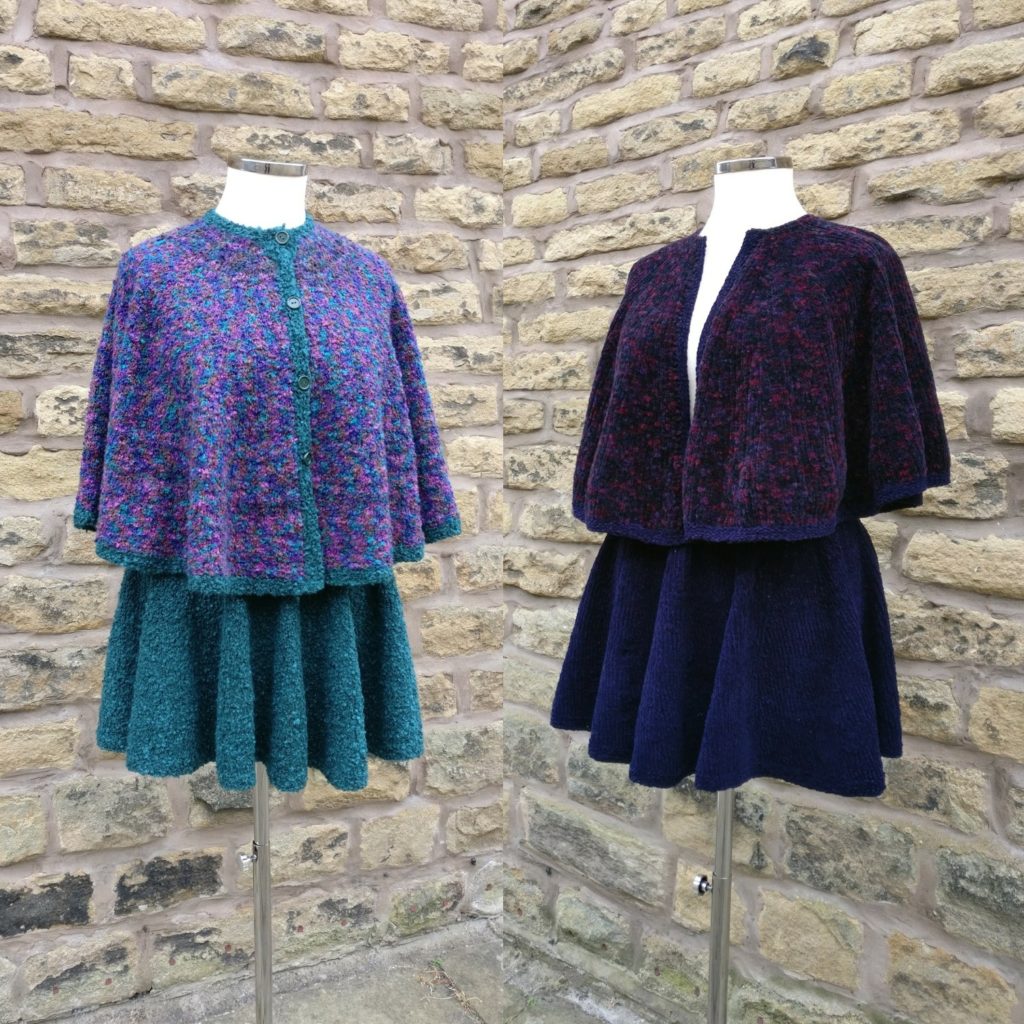
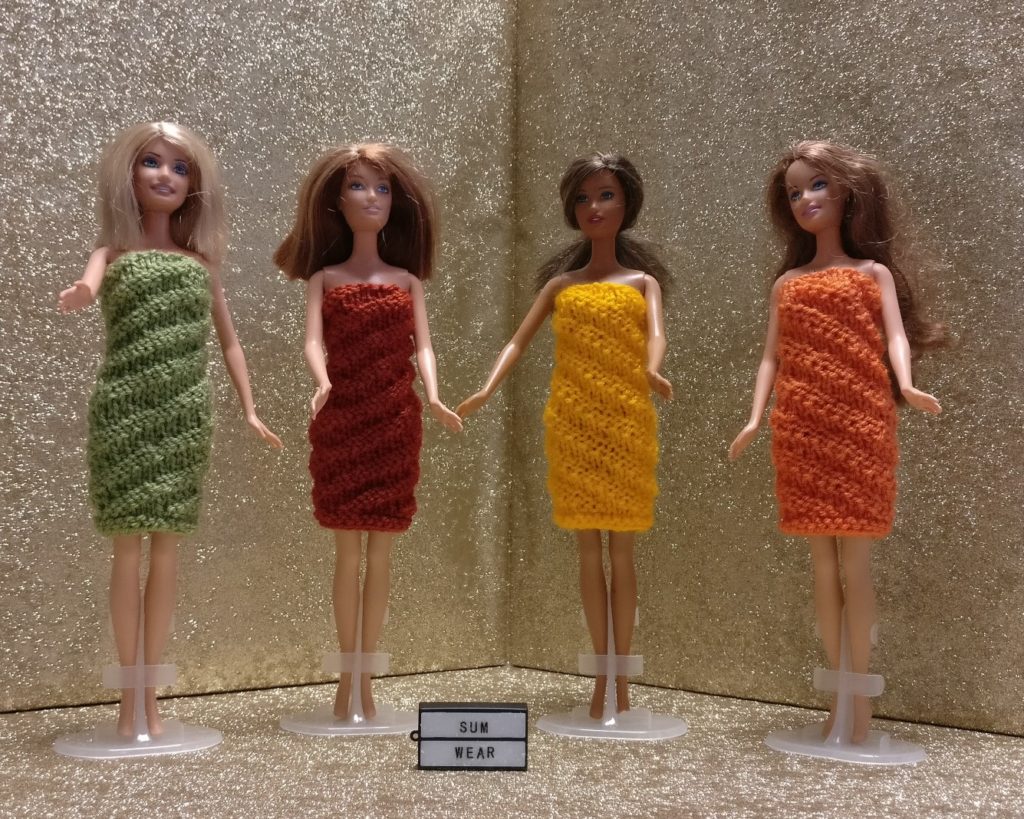
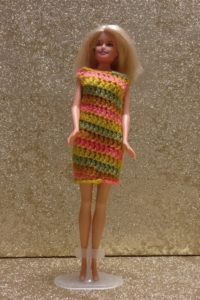
Single colour spirals

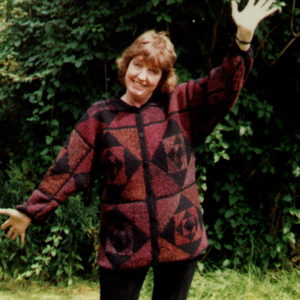
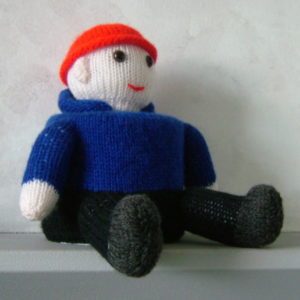
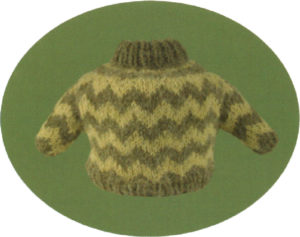
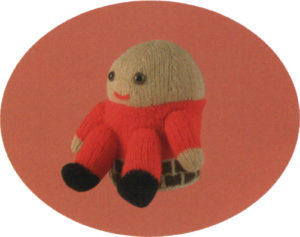
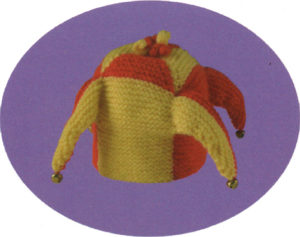
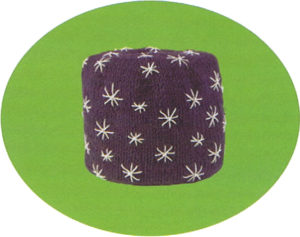
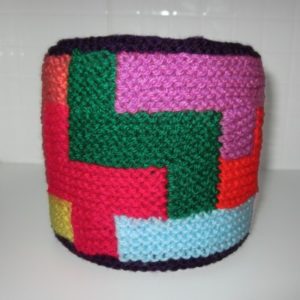
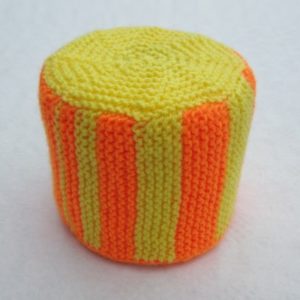
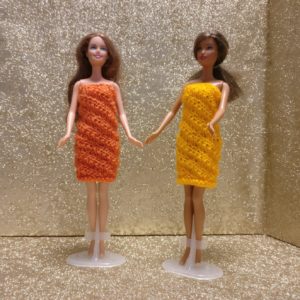
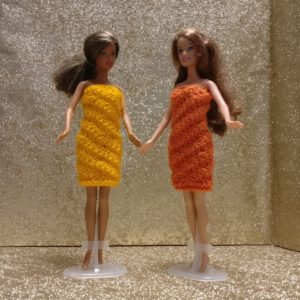
All knitting in the round is technically a spiral. If you are going round and round with no breaks you are making a spiral. In most cases this is not noticeable. If you want the spiral to stand out it has to have some kind of texture. All four dresses below use the same basic rib pattern but it moves across by one stitch on every round.

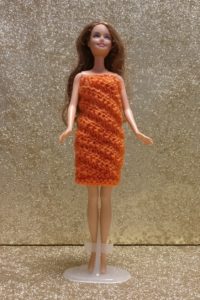
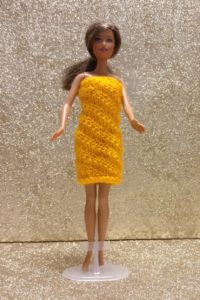
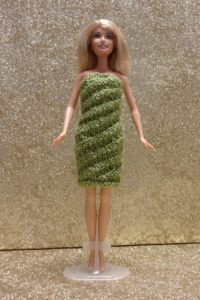
The two on the left spiral in one direction, the two on the right go the opposite way. You could describe these as clockwise and anti-clockwise. I prefer to call them forwards and backwards because, as you are knitting they are moving in those directions.

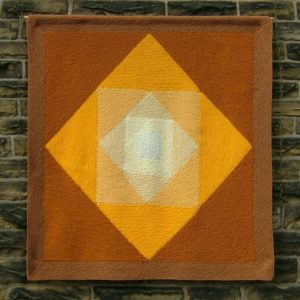
All dresses are worked in a 3 x 3 rib. A cylinder would have to be a multiple of six stitches. Surprisingly the dresses on the left (orange and yellow) have two fewer stitches than those on the right (green and brown). The ‘forwards’ dresses have 23 stitches. Because the spiral is always moving forward, the 24th stitch needed to complete a round is the first stitch of the new round. Conversely the ‘backwards’ spirals would be one stitch short at the end of the round so need to have 25 stitches.

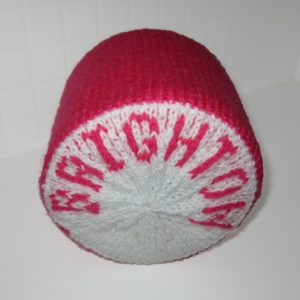
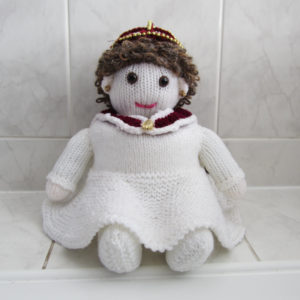
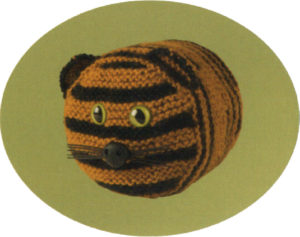
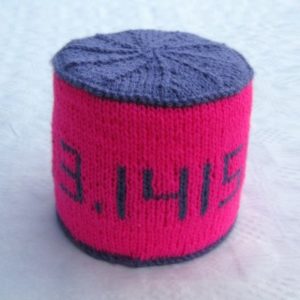
Many people think that if you look at a spiral from the other end it turns the opposite way. When there are problems with yarn, I have often heard people suggest using the ball from the other end because the twist is different. This is not true. Turn Barbie upside down and you can see the spiral is the same. This is also what happens to the yarn. When Barbie’s dress is turned inside out the spiral is reversed.
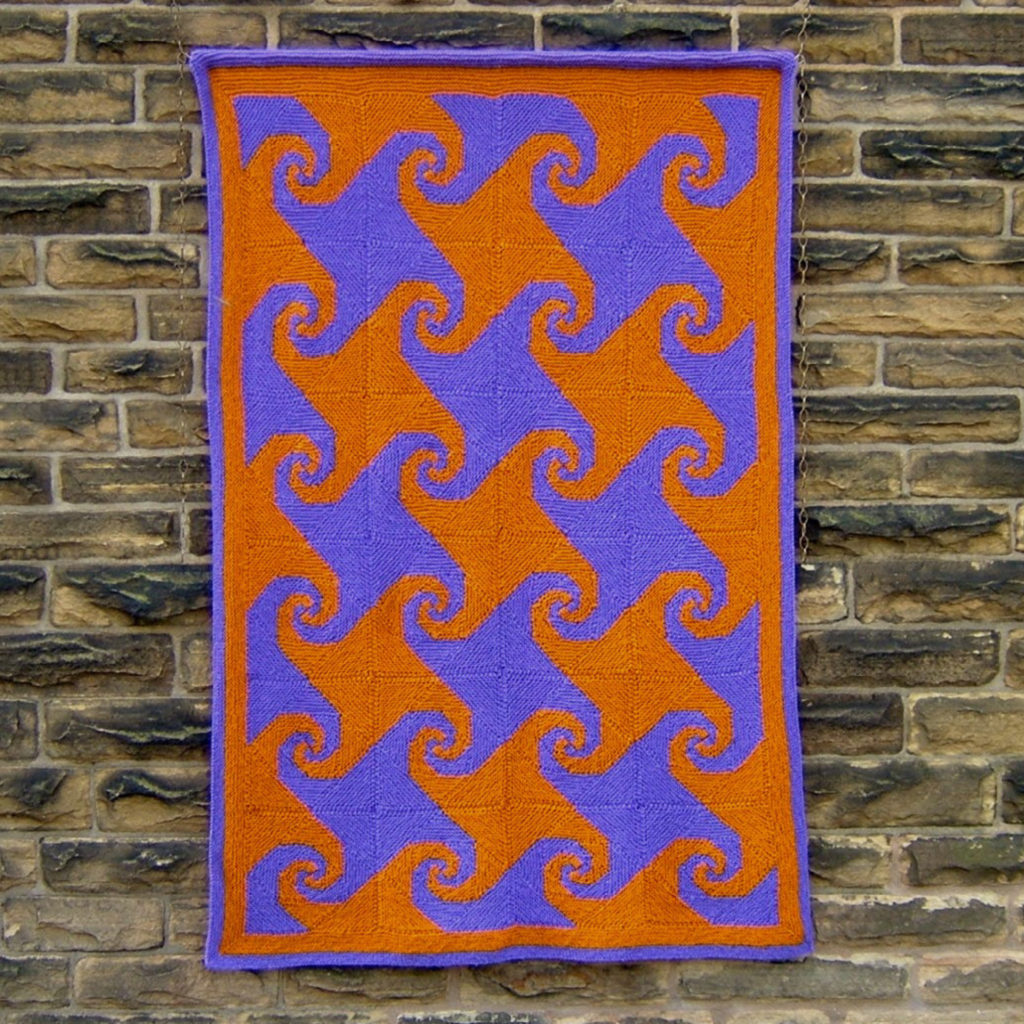
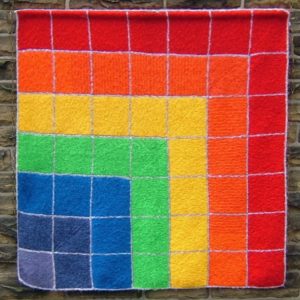
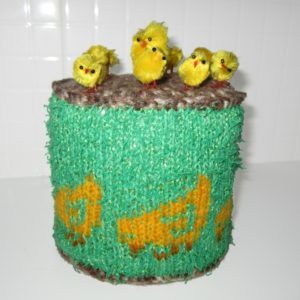
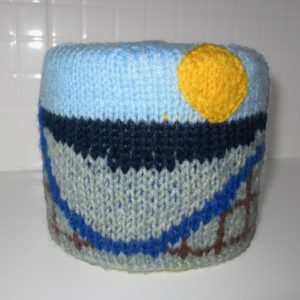
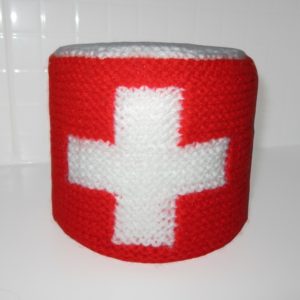
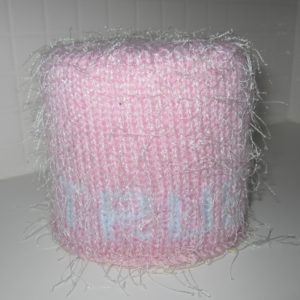
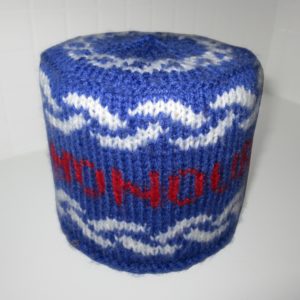
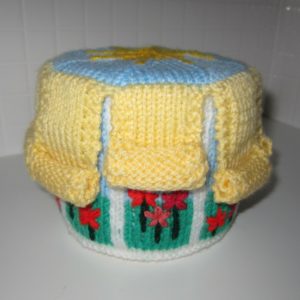
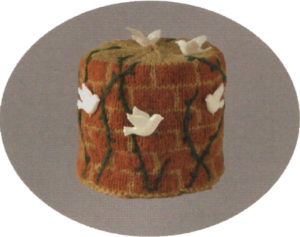
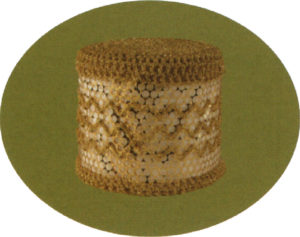
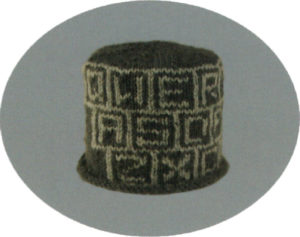
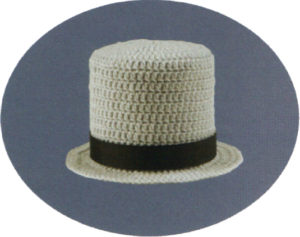
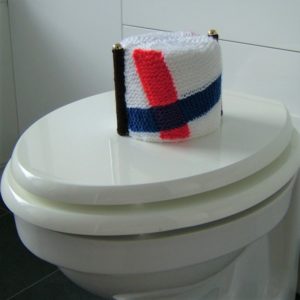
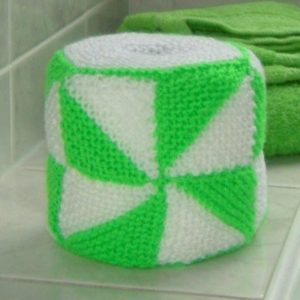
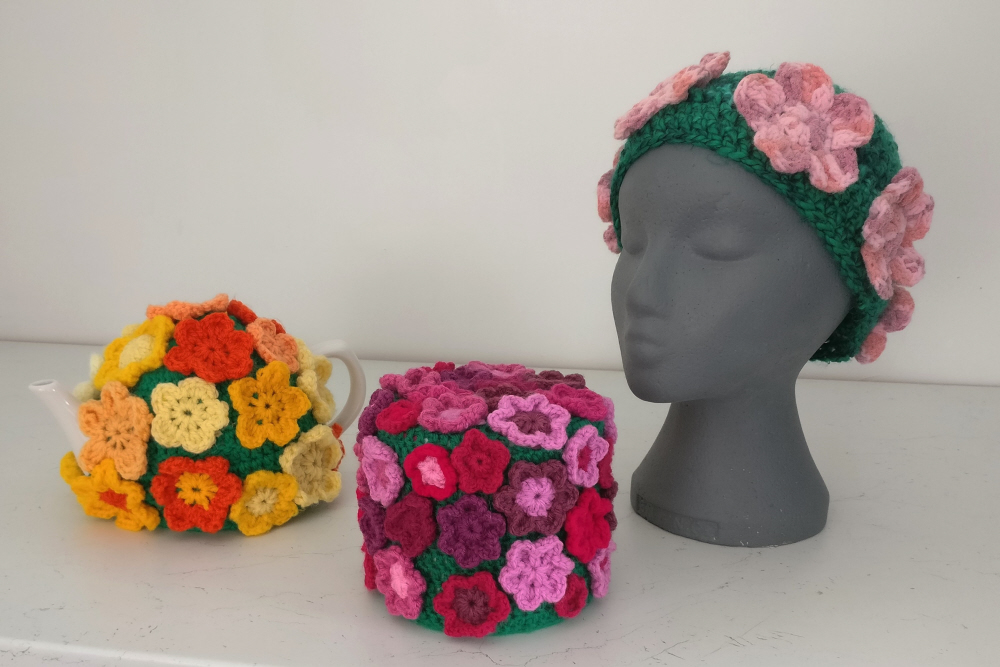
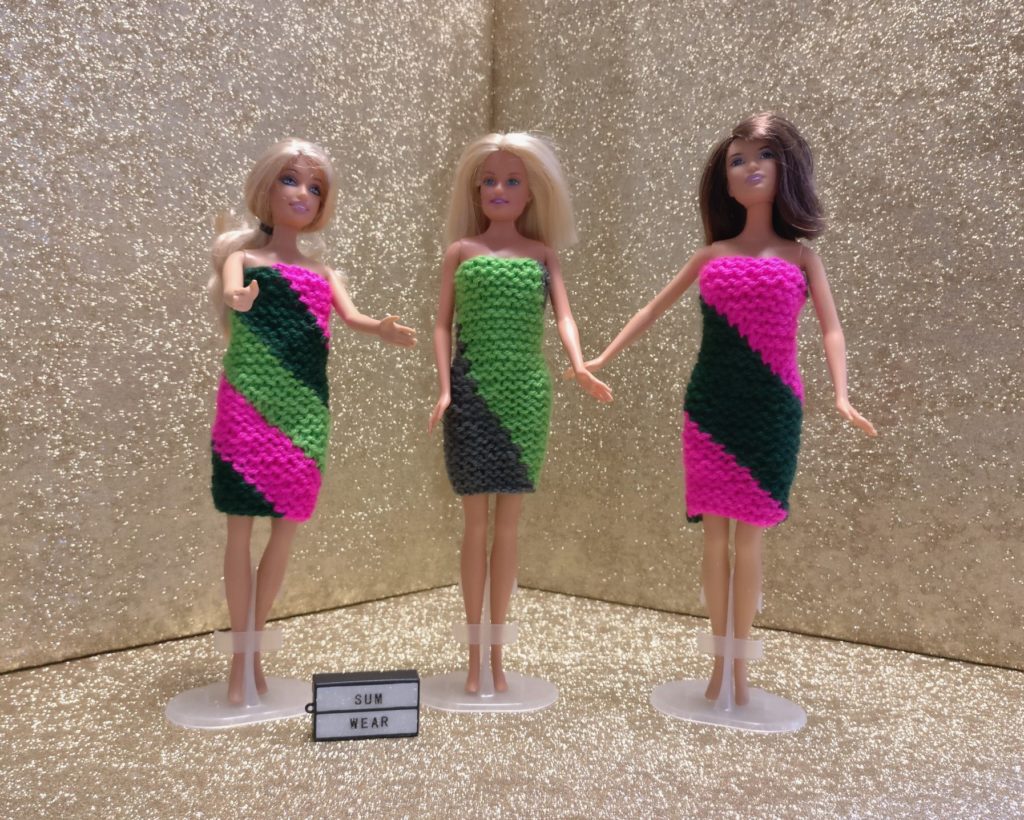
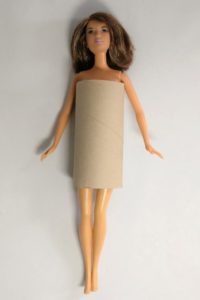
Two alike
Turn one upside down. The spirals are the same.
Turn one inside out. The spirals go opposite ways.

Toilet roll spirals

The centre of a toilet roll is a flat piece of card wrapped round to make a tube. It is very easy to get confused about the direction to knit to make a similar spiral to wrap round Barbie.

When you unwrap a toilet roll centre you get a long thin parallelogram. Wrapping it round in this orientation would make a cylinder but it would not be as tall as the original.
Turn the parallelogram round and it becomes the right height. The angles of the parallelogram could be changed but the height and width (circumference) of the cylinder must be correct.

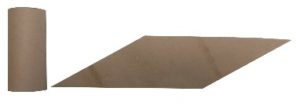
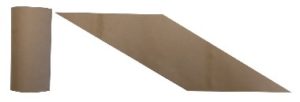
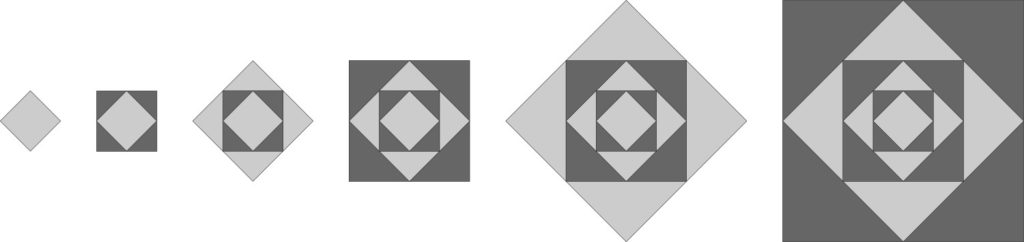
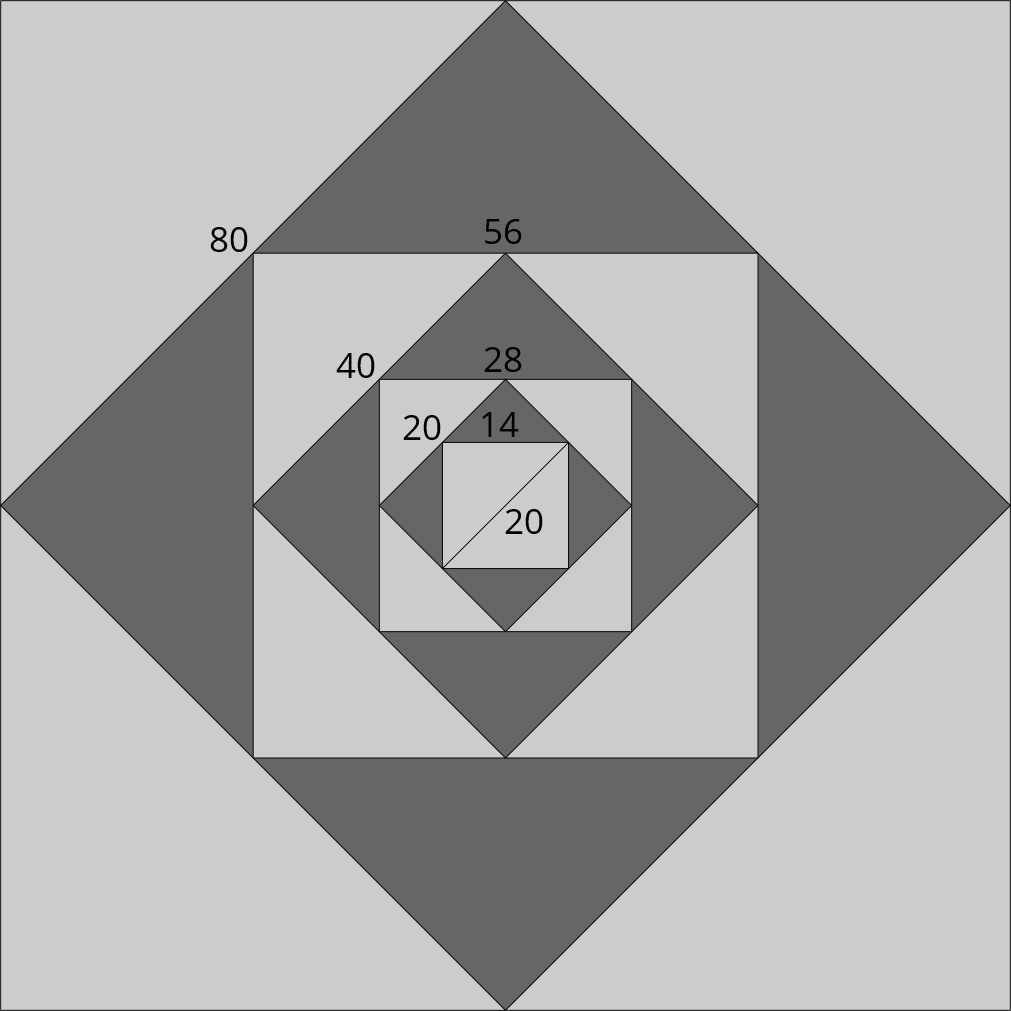
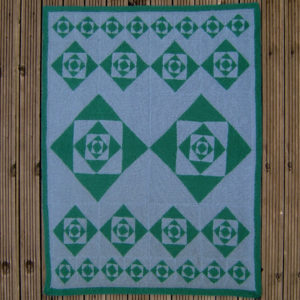
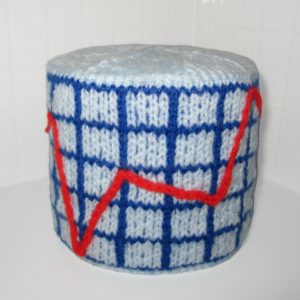
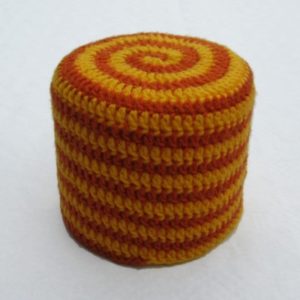
The angles of the knitted spirals are not the same as the card. When the colour is moved across by one stitch on each garter ridge it automatically creates a 45 degree angle. When it is moved across by one stitch on alternate ridges it makes a much steeper angle, approximately 63 degrees.

2 colours. 45 degrees
3 colours. 45 degrees
2 colours. 63 degrees

Download the free pattern

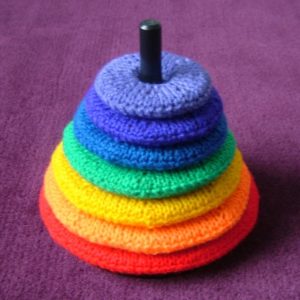
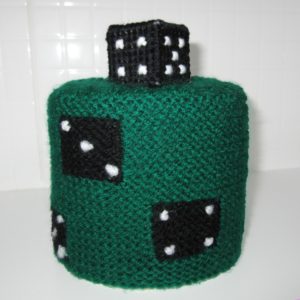
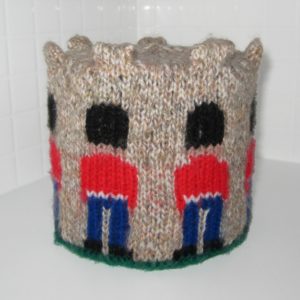
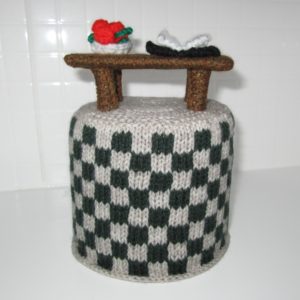
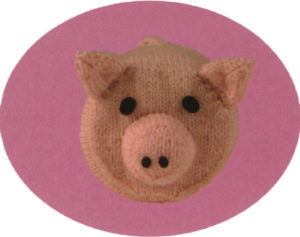
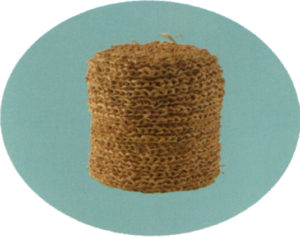
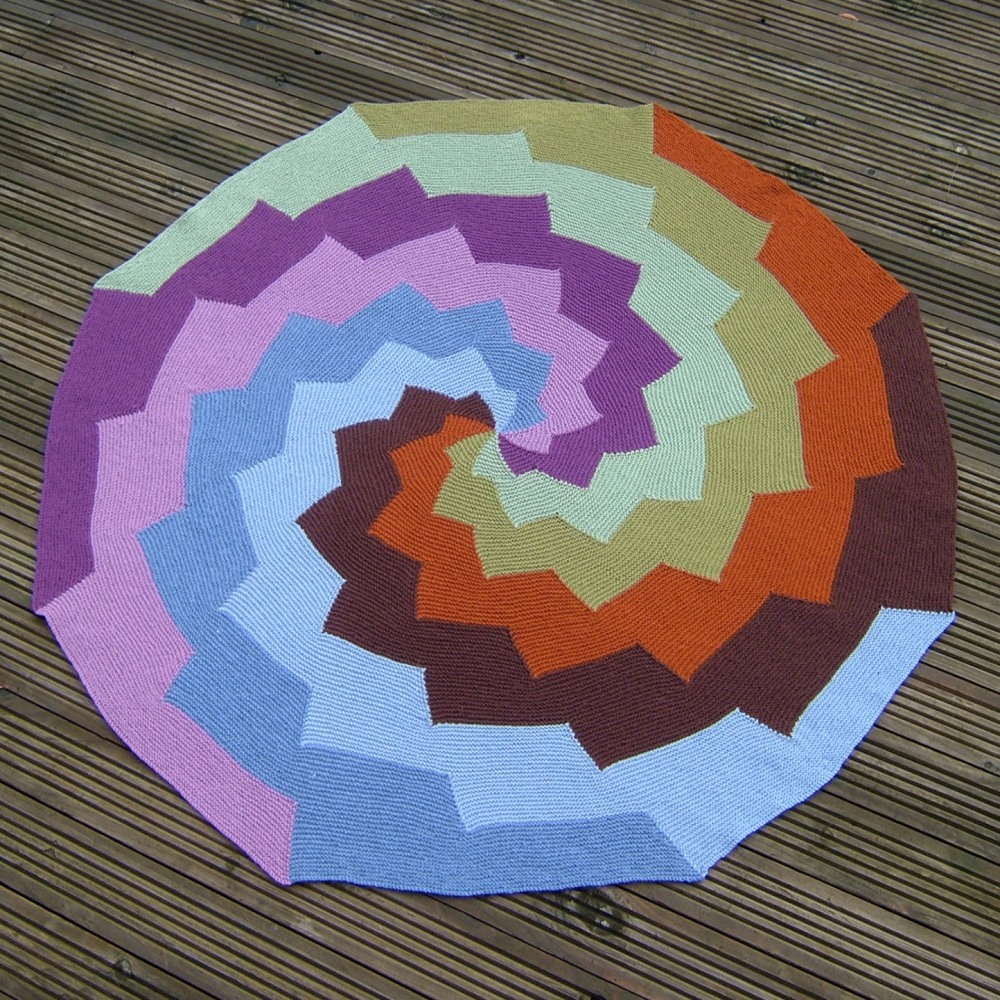
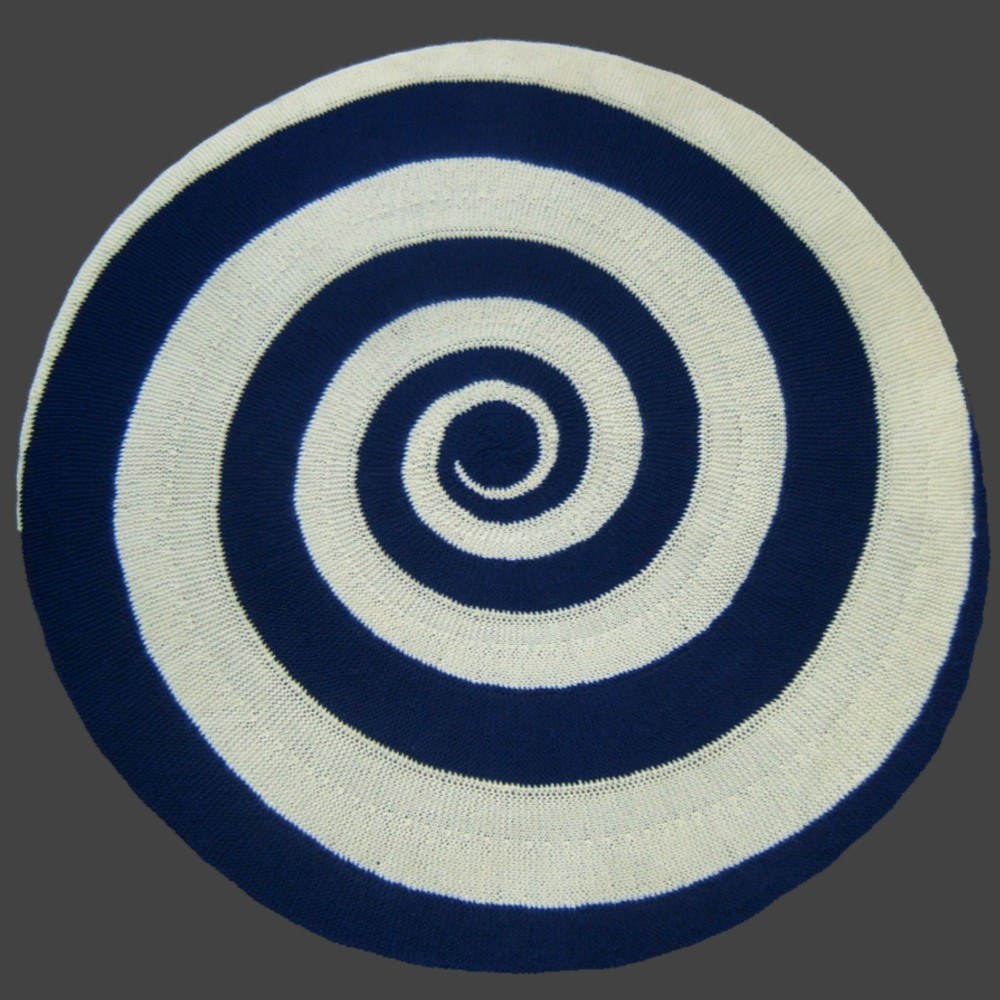
You will find many other spirals at woollythoughts.com Here are some of them:

Hyperbolic Barbie

Hyperbolic crochet has become very popular in recent years. It has been used world-wide in various coral reef projects. The world expert in the mathematics of this art is Daina Taimina.

Our latest mathematical pattern for Barbie and friends is Hyperbolic Barbie.

Hyperbolic geometry is quite complicated but you don’t need to understand it to make these simple dresses. The pattern includes three crochet dresses, three knitted dresses and two scarves. It is intended to show what happens when you repeat the same pattern of stitches over and over again, and how making one small change quickly has a dramatic effect.

These two knitted dresses are basically the same. The frills are different. The pink increases in every stitch. The blue increases in alternate stitches.
  • The pink frill begins with 26 stitches
  • Row 2 has 52 stitches
  • Row 3 has 104 stitches
  • Row 4 has 208 stitches
  • If you could add more it would increase to 416.

  • The blue frill begins with 26 stitches
  • Row 2 has 39 stitches
  • Row 3 has 58 stitches (approx)
  • Row 4 has 87 stitches (approx)
  • The next row would have 130 (approx)
These two crochet dresses are basically the same. The dark blue increases in every stitch. The cream increases in alternate stitches.
  • The dark blue frill begins with 30 stitches
  • Round 2 has 60 stitches
  • Round 3 has 120 stitches
  • Round 4 has 240 stitches
  • The next round would have 480

  • The cream frill begins with 30 stitches
  • Round 2 has 45 stitches
  • Round 3 has 67 stitches (approx)
  • Round 4 has 100 stitches (approx)
  • The next round would have 150 stitches (approx)

It is clear to see that the numbers diverge rapidly when the rate of increase is changed.

It is much easier to make hyperbolic frills in crochet than it is in knitting. When you crochet you only have one stitch on the hook. You can work into it as many times as want and can twist and turn the dress to make the stitches. Knitting is in a straight line and all the extra stitches have to get forced into that line. It soon becomes physically impossible to add any more.

Download the free pattern

If you would like to experiment with hyperbolic crochet but don’t want to make Barbie dresses take a look at Squiggly Things.

Carnival of Mathematics 175 – Sum Square Over The Rainbow

You might be wondering what a couple of knitters are doing hosting the Carnival of Mathematics. If you are not familiar with the methods we use to teach maths you might want to check out our main Woolly Thoughts site. It has got rather rambling over the last 20+ years. The Afghans page is a good place to start.

First things first – the number 175.

Steve and I often talk about ‘nice numbers’. That usually means numbers that can be split up nicely when designing things – numbers with lots of factors (or divisors or whatever else you want to call them) or other interesting properties.

At first glance 175 looks like a nice number. It’s a number you come across quite often. It’s a multiple of 25. That has to make it a nice useful number.

Look at it more closely. Is it really much use? I don’t think so. It’s 5 x 5 x 7. Fives are OK but I don’t like Sevens. The only time we have used seven in designs is for rainbows.


I do quite like that 11 + 72 + 53 = 175. Wikipedia tells me that 135, 518, 598, and 1306 also have this property where raising the digits to powers of successive integers, and adding, equals itself.

Fives makes me think of pentominoes. I wondered whether there was some connection between the number 175 and the five squares that make up a pentomino. There isn’t but 5 x (5 + 7) does give me the total number of squares in a set of pentominoes.

Wikipedia also tells me
175 is an odd number, a composite number, and a deficient number. It is a decagonal number, a 19-gonal number, and a centered 29-gonal number.

175 is an Ulam number, and a Zuckerman number. It is the magic constant of the n×n normal magic square and n-Queens Problem for n = 7.

… and now for the Carnival

  • Barney Maunder-Taylor posted a link, on Twitter, to The Car Wheel Games at House of Maths.
    He said I’ve become distracted by car wheels! Here are five games for youngsters (and mathematically inclined adults) to play while out for a walk around town.

  • Lewis Baxter sent a link to Seventeen or Bust : Progress of the search This is part of the Prime Grid project.
    Lewis said This 17 year distributed computing project (which I believe is the longest) was resumed after a pause of about 2.5 years to double check some results. Now the search continues for 5 remaining numbers, with more than 9 million digits, that is conjectured to verify that 78557 is the smallest Sierpinski number.

  • Autograph Maths made an announcement on October 12
    We are now able to bring Autograph to everyone for free, forever.

  • Ari Rubin submitted An Introduction to State Space.
    An introduction to converting equations of motion into their state space representation which is the foundation of many modern numerical methods.

  • Brent Yorgey sent a link to his new post Order of operations considered harmful.
    He warns that this is a somewhat intentionally inflammatory piece on why the way we usually teach and define the “order of operations” is wrong.

  • Colin Beveridge has an interest in ancestry and posted a long thread about calculating the number of ancestors a person might have. He links it to the Birthday Problem. When I asked if it was available elsewhere online it wasn’t but it is now – An Ancestry Thread.
    One of the replies to Colin leads to an older post, on a similar theme, by Tim Urban – Your Family: Past, Present, and Future

  • Katie sent a link to a Duplo game posted on Twitter by Sam Blatherwick.

  • If paper folding is your thing you might like these geometric tessellations by Arseni Kazhamiakin. 

  • Do you prefer facts about heights and lengths and such things? UK Railway Station Trivia has recently been updated.

  • Why mathematicians just can’t quit their blackboards. A Guardian article about a project called Do Not Erase, which is to be published as a book in 2020.

  • Katie sent a link to a blog post that is a snapshot of what being a maths teacher involves – Classroom Reflections

  • Another thing Katie spotted was a post on John D. Cook’s blog – Exact values of sine and cosine

  • If you prefer listening to reading check out The Art of Innovation. This is A partnership between Radio 4 and the Science Museum exploring art and science
    (Use the Episodes tab to find the programmes.)

  • The Aperiodical website has a review of Kit Yates’ new book The Maths of Life and Death

  • To end the month Ed Southall started a Twitter thread about Vampire Numbers and evil numbers, and magic numbers and lots of other Halloween related numbers.

… and finally

Take a fence

The next Carnival of Mathematics (#176) will be hosted by Mehak at Tangent Math. Submit ideas here.

Tilting at Windmills

Before you scroll down, I want to ask you a question – Is this a pattern?

You may think this is a totally pointless question. Try showing it to other people and see if their answer is the same as yours. You might be surprised.

It doesn’t matter where we take this, or what the age or understanding of a group might be, we can ask that one simple question and arguments begin. There will always be many who land firmly on one side of the fence and can’t understand why there should be anyone on the other side. The discussions can get quite animated.

Tilting at Windmills is made entirely from squares that are navy on one side and some shade of pink/purple on the other. They had to be in the correct orientation but the choice of squares was mostly random. However, in a few areas, the colours were carefully chosen to give a hint of a repeated pattern. This had to be enough for the brain to think it was looking for a pattern but quickly be able to dispel the idea. It was deliberately confusing.

If the photo is recoloured I’m sure everyone would agree that it is a pattern. Before you scroll down look at the photo below, or the one at the top, and think about what you can see.

Did you see windmills, or pinwheels? Many people do.
If you didn’t see them before, can you see them now? Are they light or dark? Which way are they turning?

You might have seen, butterflies, bow ties, ‘diamonds’, lozenges, small squares, large squares. or many other different things. (One ten-year old once told us there were diaboloes.) The more you look the more you will see.

The first time we saw groups arguing it came as a bit of a shock. It became apparent that those who declared that it was a pattern were not taking notice of the colours at all. The shapes made a pattern and that was all that mattered. On the other side were those who insisted that if the colours were wrong it couldn’t possibly be a pattern. It certainly justified our arguments for not using colours in our Woolly Thoughts book though we had not been prepared for the extreme reaction whenever a group of people look at the hanging.

This has implications for normal classroom teaching. Almost every teacher provides pupils with coloured shapes for particular tasks but we rarely make it clear whether the colours are strictly relevant to the task. Perhaps those pupils who struggle are not seeing the task as we intended it to be.

Before you scroll down – can you see any tunnels?

We haven’t put this in front of a group for a long time but last week we had a visitor who came to look at what we do so we asked her the usual questions.

I have been looking at this for over 20 years now and I saw something I had never seen before. It might have been the effect of the light at that moment but I suddenly saw three tunnels. The really strange thing is that their outlines do not follow the lines in the divisions of the squares.

It troubled Steve that the inside/outside parts of the tunnels were ‘wrong’. He couldn’t accept them as tunnels but to me they very definitely were. I can see another tunnel above these and one below but they are not as well-defined. There is always something new to be discovered.

Just in case you were struggling to see windmills going in opposite directions, this photo might make them more obvious.

If you want to make your own you can buy the pattern.

Warrington’s Geometric Car Park

This week we decided to go to Warrington – and this was the view from inside the car park. I love all these different size hexagons.

This is the outside of the car park. Unfortunately, it was in shadow. There is a lot of building going on in the town centre.

We really went to Warrington to go to the museum and art gallery which are in an interesting building. We didn’t realise, until we got there, that there was a temporary exhibition Let’s Get Stuck in Traffic! which included knitting.

The artist Marie Jones had filmed herself chatting to people in her car. The videos were projected on to pieces of knitting and she had taken a quote from each person and knitted them into panels.

In another room there was an enormous knitted landscape.

I was also impressed by the children’s play area. I have never seen circular snakes and ladders before.

Take a fence

A friend recently posted a photo of his new garden fence. It prompted me to find some photos of our geometric fence.

The house has this very small garden at the front and no garden at the back. When we moved in, over twenty years ago, there was a very old, rusted, fence sitting on the stone wall that you can still see. It was held in place by a tree that had obviously been growing between its bars for many years. It needed replacing but wasn’t really dangerous – unlike the back of the house.

To understand the potential dangers you need to understand the layout of the back of the house.

As you can probably tell, the front door is one floor up from the back door and the building fills the entire site. The original plans, from 1890, show that the area at the back was originally a walled yard with buildings for coals, ashes and W.C. In the 1970s the garage was built, a window was replaced by patio doors and it became possible to walk out of the back of the house onto the garage roof. Unfortunately, it seems this was not done in accordance with building regulations so it was also possible to walk straight over the edge.

One of the first things we did when we moved in was to make the garage roof structurally sound, cover it with decking and add a fence. We wanted the fence to use one of our favourite geometric designs so commissioned Varcrofts Wrought Iron, in Burnley, to do it. We originally thought that we would use the same square design all round but soon discovered that building regulations say:

Any structure that has a fall or drop over 60mm needs to be protected by a railing that is at least 1100mm high. The bars of the railing and the bottom rail should be no more than 99mm apart; an object of 100mm diameter should not be able to pass through.

The cost to make hundreds of small motifs would have been exorbitant so we settled on having just a few between plain upright bars.

Popular belief is that the 100 mm rule is to prevent a child from getting their head stuck in a fence. This doesn’t seem to make sense when you consider that the fence at the front of the house is just at the level where a child could reach, and get stuck.

The design is the same but the scale is different. It was adjusted to fit the space available.

Some years ago our next door neighbour took a photo of the garage roof, from his upstairs window, because we had washed some afghans and laid them out to dry.

These photographs have been taken at different times over the years, often in the rain. We get more than our fair share of rain in this part of Lancashire! This is a fairly recent one. The garden changes but the fence doesn’t.

But why did we use this design?
This has long been one of our favourite designs. It is very pleasing to a knitter and to a mathematician and it is easy to create in wrought iron because it can be made entirely from straight lines.

We call it From Square To Eternity because you start with a simple square and keep adding to it for as long as you want. For many years our most popular knitting workshop was called From Square To Eternity. It seemed to capture the essence of our mathematical knitting.

The Mathematics
One of the nicest properties of this design is that each new set of triangles is the same area as everything that has gone before. The overall area is doubled each time.


Two squares side by side double the area.

The ‘diamond’ shape is also twice the area of the starting square. You can see this if you imagine folding the four triangles inwards. They exactly cover the centre square.

Four squares together have the same area as the next iteration.

There are also nice relationships between the lengths of the sides. Pythagoras Theorem says that the square on the hypotenuse of a right triangle is equal to the sum of the squares on the other two sides.
The hypotenuse (the longest side) is referred to as h.


This design is also very useful for investigating how triangular numbers and square numbers are related.

The Knitting
This design is nice to use because the calculations are so simple. Knitters don’t even need to know Pythagoras Theorem to make it work. The accurate calculations refer to the square root of 2 but all you really need to know is that it is roughly the same as 1.4. Knitting is forgiving so a slight inaccuracy won’t matter.

The start of each new shape is 1.4 times the previous one. If you know the number of stitches on the diagonal of the very first square you can use a calculator to find out how many stitches to pick up along a side of the square to make it stay flat. The diagonal is 1.4 times the length of the side so you need to divide by 1.4 to find the number of stitches.

Example: If the centre square has 20 stitches, divide by 1.4 and you get the answer 14. Pick up 14 stitches along the edge of the square and knit the triangle. Do the same on all four sides.

Tip: If you are confused about whether to divide or multiply you should be able to reason it out. You will be able to see whether what you want is bigger or smaller than you had before. If it is bigger you need to multiply. If it is smaller you need to divide.

Once you have done the first calculation all you need to do is to keep doubling the number of stitches.

You will never have to worry about whether you have enough yarn to finish the next set of triangles. Because the area doubles every time, you just need to weigh what you have done so far. You will need the same amount again.

One lovely thing about making these triangles is that you are always decreasing. Each row has one less stitch than the row before so you always feel as though you are making good progress. You get led into that situation where it is ‘just a few more rows’ until a triangle is finished and you can move on to the next.

The mathematical pattern of triangular numbers is 1 + 2 + 3 + 4 … For the knitted triangles you are using these numbers in reverse. The centre square begins with one stitch, increasing to the middle, then decreasing on the other side. If you were making a small square you might only have 10 stitches at the widest point so would knit
1 + 2 + 3 + 4 + 5 + 6 + 7 + 8 + 9 + 10 = 55
When you get to the centre you knit 9 + 8 + 7 + 6 + 5 + 4 + 3 + 2 + 1 = 45
Altogether you have knitted 55 + 45 = 100. One hundred is a square number. You have knitted a square. Two consecutive triangular numbers always add together to give a square number.

Using the design
Because the design relies on doubling the numbers of stitches, different squares automatically fit together. Use them in any combination you like.

We use grayscale diagrams so you can think about what happens when you add your own colours.

If you want your finished item to be a particular size, start by calculating the size you need for the very smallest square. Everything else should then follow on automatically.

Here are some designs using From Square To Eternity


It was only when I started writing this that I realised, after twenty years of living here, that, unless you live in a town like ours, it is quite unusual to have a house with roads on three sides. We have a ‘back street’. (Think Coronation Street but smarter.) These streets have no names but they are proper, cobbled roads, with footpaths, and wide enough for two vehicles. The wall on the right is the end of our garage. This is where anyone could have fallen to the ground.


Rolling Around

Toilet rolls have been at the front of my mind this week. That’s not something you hear often.

Every week Museum Crush email digest pops into my inbox. It says of itself The Museum Crush digest brings incredible objects from the wonderful world of museums to your inbox every week. It does indeed contain some fascinating links. This week my attention was caught by a link to an article about an 83 year-old toilet roll The old toilet roll that helps tell the story of Letchworth Garden City. It is an interesting read but even more fun is a link in the article to How Brits went soft on toilet paper on the Wellcome Collection website. It tells you all you never knew you wanted to know about how modern toilet rolls came about.

My other event with toilet rolls started a few weeks ago. I got an email from a man who had come across photos of toilet roll covers, on our website. He was desperate to buy one for his wife’s ‘big birthday’. He didn’t seem to know why she wanted a knitted toilet roll cover. He thought it might be a childhood memory thing.

We don’t usually sell anything we have made, unless it is to museums and galleries. My first reaction was to say no. Then I stopped to think and decided they had been sitting on our shelves, collecting dust, for long enough, so I said he could have whichever he wanted (with a few exceptions), for a donation to Kidney Research UK. He chose two. This was Wednesday and he needed them by Saturday so asked for them to be posted with guaranteed 24-hour delivery, which was very expensive but he was prepared to pay. I had to tell him they might be dusty but there was no time to wash them so I gave them a quick once over with baby wipes.

They were posted, got there in time, the postage was paid and his wife was thrilled. He sent a message to say they arrived and that he would send a photo, and make a donation, later. I haven’t seen a photo but this week he made a very substantial donation to my my fund-raising page.

Toilet roll covers are a far cry from the kind of knitting we put our hearts into and yet they seem to keep popping up. I decided to go back and try to work out how we seem to have made so many of them.

The very first are a dim and distant memory, well over 20 years ago. They were in response to a discussion on one of the original online knitting groups – probably the KnitList. I remember using red chenille to make a crown, with gold trimmings and jewels. There were some towers and some geometric designs. I don’t know why we made them but I do remember a conversation with the organisers of the Knitting and Stitching Show who had a tea cosy competition that year and said they had wished they had thought of toilet roll covers instead because they were hoping for really eccentric creations.

In about 2006 I had the mad idea of combining our love of puns and word play with some crazy designs. We started to think of names for covers that would contain the words paper, roll, tissue, etc. We soon had about 50 ideas and made many of them. These are some of the first:

Rock & Roll
Chicken Roll
Graph Paper
Roll of the Dice
Roll Call
Roll-top Desk
Roller Coaster
Swiss Roll
Tissue of Lies
Wallpaper
Roll of Honour
Roller Blinds

Steve’s idea for making Paper Boy (who goes by the name of Roland) sent the covers in a different direction and spawned rows of little people. These are some of them:

Paper Boy – Roland
Paper Girl – Lulu
Royal Flush
Toilet Trainer

We became inundated with toilet roll covers and eventually approached GMC Publications to publish them in a book. They jumped at the idea and decided to publish a whole series of ‘Cozy’ books. The publishing was fairly chaotic. They had all the covers, we were in Australia and NZ for six weeks but they had ‘forgotten’ to give us a contract or ask for any text even when they had taken all the photos. The main part of our document was back at home but we managed to get there with a whole series of disjointed notes. It was published in 2007. The only disappointment was that they changed most of the names so the puns that held all the ideas together had disappeared. These are the covers from the book with our original titles, not those in the book:

Drum Roll
Paper Chains
Eskimo Roll
Paper Clips
Roll-neck Aran
Wallpaper
Arctic Roll
Paper Hat – Bobble
Squared Paper
Roll-neck Fair Isle
Rolled Gold
Ham Roll
Roll in the Hay
Egg Roll
Paper Hat – Jester
Tissue Type
Lamb Roll
Master of the Rolls
Bank Roll
Roll Mop
Piano Roll
Paper Roses
Scrap Paper
Spring Roll
Paper Tiger
Starring Roll
Paper Hat – Topper
Toilet-Trees

We don’t often accept commissions but sometimes they are just too much fun to resist. In 2007 we were asked by Sky Sports to make two football characters for prizes in a competition. They were Ruud Gullit and Ron Atkinson. It is difficult to make toilet roll covers look like real people but these two were comparatively easy because Ruud had very distinctive hair, and his name and number on his shirt. Ron wore dark glasses, a sheepskin coat and frequently had a cigar in his hand. They took a ridiculously long time to make. This was partly because both had layers of clothes. We also had to find suitable yarns and work out how to make glasses. (It would be easy now as we have recently 3D printed glasses for puppets.) Unfortunately Ron had a falling out with the organisers before the event so his cover was never used and went home with one of the researchers.

Then we were asked to make a cover for the Paul O’Grady Show. This was much more challenging as there was nothing in his appearance that really made him stand out. We almost turned it down but then realised that he did have a very distinctive dog!

Another fun one was the national flag of Lovely. I have written about this at length elsewhere so click here if you want to read the whole story. It was related to a television programme, with Danny Wallace, called How to start your own country. The citizens of the country were encouraged to print out their own flags and display them. I put mine on a toilet roll which was then requested by the production company and displayed in the programme. The entire series ended with a shot of the toilet roll, on the toilet, in our bathroom.

For some reason these things keep rolling back into our lives. In 2014, for some reason I don’t remember, maths and toilet rolls collided and we made a series of covers based on mathematical concepts.

Tilting at Windmills
Square to Eternity
Crochet Fibonacci
Knit Fibonacci
Lucas Numbers
Pentominoes
Pi
Counting Numbers
2-colour Spiral
4-colour Spiral
6-colour Spiral

… and now this account has turned full circle. It was two of the mathematical covers that the man bought for his wife.

I surprised myself when I collected together all these pictures. I hadn’t realised there were so many – and there are a few more I haven’t included. These are the two most recent people:

Einstein
Pendle Witch

Many patterns are available on Ravelry

One last thought: There is very little difference between a hat, a tea cosy and a toilet roll cover. This was something a publisher was once thinking of following up but it came to nothing because (a) it would have been boring to make the same thing three times over and (b) the publisher was likely to sell more if they were in three separate books.

Magical Disappearing Unicorn

Over the years Steve has often been asked for an illusion unicorn. He has finally designed one.

The blanket in the photo is much prettier in real life as one of the yarns is sparkly white and the other catches the light. The effect does not show in the photo.

When you look straight at illusion knitting you only see narrow stripes. The unicorn appears when you look from a distance – like magic.

Buy the pattern

Sum Wear Over The Rainbow

Rainbows and circles for Barbie (and more).

This is the latest pattern in the Sum Wear collection. It is a pattern for knitting three dresses, and a shawl. More importantly, it includes a mini-tutorial about knitting circles.

The two dresses with long skirts have different tops. One is in garter stitch, the other is stocking stitch. One has a straight skirt, which has a slit at the back to allow Barbie enough room to walk. The other is slightly flared.

Both skirts have stripes in the seven colours of the rainbow. Each stripe is wider than the one before. Violet has one ridge of knitting, indigo has two ridges, etc.

I could have knitted a third version with a complete circle for the skirt. It would have been similar to the shawl but starting with a larger hole for the waist. There are several ways of knitting (and crocheting) circles. Some of them are included in the tutorial at the back of the pattern.

Because knitting is very forgiving it can be distorted quite a lot to make the shape so the methods can be very different. They all depend on simple mathematical ideas.

Barbie’s shawl has the same number of stitches added on every row to maintain the shape. A lot of people find it difficult to believe that this is true. They think that, as the circle grows, you must add more and more stitches to stretch round the edge. It has a lot in common with the Rope around the earth puzzle.

It is unfortunate that rainbows have seven colours. Seven is never a nice number to work with and it is unusual to find any patterns that use seven colours. It is a prime number so the sections cannot be split into any kind of repeating pattern.

This afghan also uses seven colours. It is made entirely from left over bits of yarn but they are not really rainbow colours. The violet/ indigo/ blue range is difficult to replicate. This does not look quite like a circle. It is a shape with seven curved sides. I was not making any attempt to make it circular.

It magically turns itself into this shape because of the way the stitches are distorted. There are no sound maths principles to make this happen. On the other hand, Barbie’s skirt with the wedges needs calculations. It doesn’t matter that it has seven sections. There could be any number and the same methods would apply. It is a matter of knowing the length required and how many stitches are needed at the waist. It is then possible to calculate the distance round the bottom of the skirt and work out how many increases are needed to reach the right total. This is much easier in garter stitch than in other stitches because the stitches are square. Widths and lengths can be mixed together without any conversions. The pattern has more information about knitting wedges.

More knitted rainbows
These were made to accompany the Mirror Pillar project. They all give unexpected results when they are reflected in a cylindrical mirror. They are known as anamorphic images. The patterns are in a booklet called Alternative Rainbows.

More knitted circles
There are more patterns with circles in our Ravelry pattern store. These are a few of them.

Download the free pattern for Barbie Rainbows

Four Corners

I think you would have to look at this for a very long time to work out what is unusual about the arrangement of squares. Scroll to the bottom of this post if you want to know now

In July The Big Internet Math-Off 2019 took place. This was a semi-serious competition to find The World’s Most Interesting Mathematician 2019 (The rider from the organiser was ‘of the 16 people I contacted, who were available in July, and wanted to take part’.)

It was arranged in four groups where each contestant had to pitch against all the others in the various rounds. Group winners went on to semi-finals then the final. Those who reached the final made a total of five pitches. Quoting from the organiser on the Aperiodical website the idea was ‘to come up with maths topics they find interesting. I don’t need new things, or things that they came up with – just the kind of thing that you’d tell a fun maths friend about when you bump into them’.

The pitches were many and varied. One in particular caught my attention. It was from Sameer Shah in the final. Sameer talked about two squares. One was a greyscale portrait with 127 pixels in each direction. The other was the arrangement of 17 x 17 circles shown here.

My first reaction to the coloured picture was ‘I could knit that’. In reality knitted circles are quite tricky. Crochet circles are much easier but the problem with all circles is joining them together. They can only be joined at the places where they touch and that doesn’t make a very strong structure.

So it had to be squares. My first plan was to make it blanket size. I tried several types of crochet squares, settled on one and made 68. When I joined them together I didn’t like them and decided they had to be knitted. I tried various ways of making squares and strips, joining them together with a black edging – and didn’t like any of them.

I had originally thought the lines were important to convey the original mathematical idea then decided to go for an ‘arty’ approach instead.

I was still aiming to make a blanket-sized piece but it suddenly seemed unnecessary. The new method could use much smaller squares so it would be quicker to make and could be mounted to hang on the wall.

I started with the yellow square in the centre and worked my way outwards using a mixture of intarsia and log cabin techniques. The rows of squares got longer and longer until I was knitting 17 squares at once on the outermost edge. This would have been a very difficult job with 17 separate balls of yarn tangling together so I cut lengths of yarn long enough to make the individual squares and pulled the ends through the mass as soon as they started to get entangled.

The finished hanging measures approximately 71 cm (28”) square.

The theory for log cabin knitting is that you knit a block onto one edge then turn the work and add another (usually different) coloured block on to the next side. You keep turning the work and adding until it is the size you want. I did almost that but, for a bit of variety, I sometimes added two, or more, rows of squares before turning for the next side. I did not attempt to show separate squares where adjacent squares were the same colour. The idea of showing clearly defined individual squares had now gone. In the close-up photo you can see ridges of knitting going in different directions.

Later in the year the finished hanging will be going to Sameer in Brooklyn, after it has put in an appearance at MathsJam Annual Gathering.

What is it?
Look at any block of squares and you will never find a rectangle or square that has all four corners the same colour. It is also possible to find a solution for the 18 x 18 size.

Buy the pattern on Ravelry