A year ago I blogged about the knitting needle gauges I have in my collection that are shaped like bells. This week I was asked a question about why a size 9 hole in an old UK gauge looks as though it measures 5 or 6 mm when all the gauge conversion charts say size 9 is equivalent to 3.75 mm.
The answer is really quite simple but it is clear to see where the confusion arises.
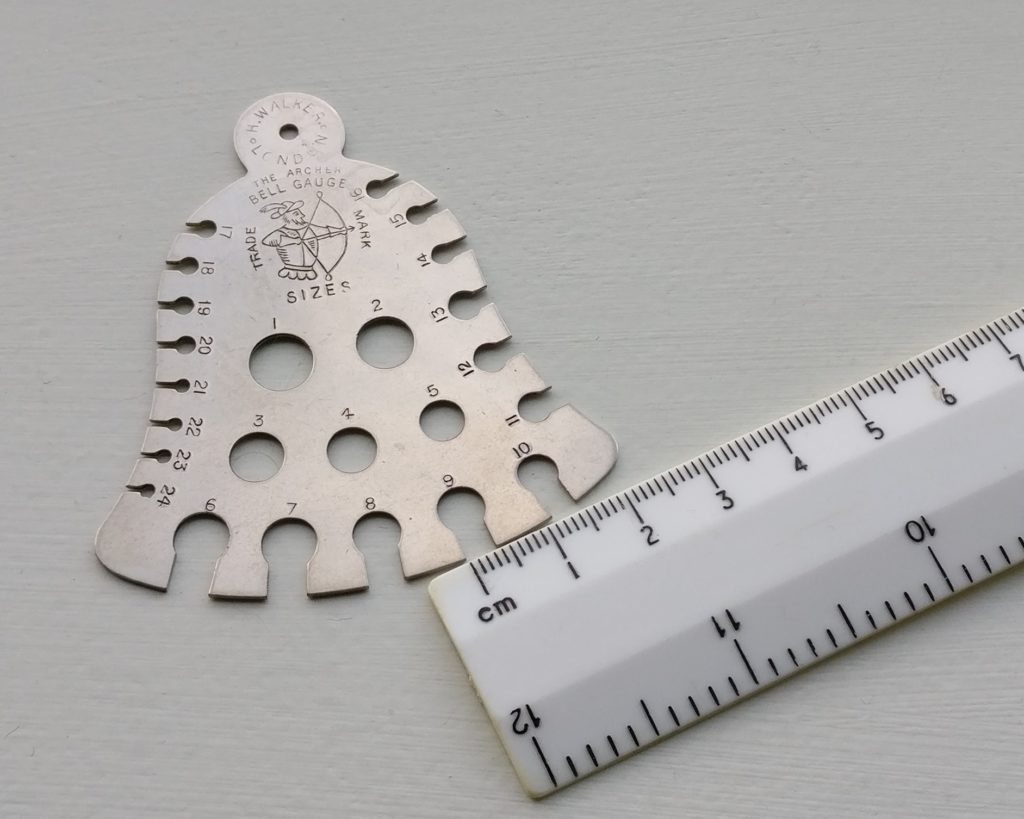
This is an early twentieth century gauge made by H Walker but it is very similar to all other gauges of that era. There are minor discrepancies with a few gauges but, generally speaking, they are all fairly accurate.
The holes in the centre are exactly what you would expect to see. The largest is size 1, which is equal to a modern-day 7.5 mm. Size 2 is 7 mm. The confusion begins when you want to use the edge of the gauge.
Below is a conversion chart showing the metric equivalents of the UK sizes. (Some are missing because there is no easy metric equivalent.)
Looking at the smaller holes it becomes obvious that the holes are much bigger than the metric measurements. It is the slits that should be used to measure the needle.
The size 9 slit, shown by the ruler, is indeed 3.75 mm (or thereabouts). The only completely accurate way to measure the diameter of a needle is using scientific calipers.
Over time gauges changed and the problem was eliminated.
As all fans of The Hitchhiker’s Guide to the Galaxy will know, 42 is The Answer to the Ultimate Question of Life, the Universe, and Everything. Today is the 42nd anniversary of the first broadcast.
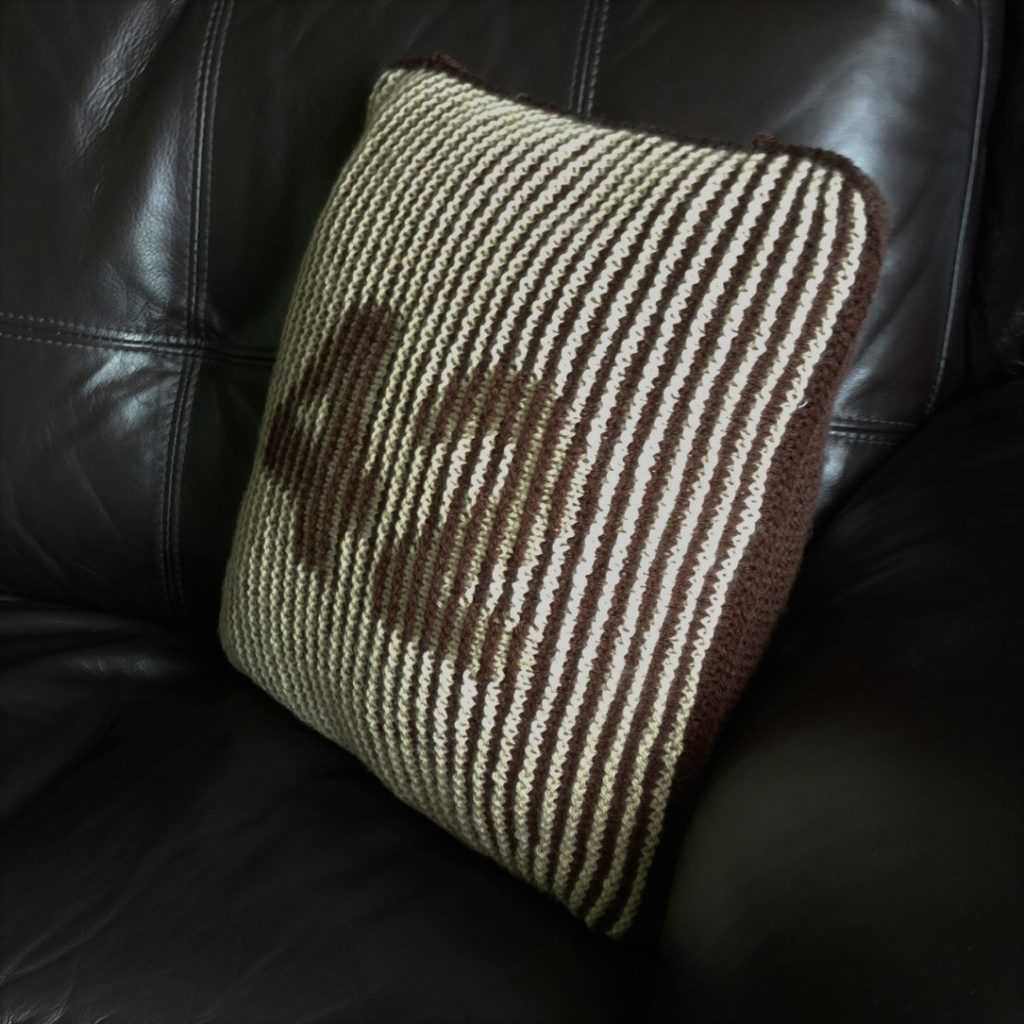
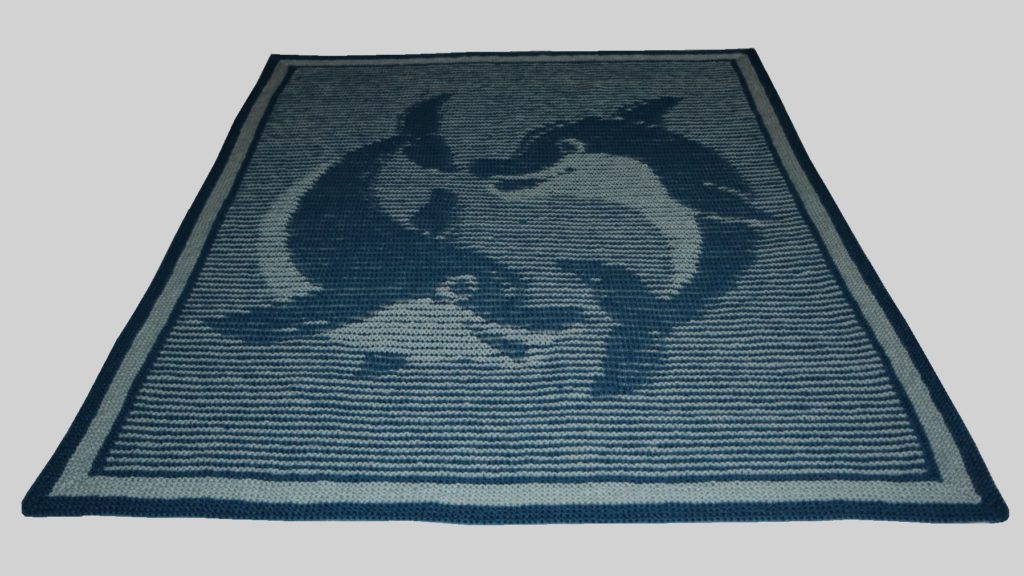
This cushion is the ideal gift for any Douglas Adams fan, or as a 42nd birthday present for anyone.
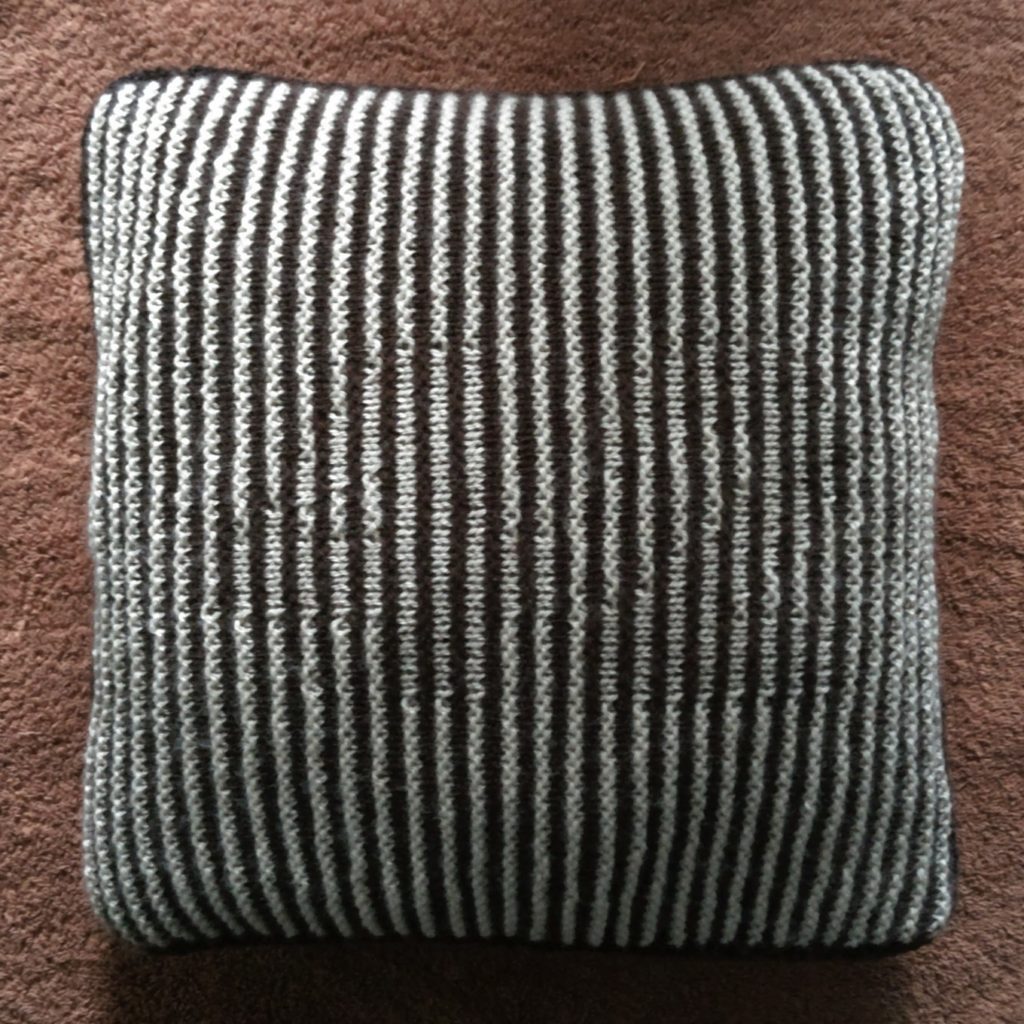
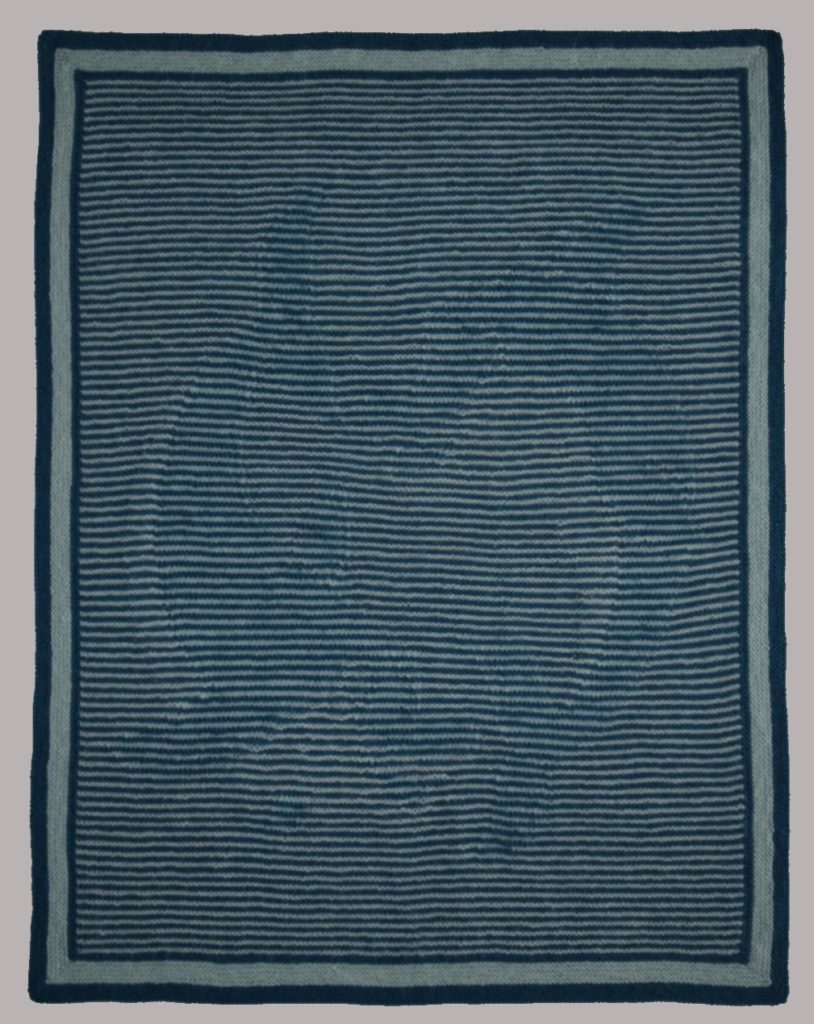
When you look straight at the cushion you only see stripes; when you look from an angle you see the number. The square could be used for a wall-hanging, or part of an afghan or sweater.
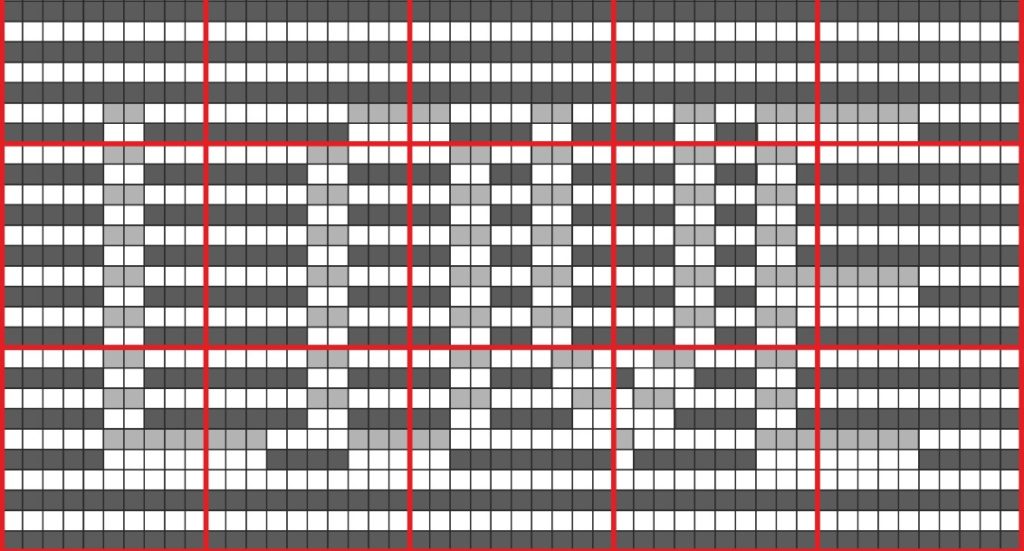
The pattern also contains all the other numbers so you could make it for any age.
We have often been asked about illusions for left-handed knitters. It is always a difficult question to answer because people use their own workarounds. It was only today that it occurred to me to do something practical about it.
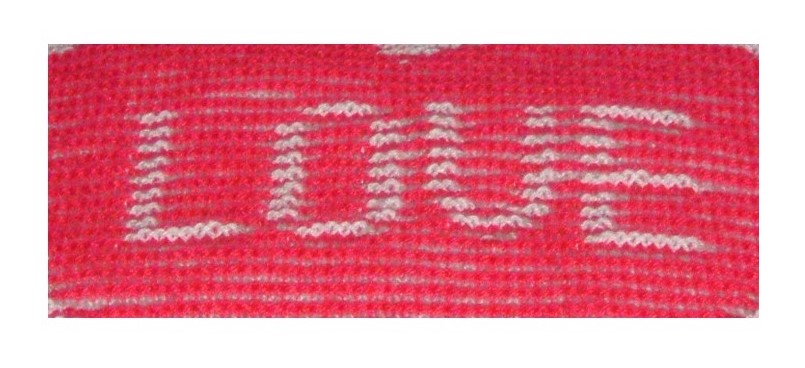
I have taken the lettering from Love Cushion and put it in a separate little pattern of its own. It only has 50 stitches and 27 ridges so should be quick and easy for anyone who is unsure. Knitting a few ridges should be enough to see whether the letters are pointing in the right direction. If they are not there are some suggestions to put them right.
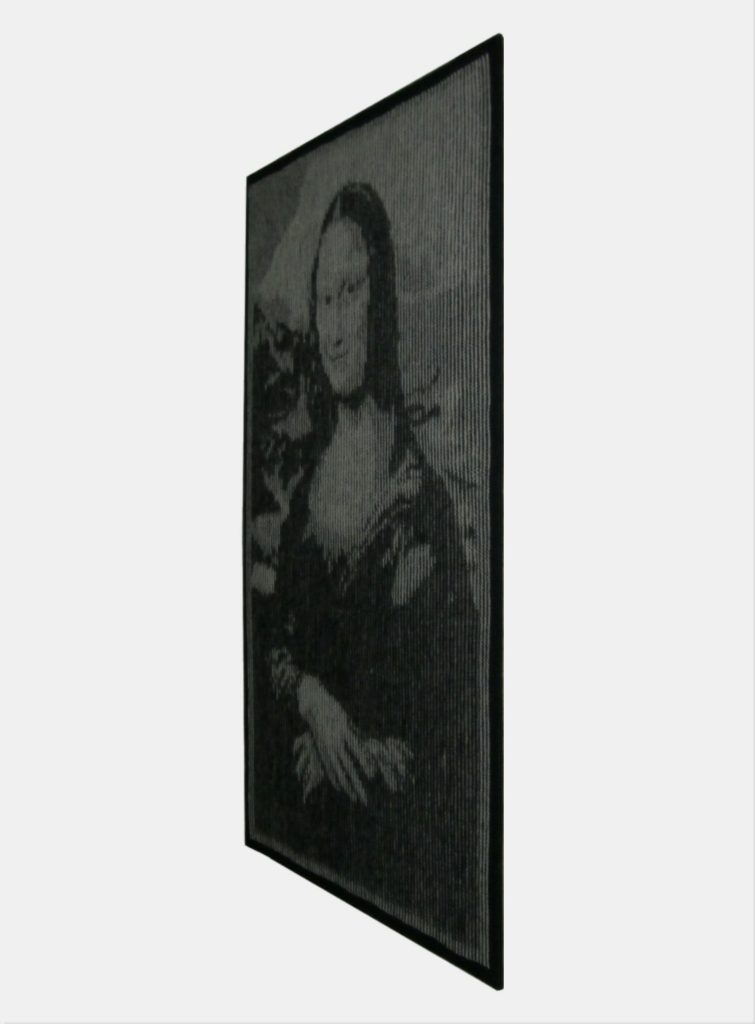
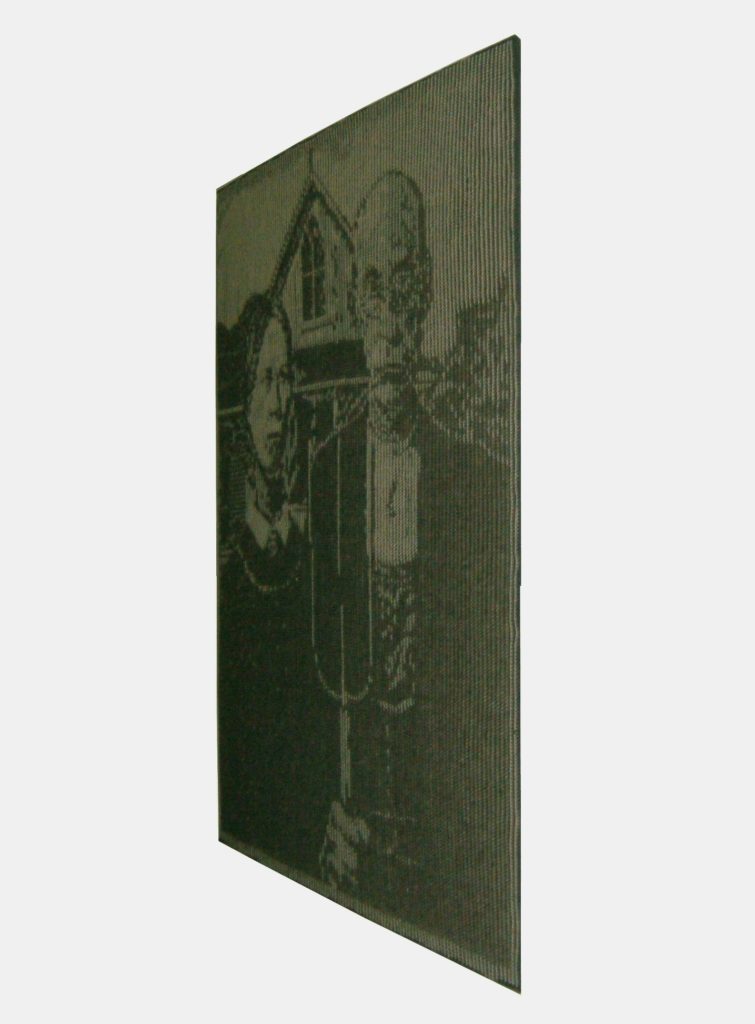
In many designs it doesn’t matter if the instructions are interpreted backwards but it certainly matters when lettering, or one-way designs, are involved. It is also important that the Mona Lisa should face the right way and that the farmer holds the pitchfork in the correct hand.
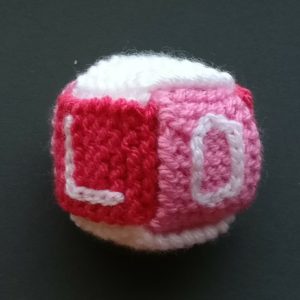
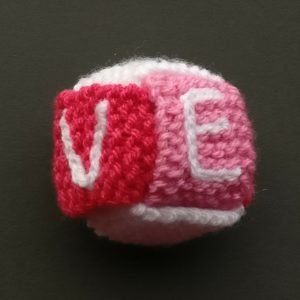
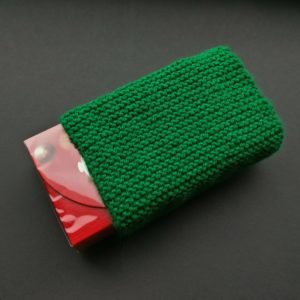
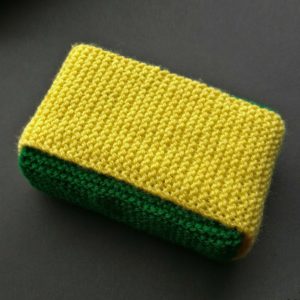
This is the ideal time to make a small knitted box with a hidden gift.
Cube Thing is made from three simple strips of knitting. They are not joined but they stay together to form a cube. You can put your gift inside and it can be taken out again without doing any damage to the cube. It has been said that this is the perfect size for a ring box. Download the pattern
If you prefer hearts ….
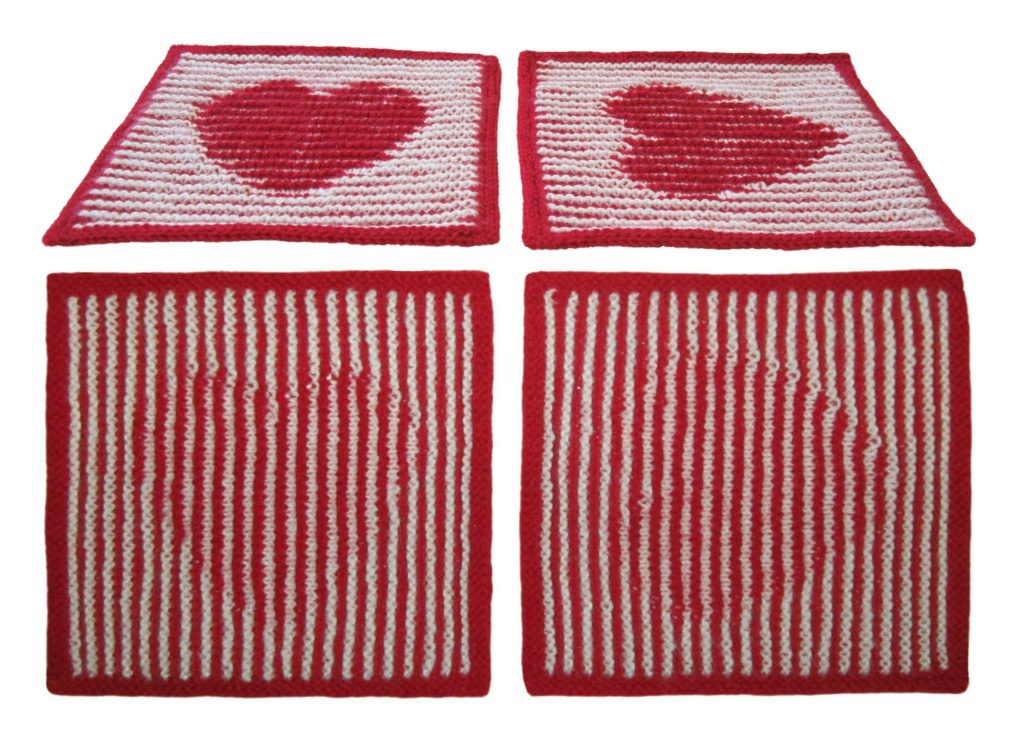
Heart 2 Heart has two small illusion hearts – one to be viewed from the bottom, the other from the side. The pattern has instructions for both. With illusion knitting you cannot simply turn the pattern round to make the heart that is viewed from a different angle.
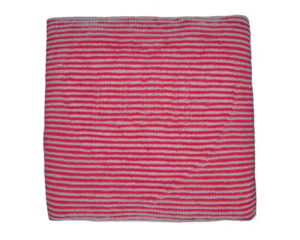
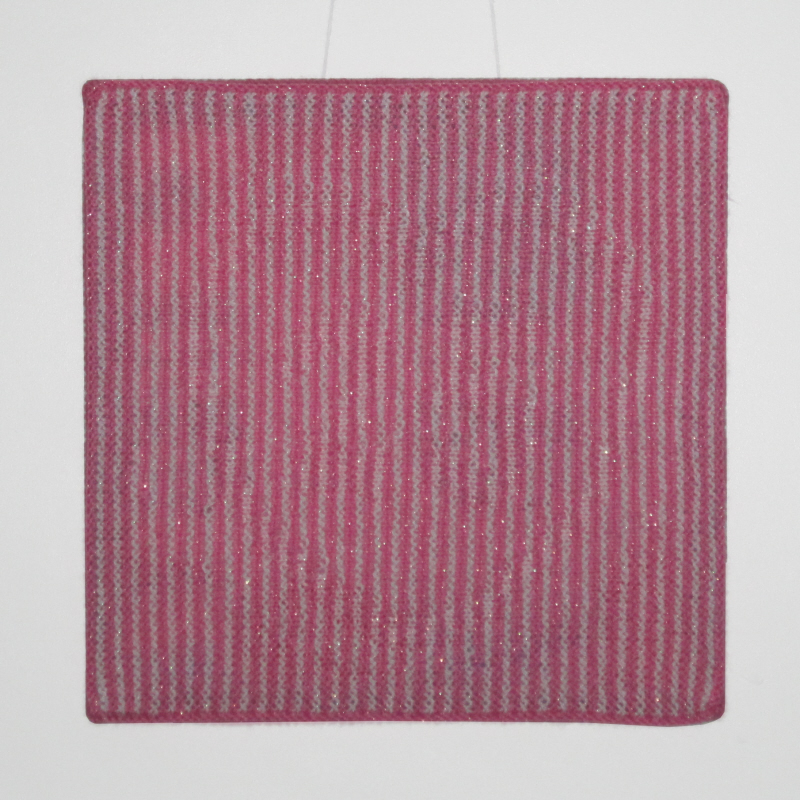
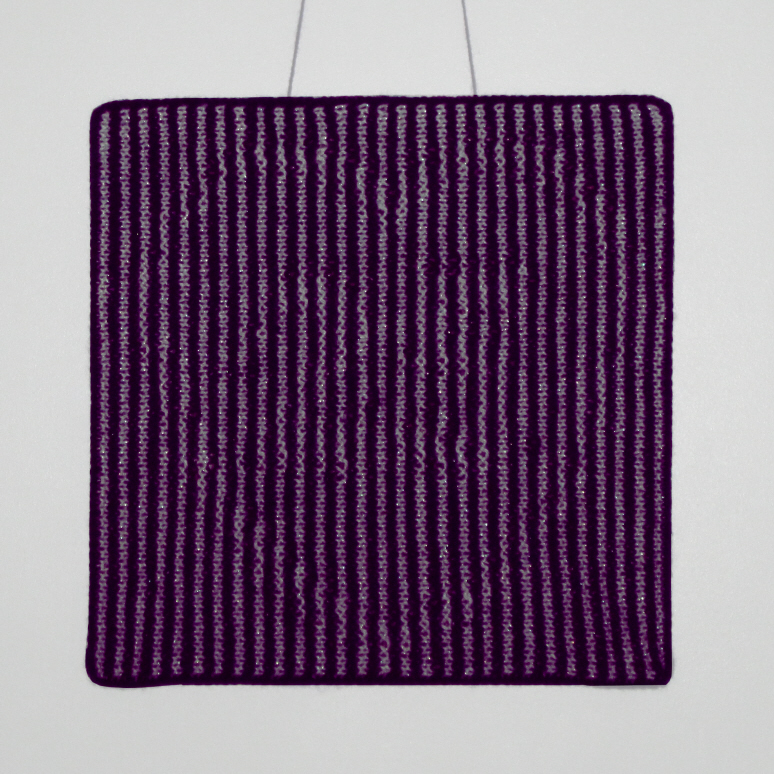
When you look directly at illusion knitting you only see narrow stripes.
These squares are quick and easy. They measure about 20 cm (8”) and only have 41 stitches. Individually they could be used as dishcloths or mats. You could use a series of them to make a scarf, bag, or part of a garment. Four squares could make a cushion, or even more can make an afghan. Reverse the colours in some squares for a more interesting effect. Download the pattern
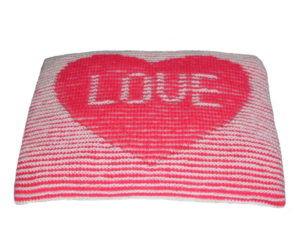
Love Cushion is another free pattern. It was originally designed for a charity but is now available to everyone.
The cushion shown was made in DK yarn and used approximately 140 metres (150 yards) of each colour for one side of the cushion. It is approximately 40 cm (16”) square and will take a 45 cm (18”) cushion pad. Illusions work with any thickness of yarn but a different thickness could change the overall size. Download the pattern (Unlike most of our illusion patterns this one has both written and charted instructions.)
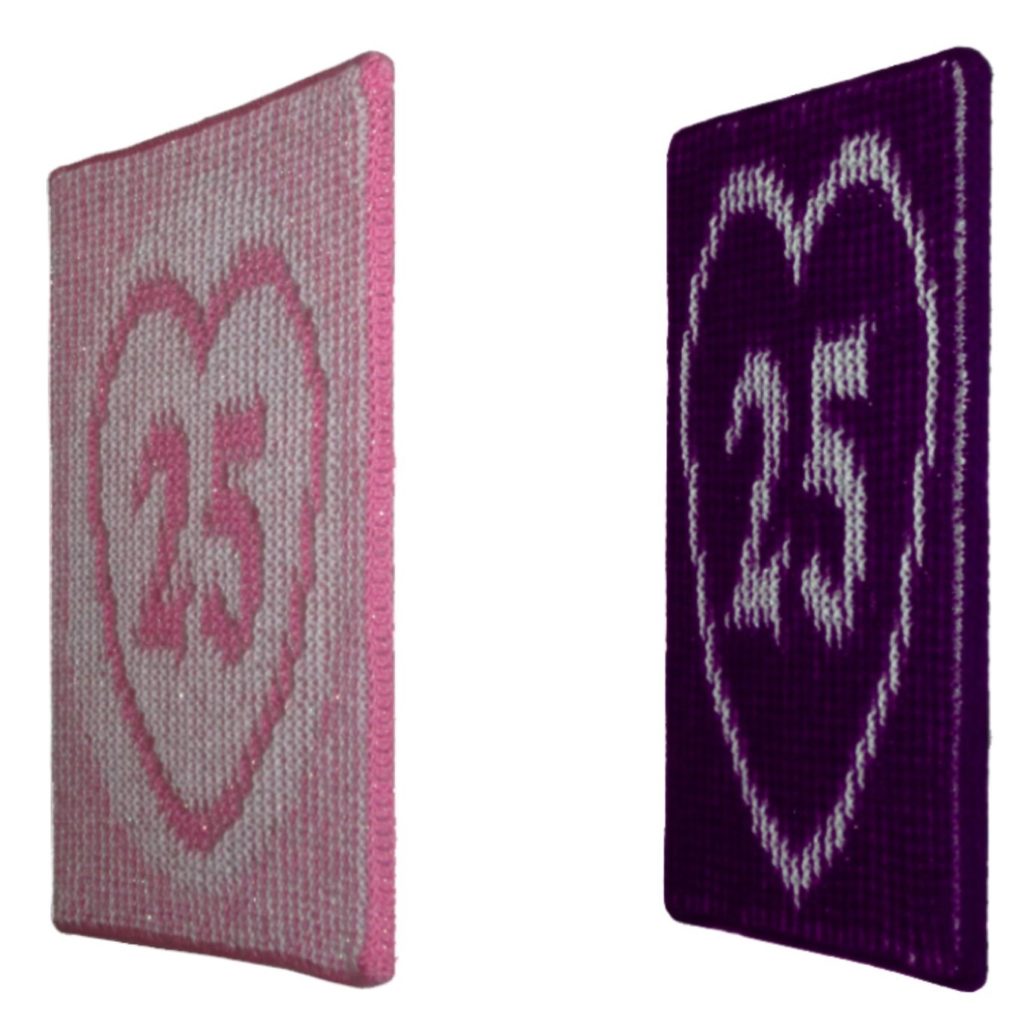
The free Silver Wedding Heart pattern includes two simple heart designs for a 25th wedding anniversary, which can be hung on the wall or used for small cushions. It doesn’t have to be for an anniversary. You could omit the numbers or add your own message. You could also add a few extra stitches to make it match the size of Love Cushion for a cushion with different hearts on each side.
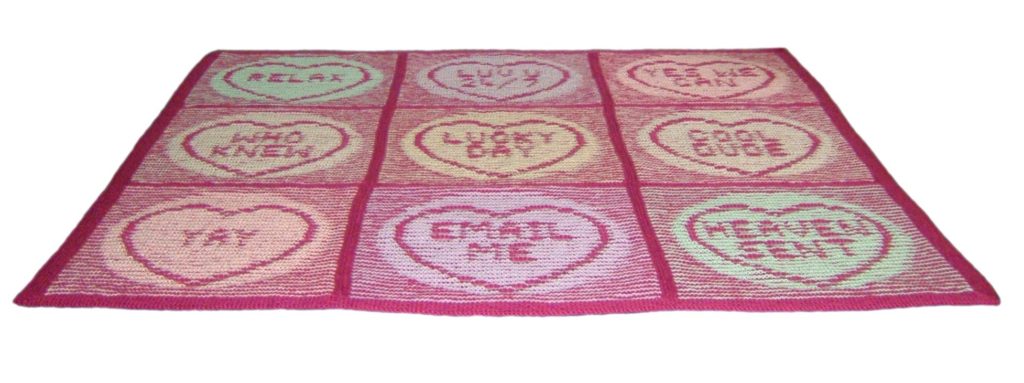
If you have a little more time make a Love Hearts Blanket. Anyone brought up in UK will be familiar with Love Hearts® sweets though they may be less well-known in other parts of the world. They have been made in UK since 1933. We have used some of the traditional messages, some modern equivalents and some of our own. Sixteen messages are included in the pattern and there are instructions explaining how to create your own.
If you don’t want a whole blanket just make two squares and turn them into a cushion. Buy the pattern Love Hearts® and the Love Hearts icon are the registered trademark of Swizzels Matlow Limited and are used with their permission.
Home is where the heart is is a bit more complicated.
When you look at the wall-hanging from directly in front you see four large striped squares; when you look from the side you see H O M E, with a heart nestling in the letter O. Buy the pattern
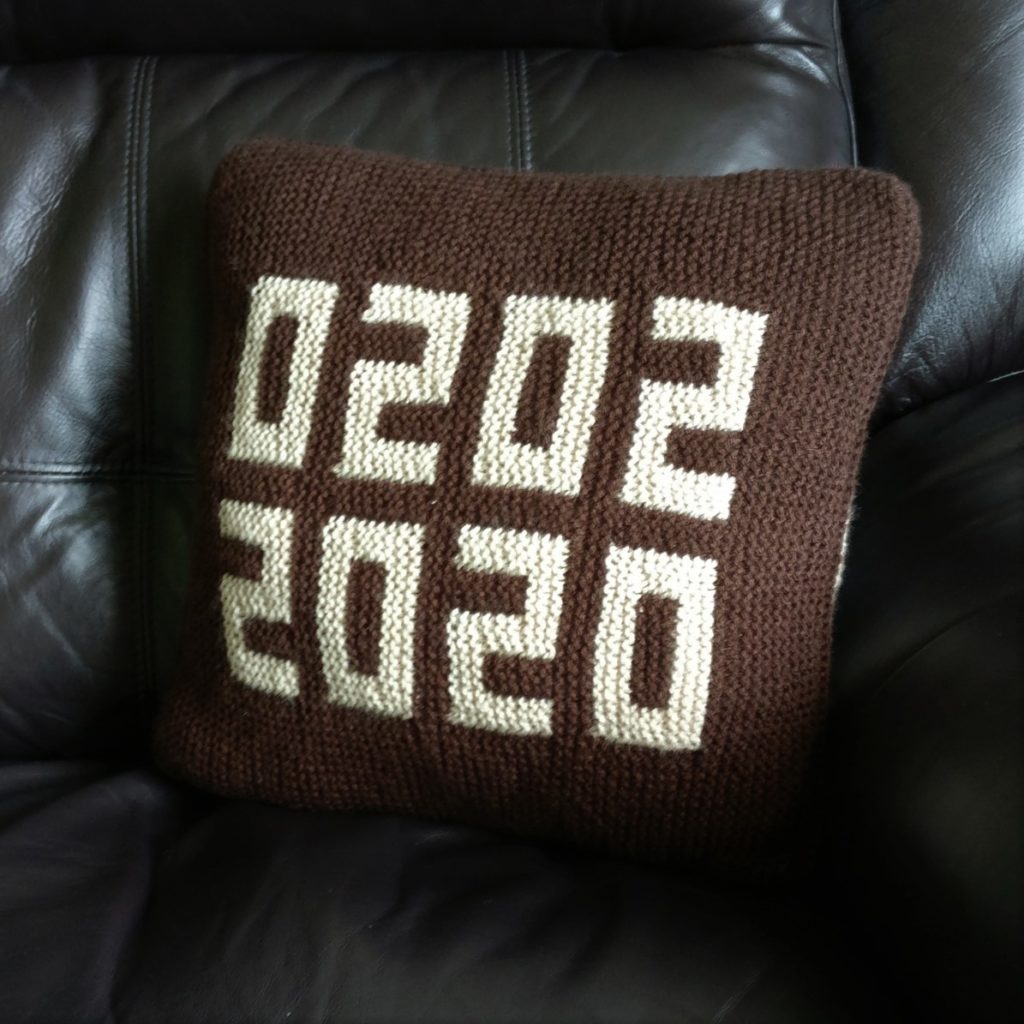
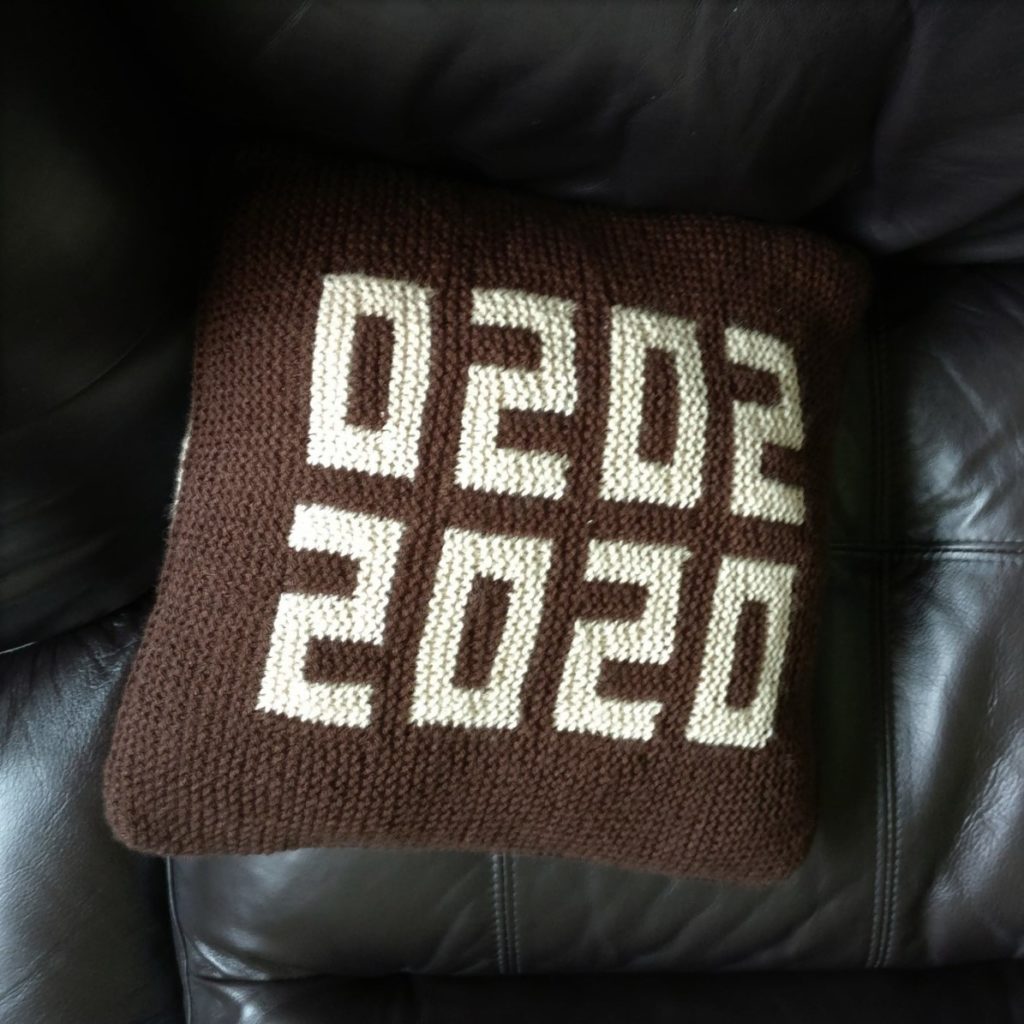
Today is 02/02/2020. Whichever side of the Atlantic you are this is a palindromic date. It doesn’t matter whether you put day or month first, or whether you put them before or after the year, they read the same backwards as they do forwards. What’s more the date will also read the same if you turn it upside down.
As a mathematician I find those numbers very pleasing but this date is remarkable for other reasons.
On this day my kidney transplant is 33.33 years old. That’s a third of a century! Coincidentally it is also Ben’s birthday and I made him a cushion. (It is also Groundhog Day and Candlemas.)
The cushion looks exactly the same when you turn it upside down.
My kidney has never functioned spectacularly well but it has plodded along and kept me alive, and living a fairly normal life, for all these years, thanks to some unknown person who was generous enough to donate their loved one’s organs in 1986.
I have Polycystic Kidney Disease. My father had PKD. My grandmother, who died, in 1929, almost certainly had PKD.
When my father, George Boddy, was diagnosed in 1963 little was known about PKD. Despite living in Staffordshire, he became a patient of the Royal Free Hospital, London, which was one of the very few hospitals with experience of the disease. By 1966 he was on dialysis. This was in the early days of home dialysis when all patients had to be within easy reach of the hospital. George had joined the Household Cavalry as soon as he was old enough. He served for many years, including the whole of World War 2. When he left he became a police officer. He was very determined and disciplined and, combined with his DIY skills, this made him the ideal person to trial dialysis 150 miles from base. He was never afraid to try something new and was a willing volunteer to try out any new techniques.
Both of my parents became involved in educating others about dialysis, which was a very unfamiliar procedure, even to many medical people. They did this through talks and demonstrations, sometimes using a series of slides, which can be seen on the Woolly Thoughts web site. George and Maisie made a big contribution to the development of the home dialysis system.
George had an unsuccessful transplant in 1969. In the last few years before his death he was no longer able to be a ‘bobby on the beat’ but his astounding local knowledge was put to good use as Collator of Information for the local Police Force. He was still a serving police officer when he died in 1974. (Maisie also died from another kidney disease many years later.)
My progress was monitored over the years. By 1983, I was, to all outward appearances, living a normal life and working as a teacher in a very demanding school but I had amazingly little kidney function. I was put on a ‘low clearance’ diet and watched very closely, to try to determine why my body didn’t seem to accept what was happening. My condition continued to decline but I still did not feel any ill effects. After three years on the diet it was decided that it was dangerous to continue any longer without dialysis.
I started on dialysis and very soon afterwards, to everyone’s surprise, a kidney became available for transplant. I am from one of the rarer blood groups. I consider that I was very lucky to be ‘in the right place at the right time’. The kidney was not a good match. In those days it was thought to be important that there should be a close match. I was as good a match as anyone else they had on the list, and I was already in hospital though not really unwell, so it was decided to take a risk. It was definitely a gamble but it added to research that was being carried out.
The first few months were very shaky. I was in hospital for seven weeks. During that time I had peritonitis, which didn’t help. There was no suitable drug that could be used so I agreed to taking one that was still in trials. It worked like magic. I believe it saved my life. I had to fill in an enormous questionnaire afterwards. I don’t know whether it ever became an approved drug but I was glad to have been part of the testing.
I agreed to take part in many trials over the years. One of the early ones was to compare the effects of Cyclosporin with Azathioprine. Cyclosporin was the new wonder drug but it was found to be poisoning my kidney and I had to be withdrawn from that trial. I still take Azathioprine and Prednisolone now. They are the kind of drugs you have to take forever to prevent the immune system from rejecting the transplanted kidney, which it regards as a foreign body.
Eventually the kidney settled down. It has never produced the stunning results that many transplantees have but it is almost as good now, thirty-three and a third years later, as it was then. For the past fourteen years I have been able to see all my test results online via an amazing service which was originally known as Renal Patient View and is now Patient View. I cannot praise this system highly enough. This is the NHS at its very best. I can have my blood taken at my local surgery in the morning and see my results at midnight the same day. This means I can make minor adjustments to some of my medication, if necessary, without having to go to the hospital or take up a doctor’s time. It is good for all sides.
My results on Patient View go back to 2006 and my highest ever eGFR is 25. eGFR stands for Estimated Glomerular Filtration Rate and is an indication of kidney function. Anything above 60 is considered to be normal. The good thing is that it has stayed fairly stable although it is now below 20.
I hadn’t felt ill before the transplant but I felt a million times better afterwards. A progressive disease creeps up so slowly you don’t notice it. I am eternally grateful to the family who gave their loved one’s organs for transplantation. I know that four kidneys were given that night, and I believe that they were all the same blood group which makes me think that they were probably from two members of the same family.
Unlike most transplant patients I still need to limit the amount of liquid I consume (but, thankfully, not as drastically as dialysis patients do). My kidney doesn’t seem to work fast enough to process it but that is a small price to pay.
Over the years I have been looked at by more students than I could possibly count. I have signed to allow my details to be shared for various purposes. I have been a patient for doctors’ exams and in the training of doctors for those exams. I have been videoed for training purposes. Whenever possible I have agreed to whatever I have been asked to do. It is all part of the research that goes on all the time.
There have been good times and bad times. Immunosuppressants mean that transplant patients can get some weird and wonderful things that don’t happen to ‘normal’ people and I have had my share.
My illness has changed my life dramatically and taken me down paths I could never have imagined. I am a knitter. I have been a knitter for as long as I remember. I have also done many other crafts but knitting was always something to return to in the times when sitting around and waiting. After the transplant I lost much of the feeling in my fingers and they never quite returned to how they were before. It was frustrating and I had to find a way round. For a long time I couldn’t use more than one yarn at a time because I couldn’t feel what I was holding. So how could I make multi-coloured things. The first trick, which I learned from a famous knitter, was to make a ball of different lengths tied together and knit as though it was just a normal ball. That worked OK but I was not in control of the result.
The mathematician in me came to the fore and I started making small geometric shapes and then adding on more and more pieces, only using one ball at a time. To cut short a long story, this eventually developed into writing several books and creating mathematical wall-hangings. My husband and I designed these, getting inspiration from each other. We became very well-known in the knitting, and maths education communities. Some of our earliest pieces were bought by the Science Museum in London. Knitting was the unconventional medium we used to teach maths. We travelled this country and abroad, sometimes working with high-powered mathematicians, sometimes with small children, sometimes with groups of ‘I can’t do maths’ ladies.
We have taught in a palace in Italy, above the snow-line on a volcano in New Zealand, at a football stadium event with 10,000 children, and many other amazing places. None of this would have happened if it hadn’t been for the drugs I have taken all this time. Yes, they leave me vulnerable to various types of cancer and strange illnesses, they have wasted my muscles, they make my skin unbelievably fragile, but I am still here! I have a large bald patch as the result of surgery on my skull but I have ten wigs in a variety of colours. It confuses people a bit sometimes though. I can be a different person every day and I have saved a fortune on hairdressing bills.
Since we reached retirement age we have gone off on another tack and are now equally famous for designing and creating illusion knits. These look very complex but are really very simple. They rely on knitting two rows in one colour, followed by two rows in another colour and, although I am much slower than I used to be, I can do that. We don’t travel any more but the internet means that we can communicate with people who we can’t teach in person. Without my illness none of these things would have happened. We are happiest when we hear of the effects we have had on other people. I never expected to live to be over seventy years old or to become involved with such a wide range of amazing people. If we have brought light into any of their lives, my transplant has done far more than benefitting me.
A transplant is a treatment, not a cure. There are always side effects. Nobody could have known what the long term effects of some of the treatments might be but the research that has gone on over that time has helped to refine the treatment still further and make the prospects better for anyone needing treatment in the future. I have seen, first-hand, the progress over more than 50 years and it has been dramatic.
We have also been involved with The Little Yellow Duck Project. It’s aim is to raise awareness of the need for blood, bone marrow, organ and tissue donors. Hand-made little ducks, with labels round their necks, are left for people to find. The ducks can be logged on a world map and the site also has links to the donation registers in many countries. Ducks have been reported from over one hundred countries.
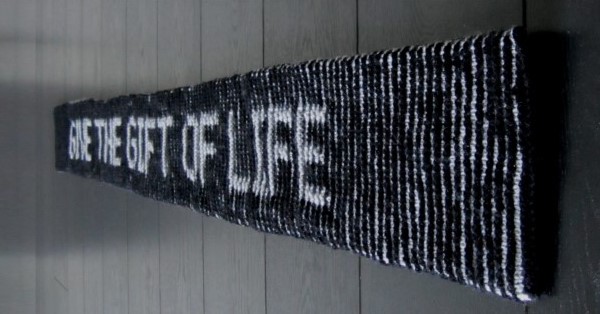
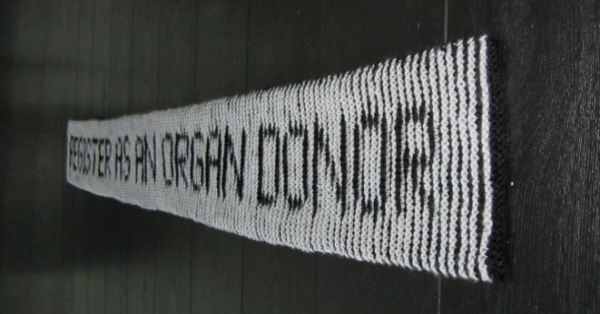
If you want to try your hand at illusion knitting we designed a scarf that looks normal from straight in front but, when you look from an angle it says GIVE THE GIFT OF LIFE on one side and REGISTER AS AN ORGAN DONOR on the other. You can download the pattern
Now you know how to make the shapes, what can you do with them? You could make a small cushion or go on, as many people have, to make a blanket.
Making a garment is easy. The most important thing is to decide the overall size you need, before you begin.
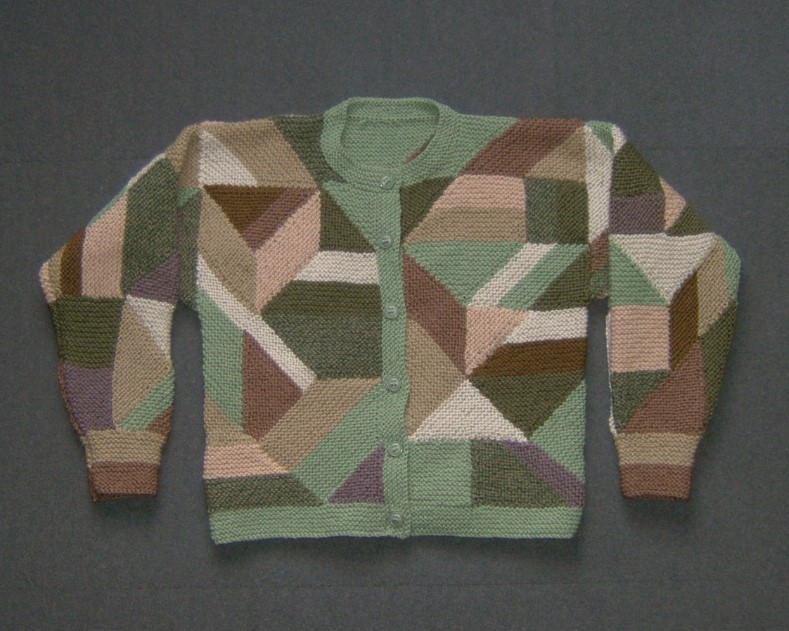
It is possible to make a sweater, jacket, hat, etc. without any extra shaping. It can be a very simple shape. My (very old) cardigan has tapered sleeves.
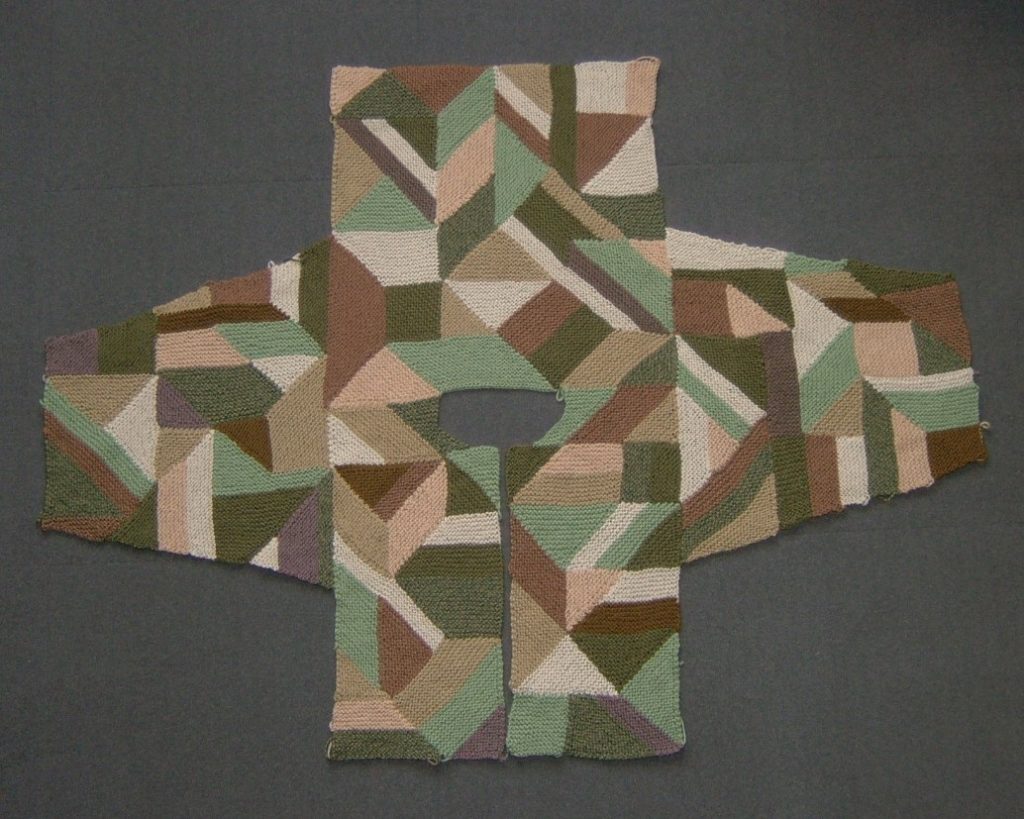
I made the cardigan entirely from scraps of leftover yarn. The second photo shows all the shapes, before the edgings were added.
To make something like this
Decide how wide you want the back to be and divide the measurement by six.
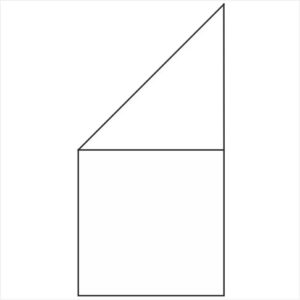
Draw a square with sides of the size you calculated.
Knit a diagonal square to fit the drawing.
Make a note of the number of stitches on the diagonal.
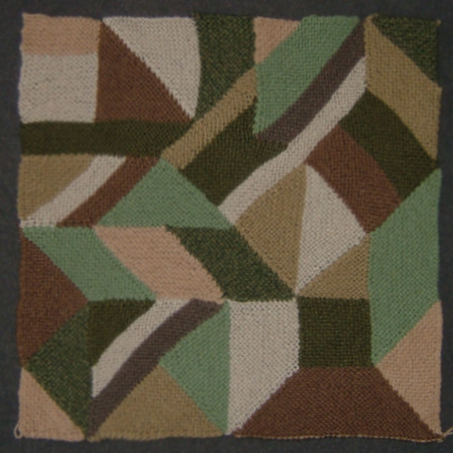
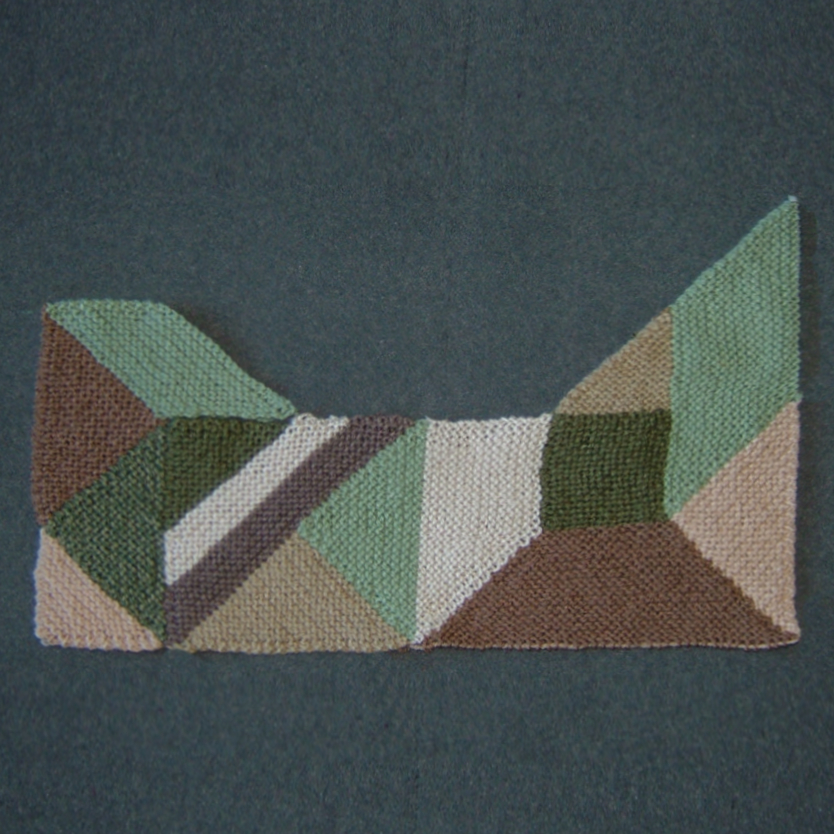
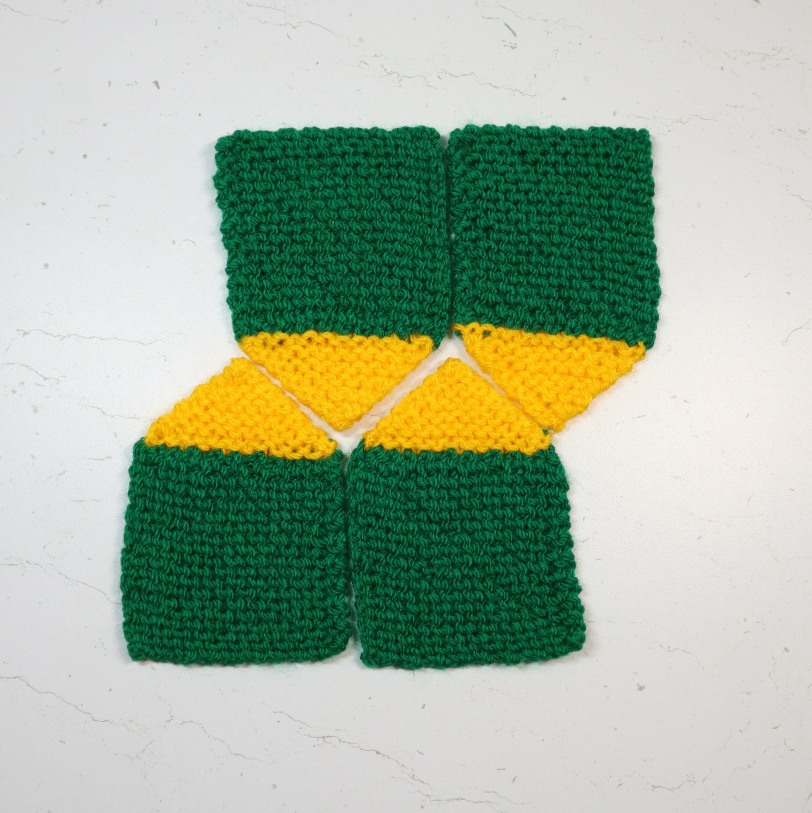
The photos below show the whole of the back and the first seven shapes that became the top corner of the back.
Shape 1 Width of back will be 54 cm (21″) Divide by 6. Square size = 7 cm (3.5″)
Knit the diagonal square.
The square in this example has 20 stitches on the diagonal.
Make a note of the number of stitches on the diagonal of your square.
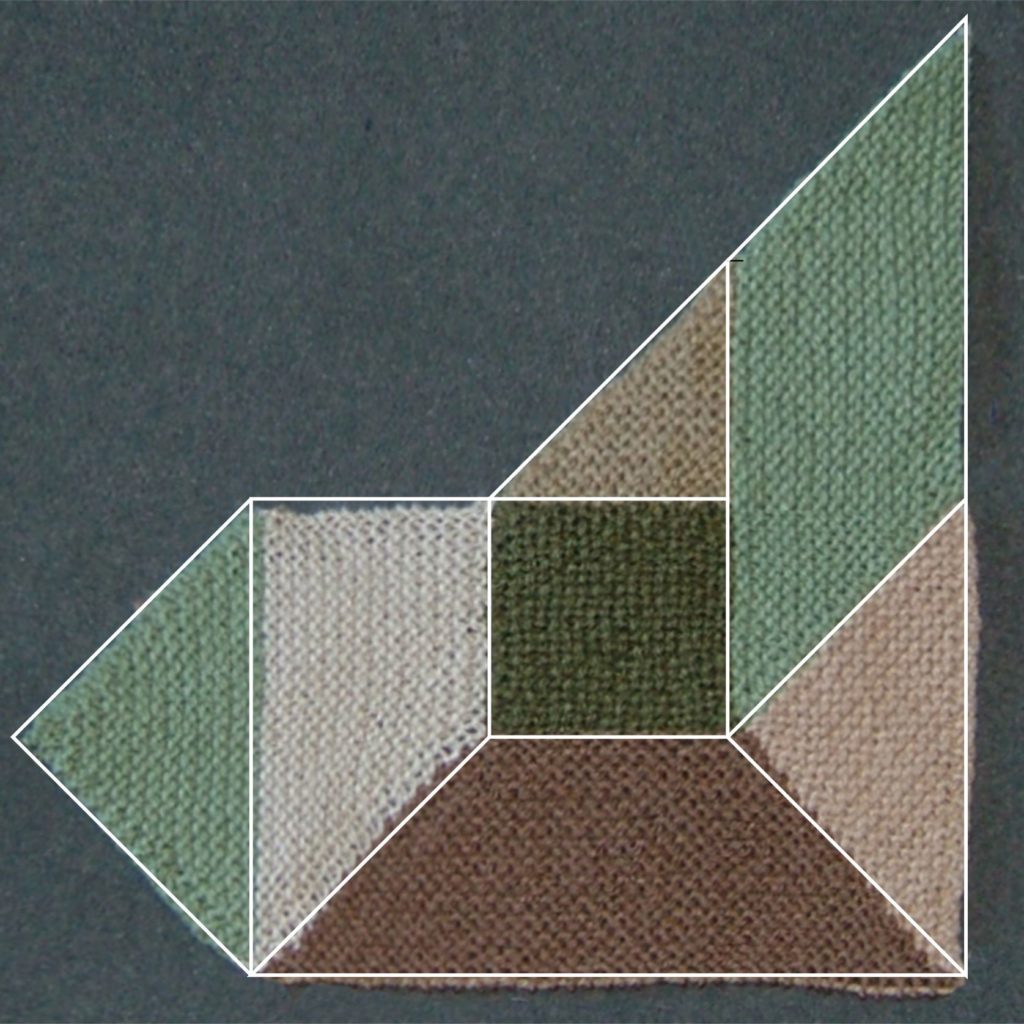
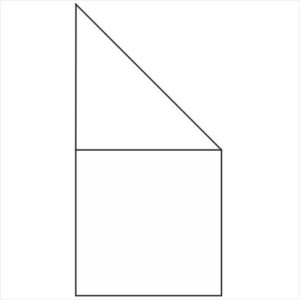
Shape 2 Divide the number of stitches on the diagonal by 1.4. I will now call this number x
Example: x = 20 / 1.4 = 14
Pick up x stitches along the edge of the square. Knit straight on wrong side rows. Knit two together at the end of every right side row until one remains. Fasten off.
The triangle is the same height as the original square.
Shape 3 Pick up x stitches along the edge of the starting square and another x stitches along the edge of the triangle.
Knit two together at the end of every wrong side row. Knit into the front and back of the last stitch of every right side row.
Continue until you have x garter ridges. Keep the stitches on a stitch holder if you think you might use them again. (Or cast off instead of working the last row.)
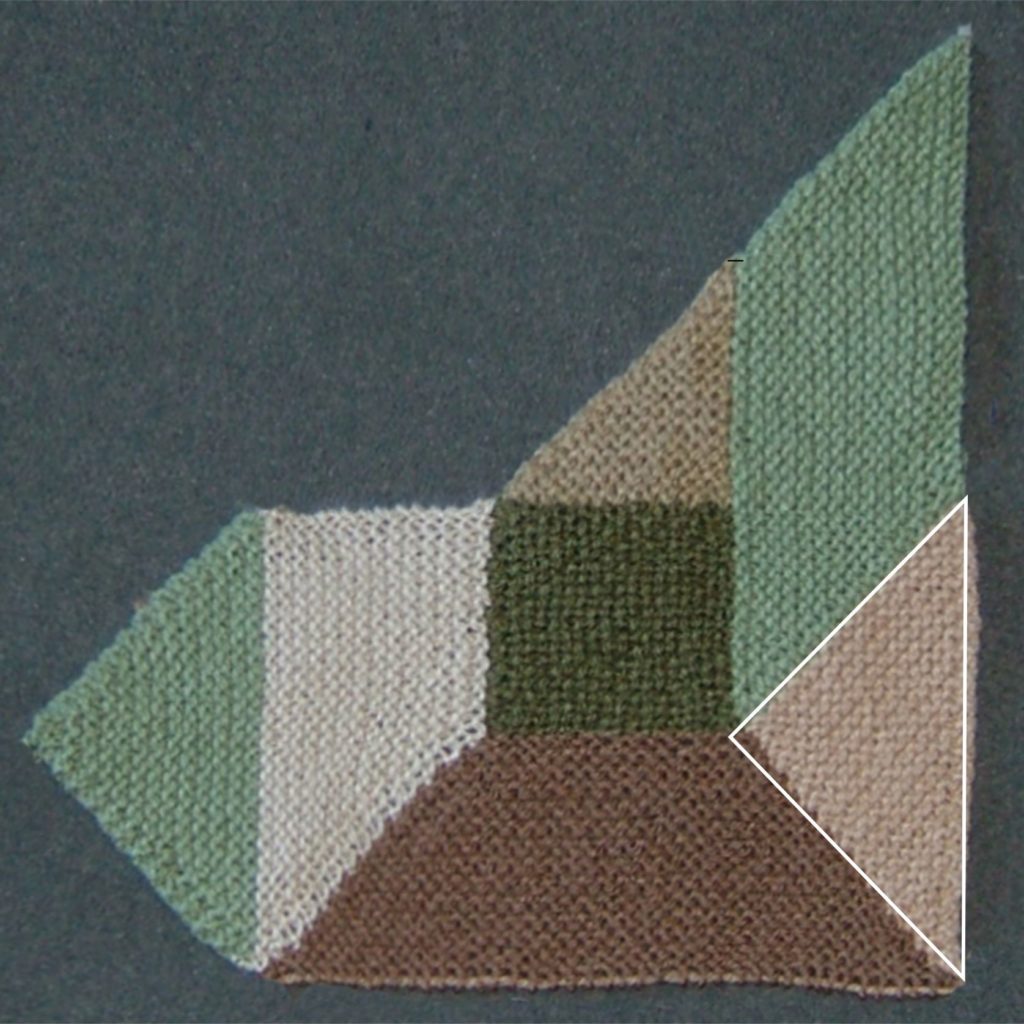
Shape 4 Shape 3 is the same height as the starting square so Its sloping side is exactly the same length as the diagonal of the square.
Pick up the same number of stitches you had on the diagonal.
Knit straight on wrong side rows. Knit two together at the end of every right side row until one remains. Fasten off.
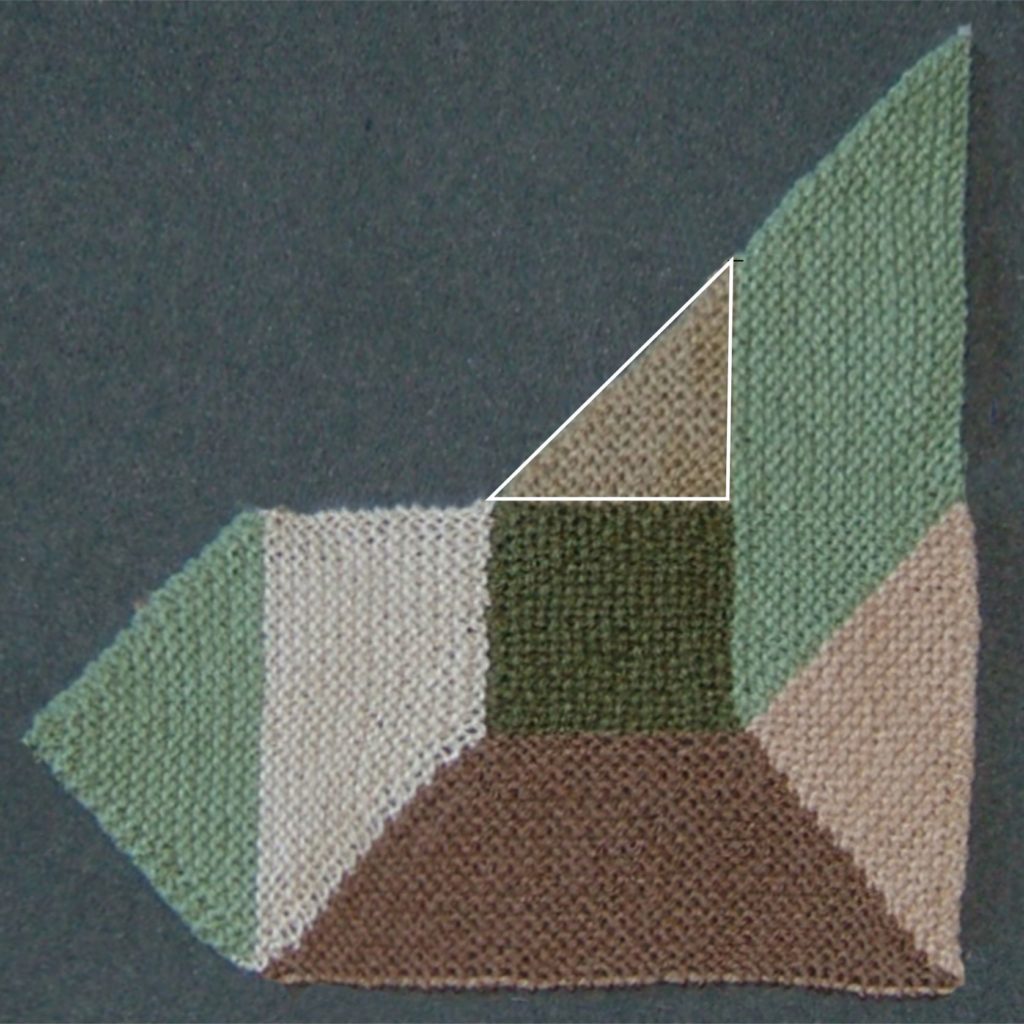
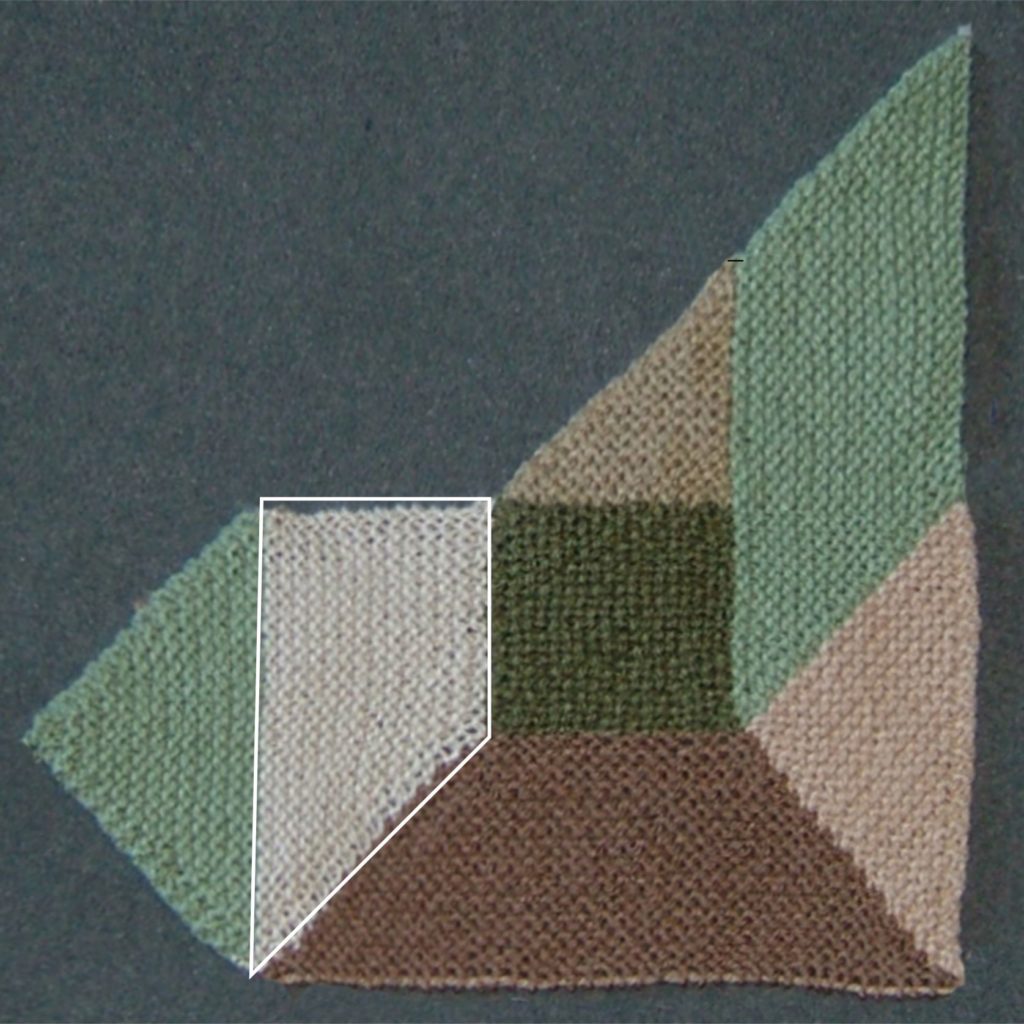
Shape 5 Pick up x stitches along the edge of the square.
Increase in the last stitch of every row.
Continue until you have x garter ridges.
Either cast off on the last row, or keep the stitches on a holder, in case you need them later.
It is easiest to stitch the join between shapes 4 and 5, as the pieces will not match ridge for ridge.
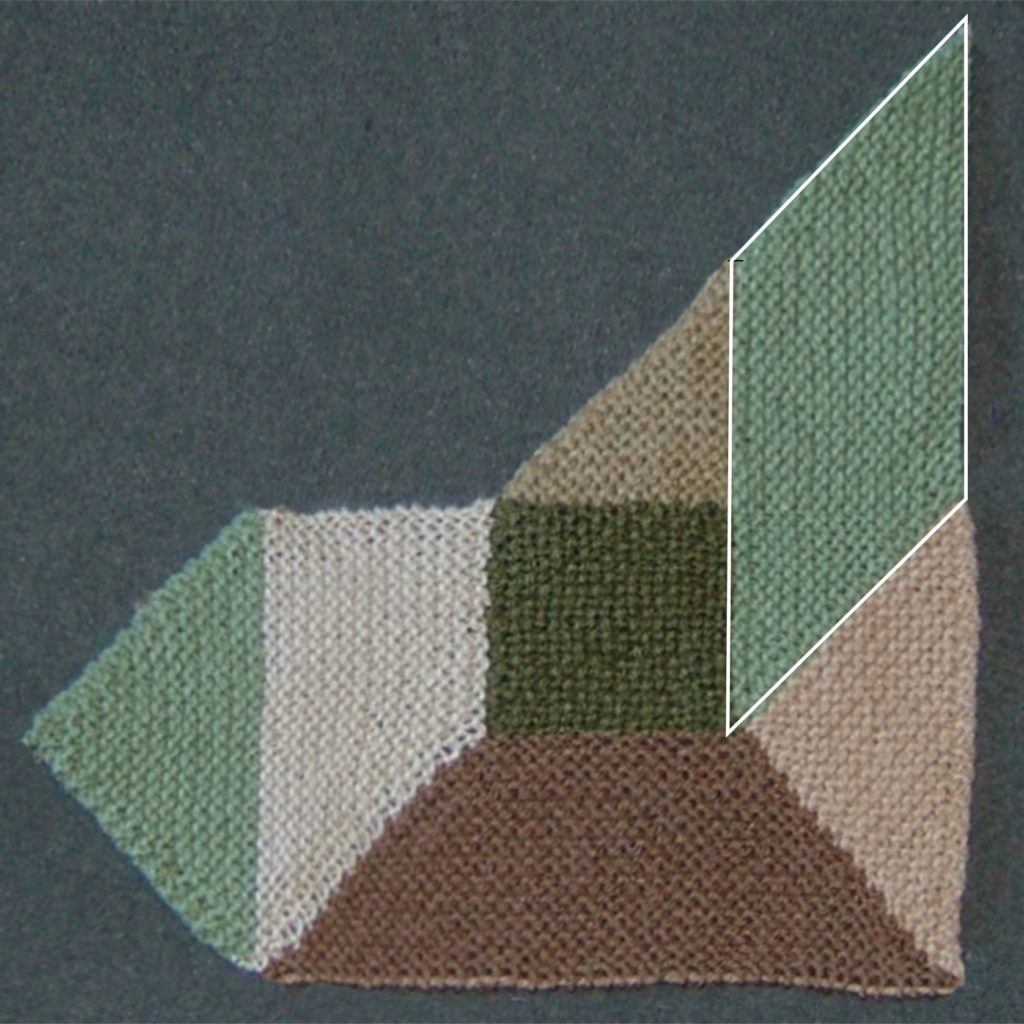
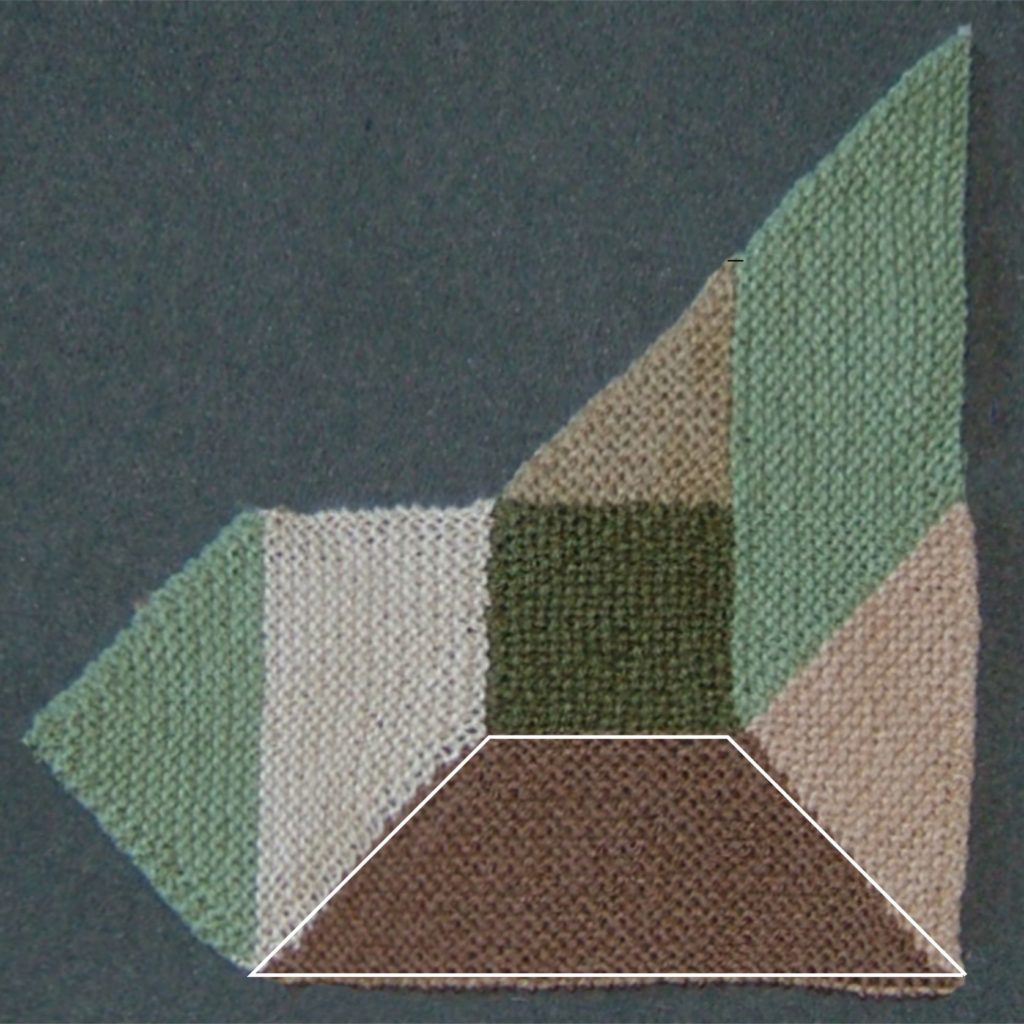
Shape 6 Pick up x stitches along the edge of the square.
Knit straight on wrong side rows. increase at the end of every right side row.
Knit the same number of ridges as Shape 5. Do not cast off.
The ridges in this shape exactly match the ridges in Shape 5. As an alternative to your normal increase you could pick up one stitch from each ridge end of Shape 5.
Shape 7 Continue on the same stitches, with a different colour.
Decrease at the end of every row. Continue until one remains. Fasten off.
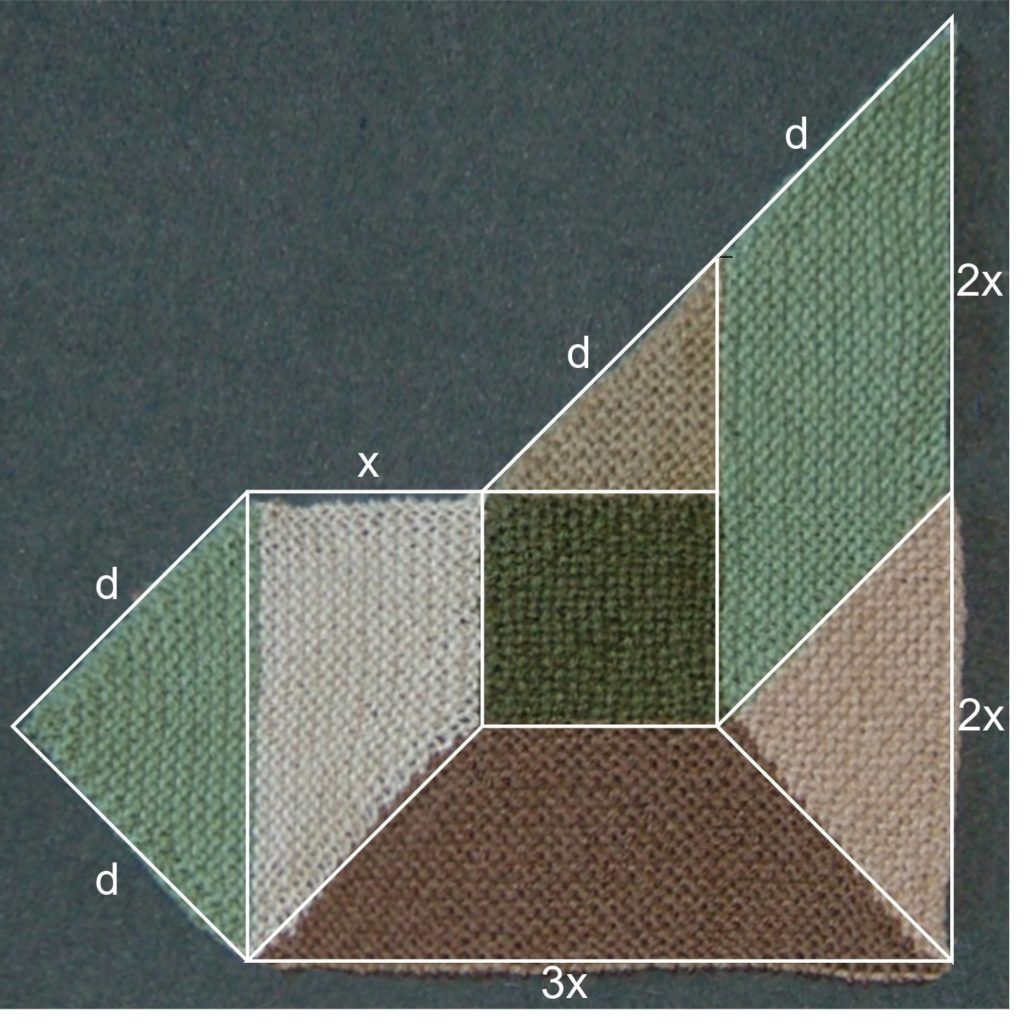
Continue adding shapes in any direction until the width of piece is equivalent to six starting squares. The length can be anything you choose.
The letters in this diagram show you how many stitches to pick up from the exposed edges.
x = the number of stitches you calculated. d = The number of stitches on the diagonal of the square,
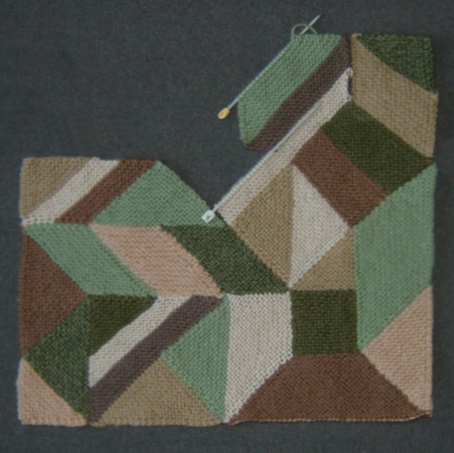
Add shapes in any direction. You can even use more than one colour in a shape. The first photo below includes shapes 8 to 13. The other photo is of an almost complete square.
These shapes are included in a pattern called Cushion Conglomeration Caper. There are two sets of instructions. The short version describes shapes for you to think about, and make, yourself. The long version gives you detailed help and, sometimes, alternative ways of making a shape.
History CCC was published in 1998, which explains why the photos are so old.
It was originally a project for, and by, the members of the Woolly Thoughts Yahoo group, as an introduction to using Woolly Thoughts methods. The plan was for a different member of the group to add each new shape so that there was no predetermined pattern. Some might refer to this as freeform but this was all using very precise geometric shapes. The only angles allowed in the shapes were 45, 90 and 135 degrees.
The original plan broke down as some members wanted to work more quickly than others. I added the remaining shapes myself so that everyone could work at their own speed. The basic instructions for a new shape were revealed every two days but all help and advice files had to be accessed separately so as not to spoil the fun for those working more slowly.
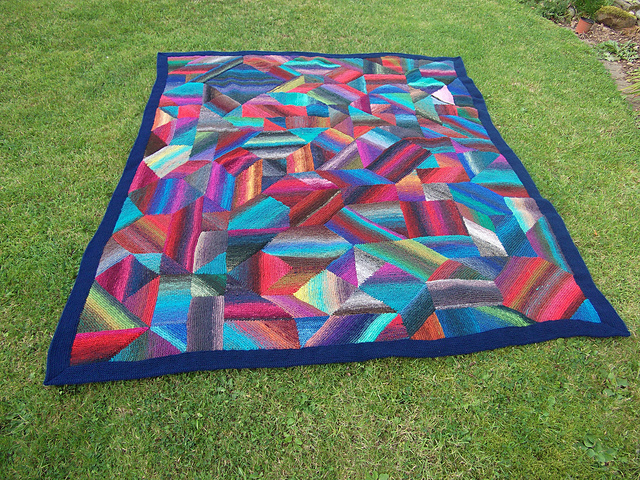
This blanket was made by two people who started with the Cushion Conglomeration pattern then took it in turns to add new shapes without the knowledge of the other person.
In an earlier post I described what happens at a typical Woolly Thoughts workshop about modular knitting and why these foolproof methods work.
Begin with a garter stitch square, knit diagonally:
Make a slip knot
Increase by knitting into the front and back of the loop
Increase at the end of every row until you have the size you want
It is very important to remember the number of stitches at the widest point
Decrease at the end of every row by knitting two together, until all stitches are worked off
To add shapes to the square Use a calculator to divide the number of stitches at the widest point by 1.4. Round to a whole number. This tells you how many stitches you need to pick up along the edge of the square.
The simplest form of modular knitting is in garter stitch and creates angles of 45, 90 or 135 degrees. There are only a few different things you can do to add shapes onto the square. Each side of the shape can lean to the left, go straight up, or lean to the right. The simplest is to just keep knitting straight but it is not very exciting. The other possibilities are:
Decrease at the end of every right side row
Knit straight on wrong side rows
Knit straight on right side rows
Decrease at the end of every wrong side row
Decrease at the end of every right side row
Increase at the end of every wrong side row
Increase at the end of every right side row
Decrease at the end of every wrong side row
Knit straight on right side rows
Increase at the end of every wrong side row
Increase at the end of every right side row
Knit straight on wrong side rows
Increase at the end of every row
Decrease at the end of every row
Some shapes work off all the stitches and come to a point, others could continue as far as you like. You can even swap between the different angles and end up with a zigzag or other eccentric shape.
If you plan to add more shapes, you need to think carefully about how tall the shapes need to be so that they can fit together. It is often best to make them the same height as your starting square, or half that height.
Last week I gave a talk at MathsJam Annual Gathering. This is an amazing annual event where ‘mathematicians’ from around the world get together. It isn’t the boring number stuff you might imagine. When 200 eccentrics (of the nicest possible kind) get together it leads to mind-bending fun, puzzles, games, performances, cake baking, singing and many other things that would soon dispel the idea of maths being boring.
Each speaker is only allowed a five-minute slot (with plenty of discussion time afterwards). I originally intended to talk about mathematical Barbie clothes, which you can find in other posts on this blog. At the last minute I changed my mind and decided to talk instead about the most basic ideas behind Woolly Thoughts mathematical knitting.
We have been presenting workshops for 25 years and work on the premise that a good many participants will say ‘I can’t do maths’. We aim to convince them that they can. The methods shown here are a ‘foot in the door’ to those people and we know, from experience, that some wonderful things can follow.
What happens at a workshop
Knitters are asked to bring their own choice of needles and yarn, to prove that the methods work with anything. The same thickness of yarn should be used throughout.
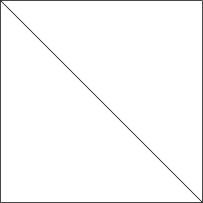
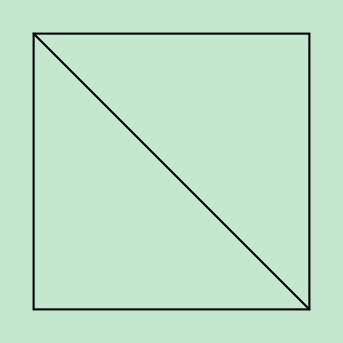
They are given a square with a diagonal line marked on it.
The instructions are
Work in garter stitch (Knit every row)
Start with a slip-knot
Knit into the front and back of the loop
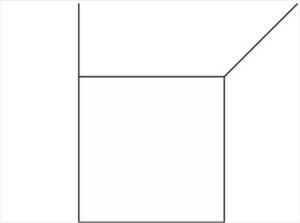
On every row, knit into the front and back of the last stitch until you have a triangle wide enough to fit up to the diagonal line
Make a note of the number of stitches
On every row, knit to the last two stitches. Knit two together
Fasten off when one stitch remains
It may not be a perfect square but will become square when other shapes are added to it.
The next part involves some elaborate work with a very large calculator where we take each person’s remembered number of stitches, divide it by 1.4 and round to the nearest whole number. We haven’t mentioned maths yet. Calculators aren’t real maths.
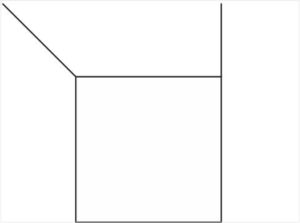
The next stage is to pick up this number of stitches along one edge of the square.
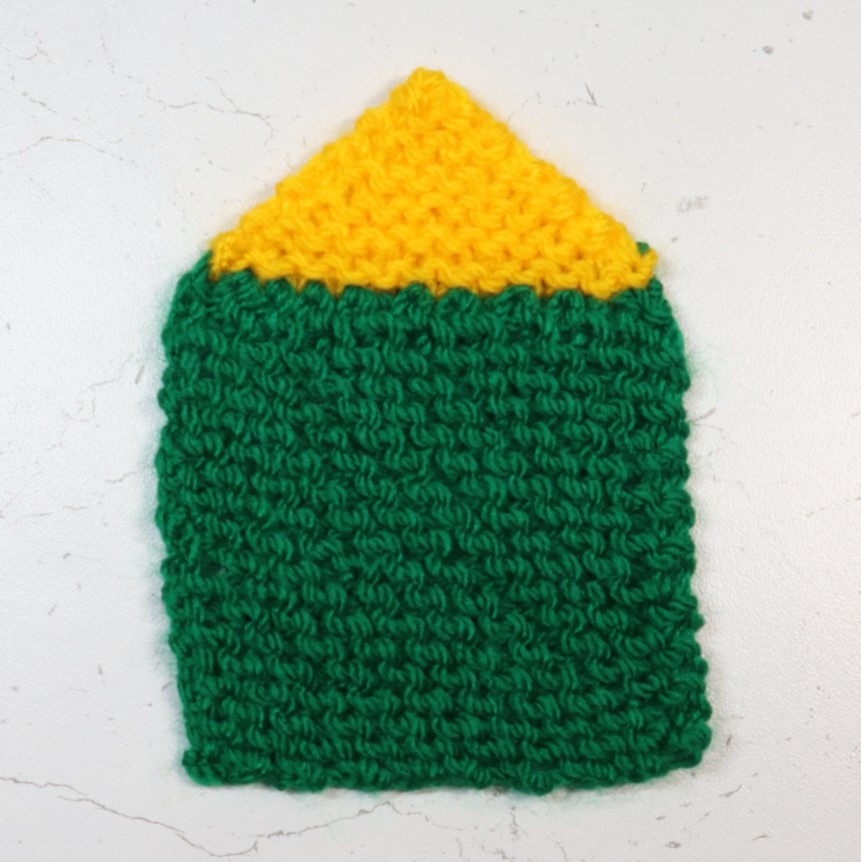
This must be with the same needles and the same thickness yarn but can be a different colour. The new triangle is made in exactly the same way as the second half of the square.
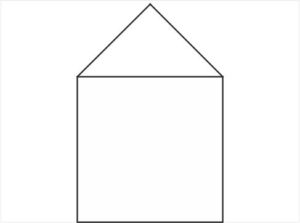
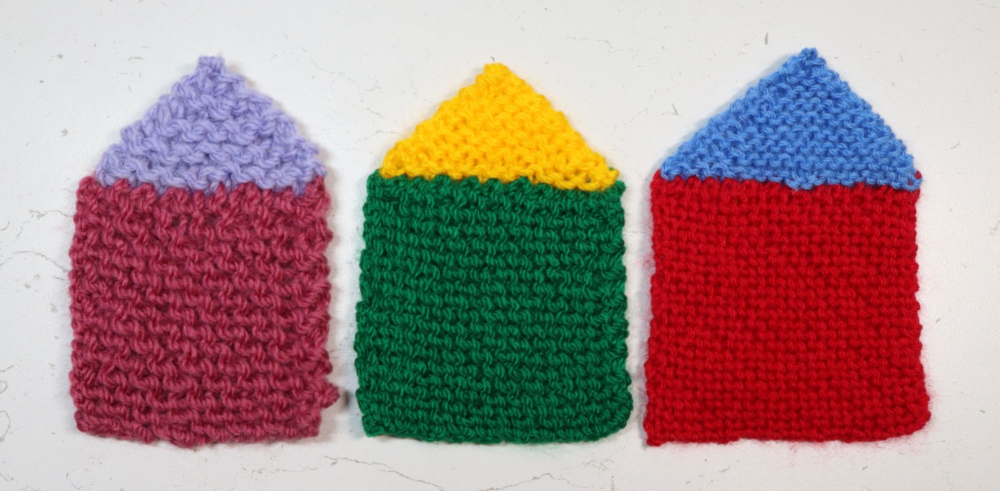
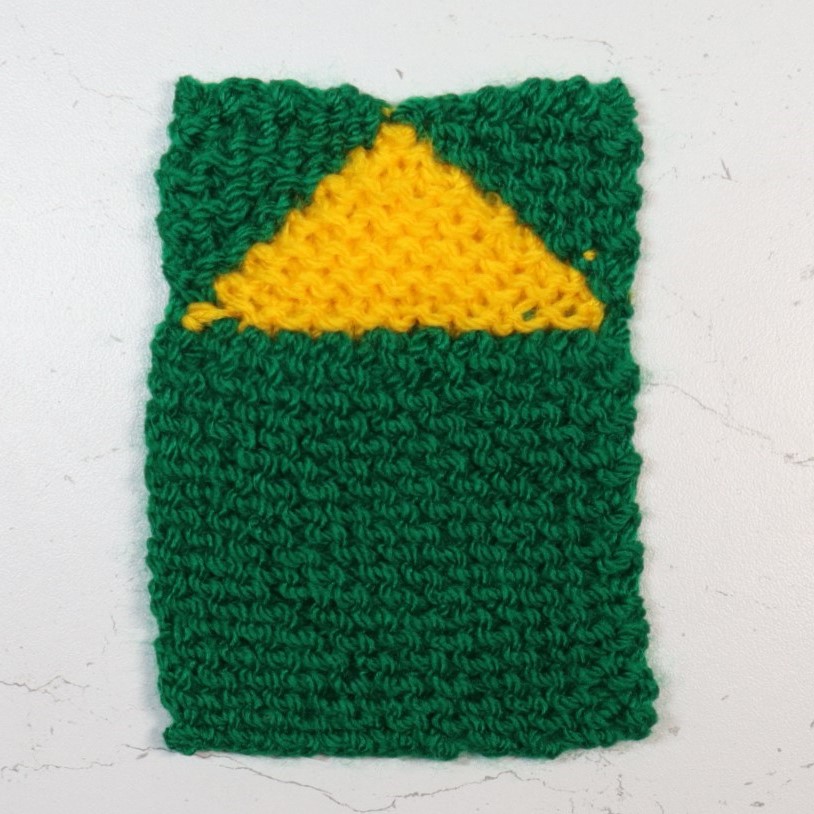
It is guaranteed that at this point someone will say ‘I’ve made a house’ … and people will put them together and say ‘We’ve made a row of houses’. All the houses are the same size with different numbers of stitches.
We still haven’t mentioned maths.
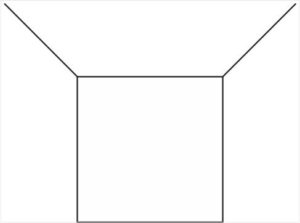
Use the number of stitches picked up before and divide by 1.4 to make the small triangles. The sharp-eyed might notice that this is half the number of stitches on the diagonal of the square so now we could start dropping in some maths.
Squares, triangles, rectangles
Mathematically there is no such thing as a diamond
Triangular numbers
Consecutive triangular numbers to make a square number
Halving and doubling
Area
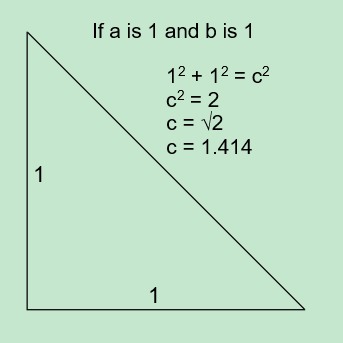
and, maybe, Pythagoras Theorem
Why does it work?
Garter stitch forms square stitches. Two rows are the same height as the width of one stitch. This property means it makes right-angled triangles so normal geometry can be used.
The square root of two is really 1.4142… Knitting stretches so the geometry doesn’t need to be quite as accurate as in normal maths. It is near enough to say that the diagonal of the square is 1.4 times the length of the side of the square.
Some knitters don’t care how it works and are happy to just believe that dividing the stitches on the diagonal by 1.4 will give the right answer. Whether they care or not they can still go on to use the basic concept in many different ways.
The ‘houses’ can be arranged in various ways to make patterns. This could be an introduction to tessellations and looking at different shapes. What shape are the houses? What shapes can you see in the arrangements below? What do you notice about the squares? etc.
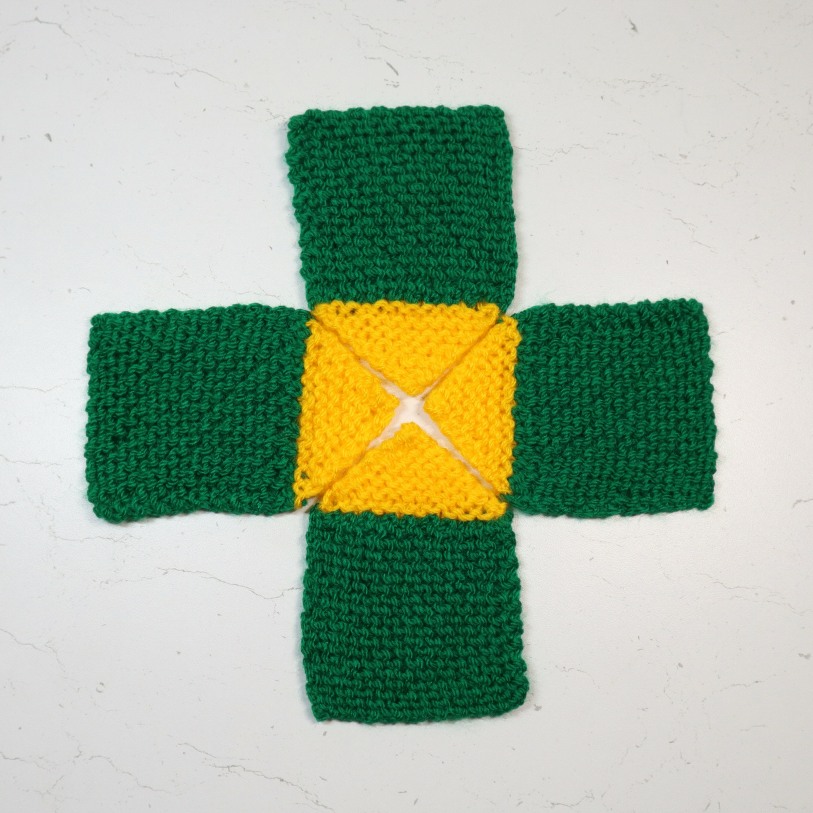
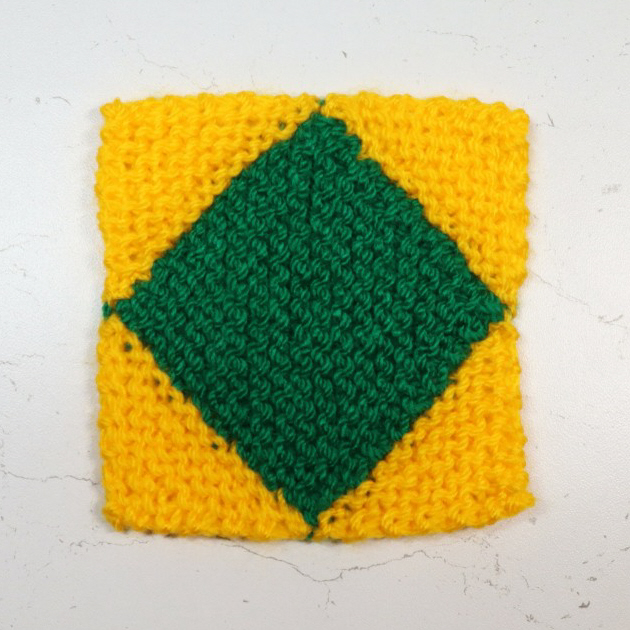
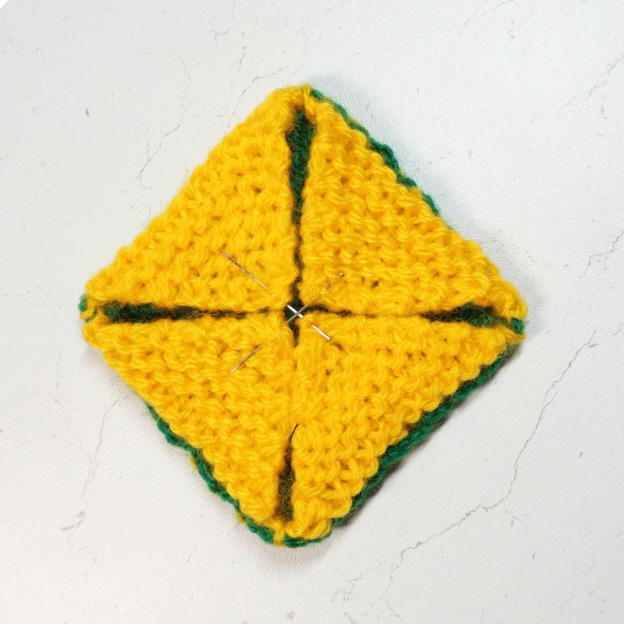
More shapes can be added, in any direction. The arrangement below is particularly useful. The four yellow corners can be folded in to cover the green square. This makes it very obvious that the yellow area is the same size as the green area. The overall shape is twice the size of the original.
This can be very helpful to knitters. The four yellow triangles will need exactly the same amount of yarn as was used for the green square.
Using these methods it is possible to go on and add shapes in any direction. The angles of the shapes will always be 45, 90 or 135 degrees. The number of stitches needed can be found by doubling and halving. Stitches in the same direction as those on the diagonal of the square will always be a multiple, or fraction of those stitches. Stitches parallel to the sides of the square will be a multiple, or fraction of the number of stitches on the side of the square.
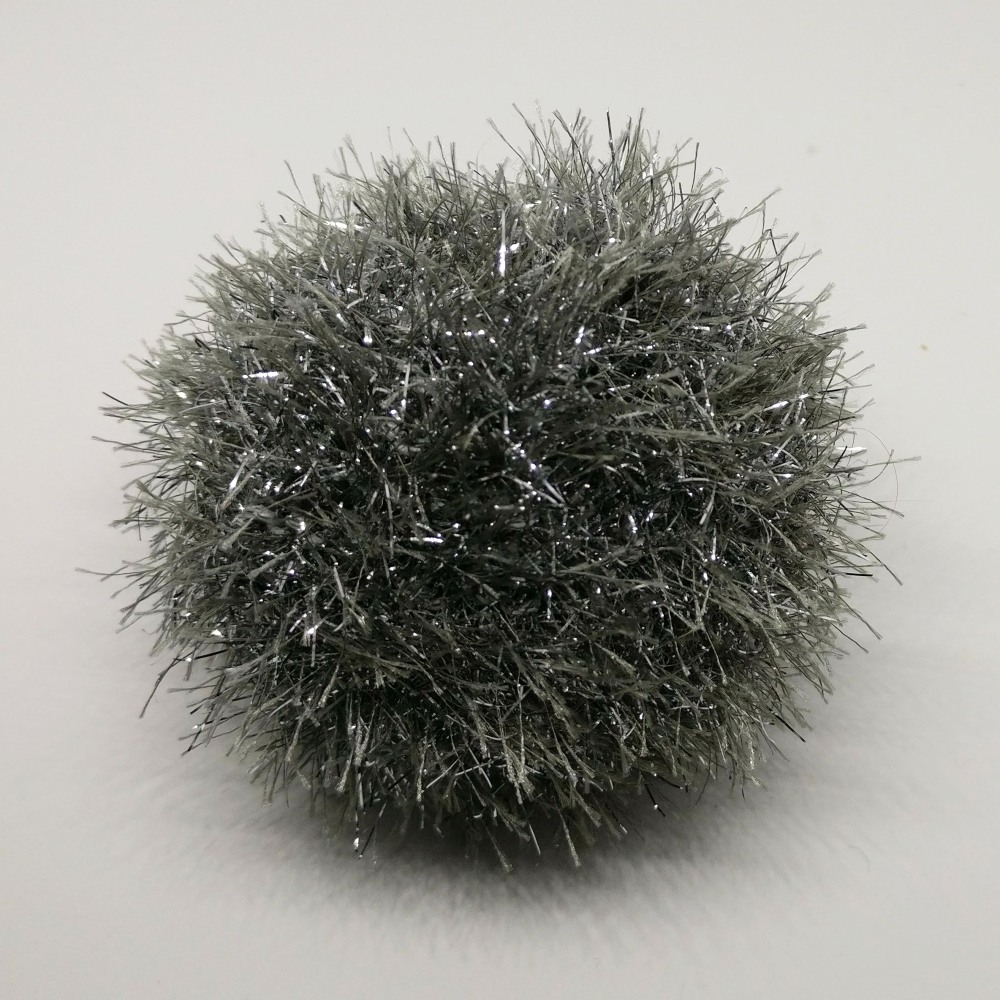
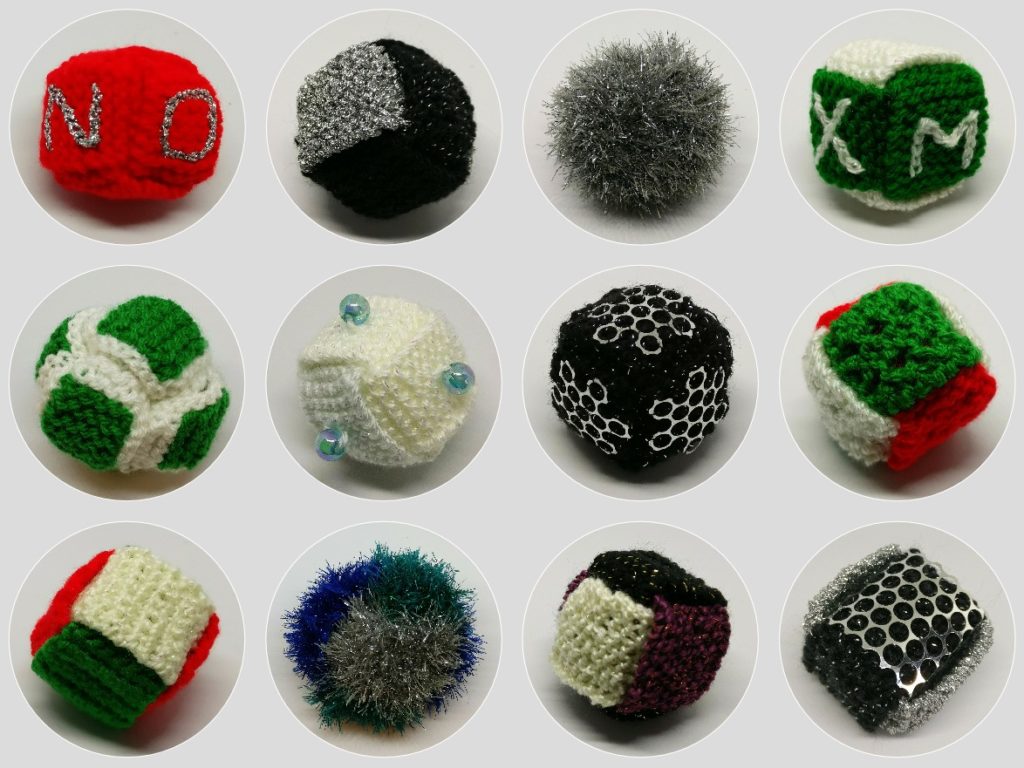
These simple mathematical baubles can be made in lots of different ways and either hung as a decoration, or used to hold a small gift.
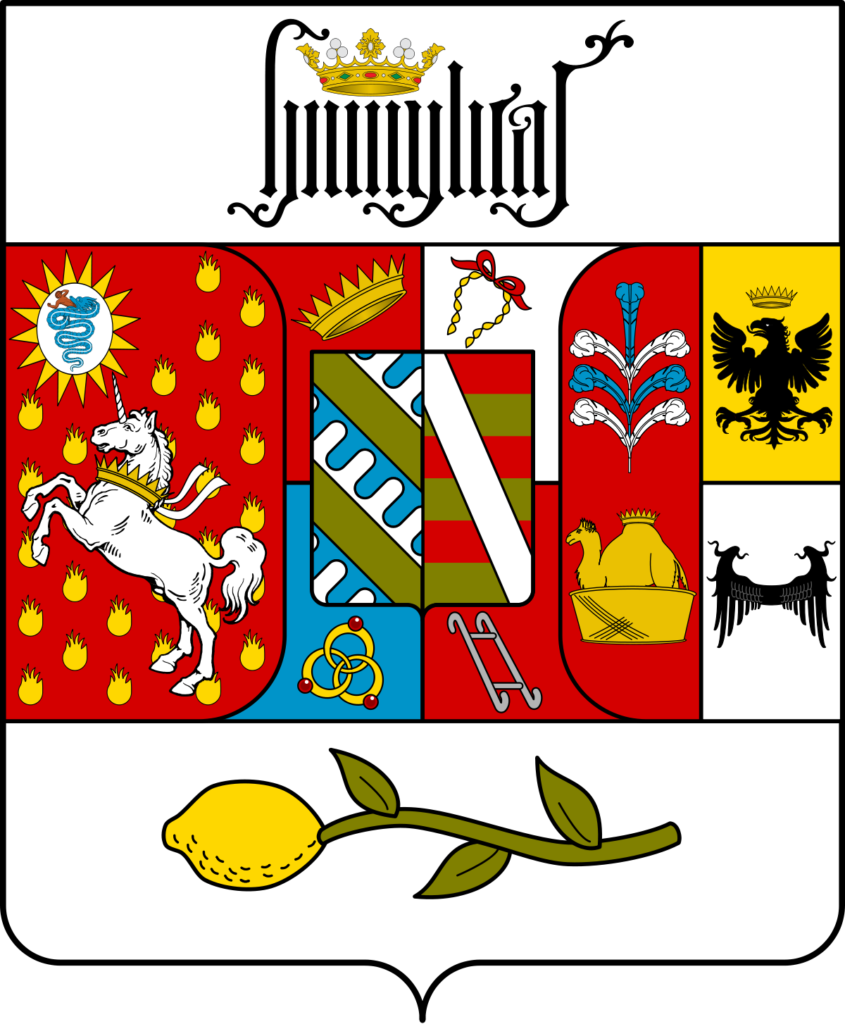
The Borromeo family originated in Rome – that’s where the Rome bit of their name came from. In the twelfth century they set up a bank in Milan and became very wealthy and influential. For hundreds of years they controlled a large area around Milan. The descendants still own some of the land today and their gardens are a popular tourist attraction.
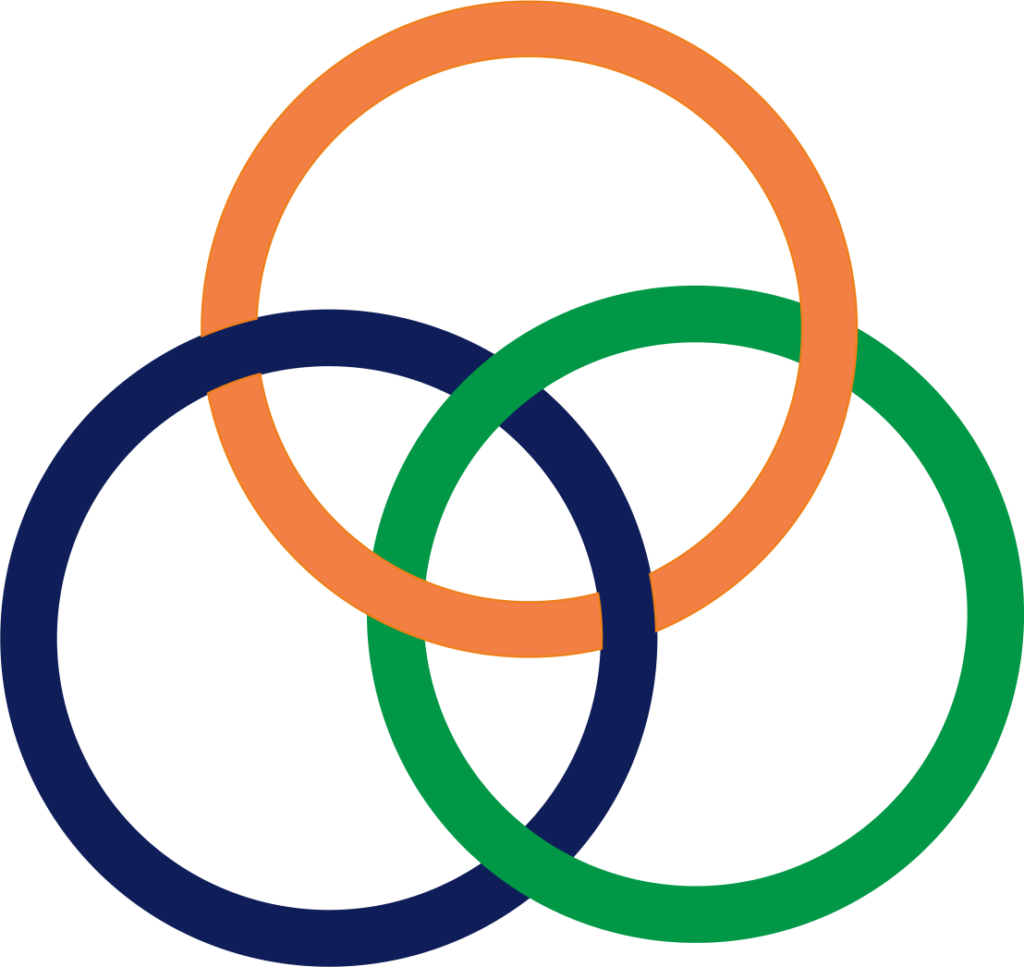
Mathematicians are more interested in their coat of arms than the history of the family. It contains three interlinked rings that are now known as Borromean Rings. They form just a small part of the crest and are thought to represent the links between three families.
The reason these rings are special is that you cannot remove one and leave the others connected. Technically, they are known as Brunnian links.
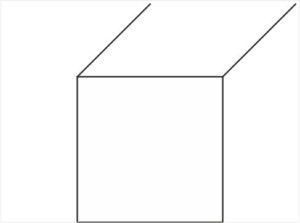
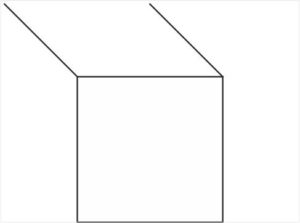
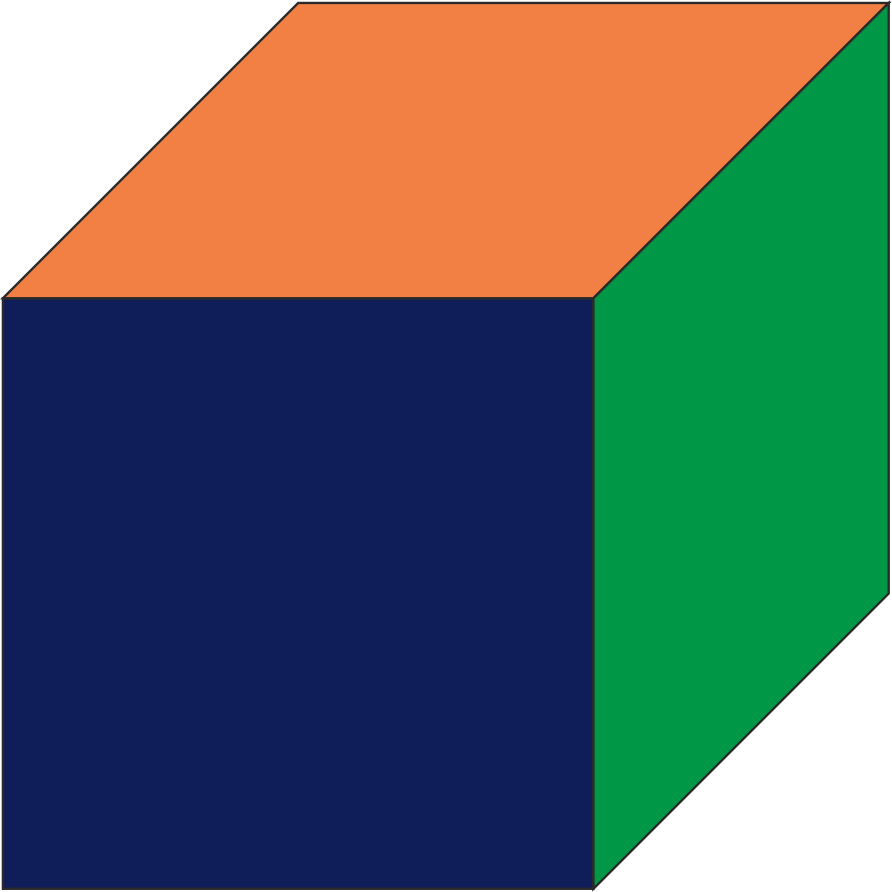
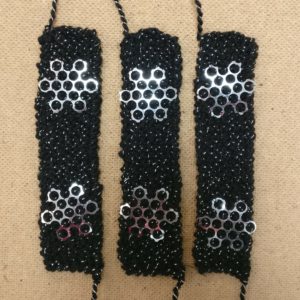
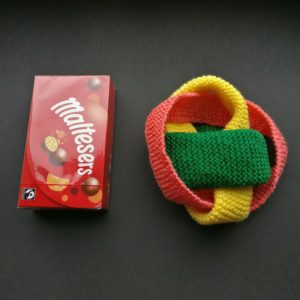
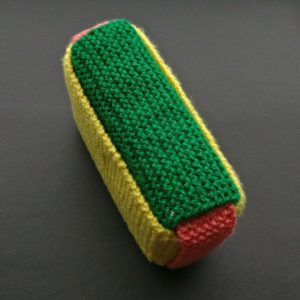
It might not be immediately obvious how the baubles are related to rings – but they are. They are basically cubes made from three strips of knitting, crochet, paper, or anything else you can think of. The strips are just wide rings.
These are all knit and crochet.
The video explains how to make a cube. There is almost no stitching to be done. You can put a gift inside and remove it without damaging the cube at all. It also shows how the rings become a cube.
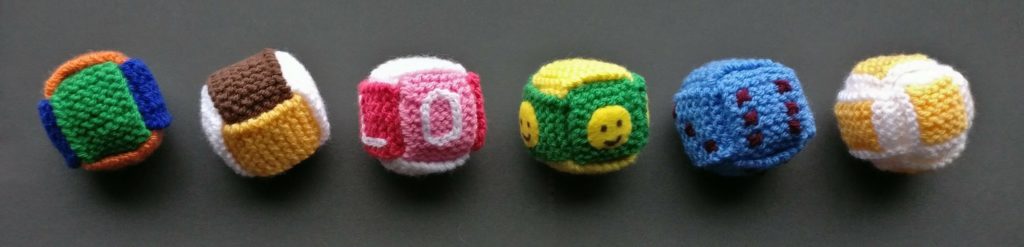
These are some of the cubes from the video
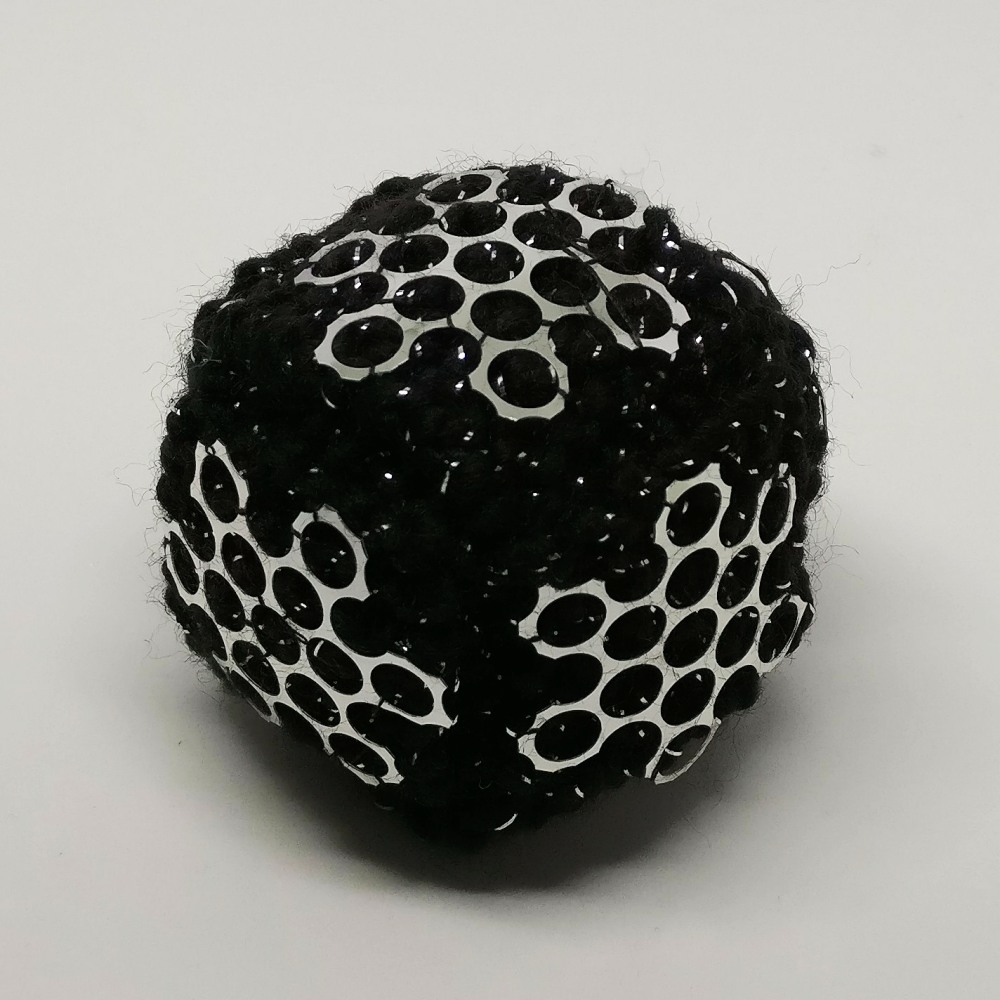
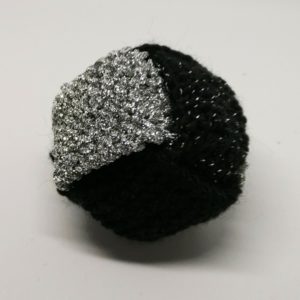
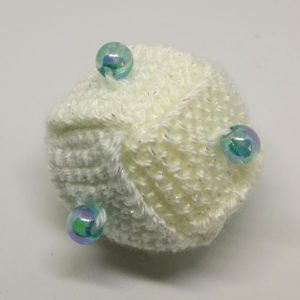
Add extra sparkle and beads to make them more Christmassy.
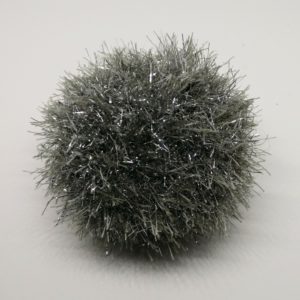
Use some sparkly yarns
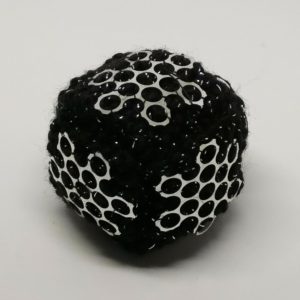
Add beads
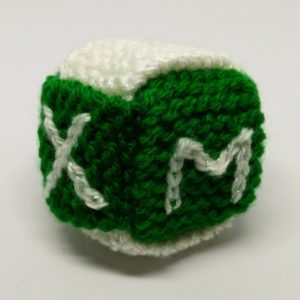
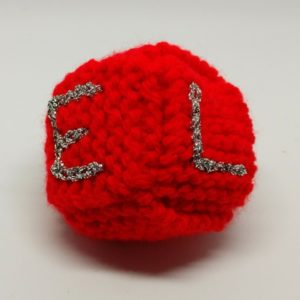
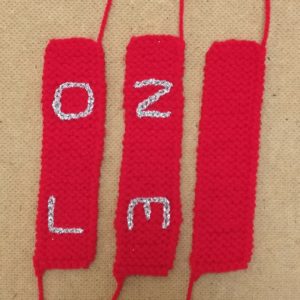
Embroider letters
Fancy yarns make the cube look like a ball
Cut shapes from sequin waste and stitch them on
Six are needed if you want one on each face
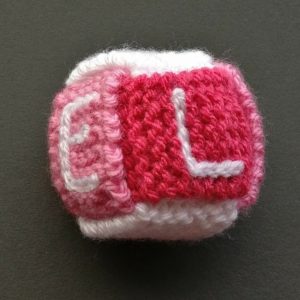
Four letter words fit nicely round the cube
Think carefully about the placement and orientation of the letters
Small cubes keep their shape very well, even when you hang them or put things inside. It is possible to make larger ‘boxes’ though it probably isn’t worth the effort. There is a lot of knitting involved and fairly accurate measurements need to be taken.
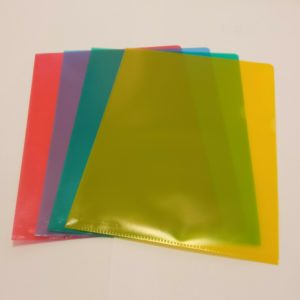
Baubles don’t have to be knit and crochet. They can be made from some quite surprising things that you might have lying around. My favourite are these made from plastic folders. In their natural state the folders are fairly uninteresting. They are usually available in red, blue, green and yellow but when the colours are overlapped you can create a myriad of different shades and the translucent shapes look more like glass or ceramic.
These are quick, cheap and easy to make but not quite so good for putting a gift inside. You need to unfasten the cube to remove the gift but you can fasten it up again afterwards. They need to be measured accurately and folded sharply to make a good cube shape.
Let your imagination run riot with coloured card, holographic foil, etc. You can even mix materials in the same cube.