How to use modular garter stitch shapes with 45, 90 ad 135 degree angles.
Previous posts about making the shapes
1. Knitting at MathsJam
2. More Modular Knitting
Now you know how to make the shapes, what can you do with them? You could make a small cushion or go on, as many people have, to make a blanket.
Making a garment is easy. The most important thing is to decide the overall size you need, before you begin.
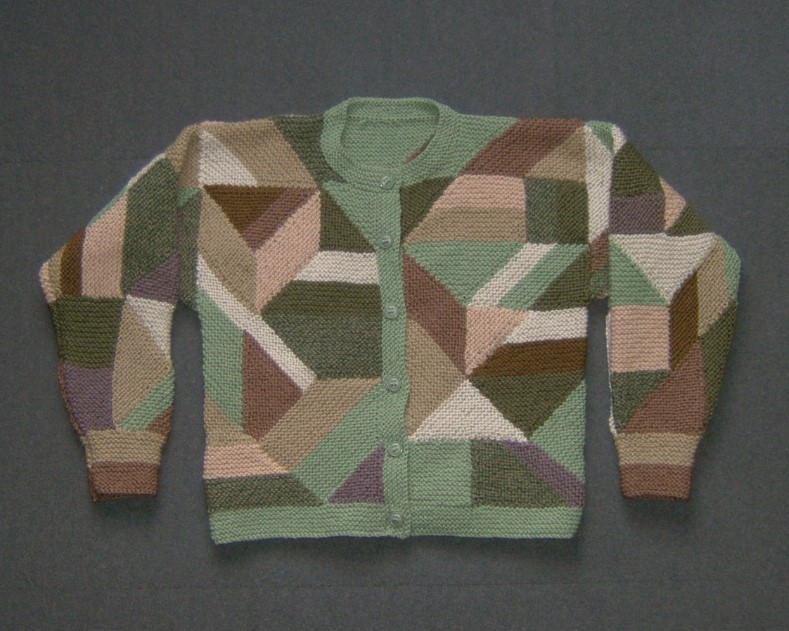
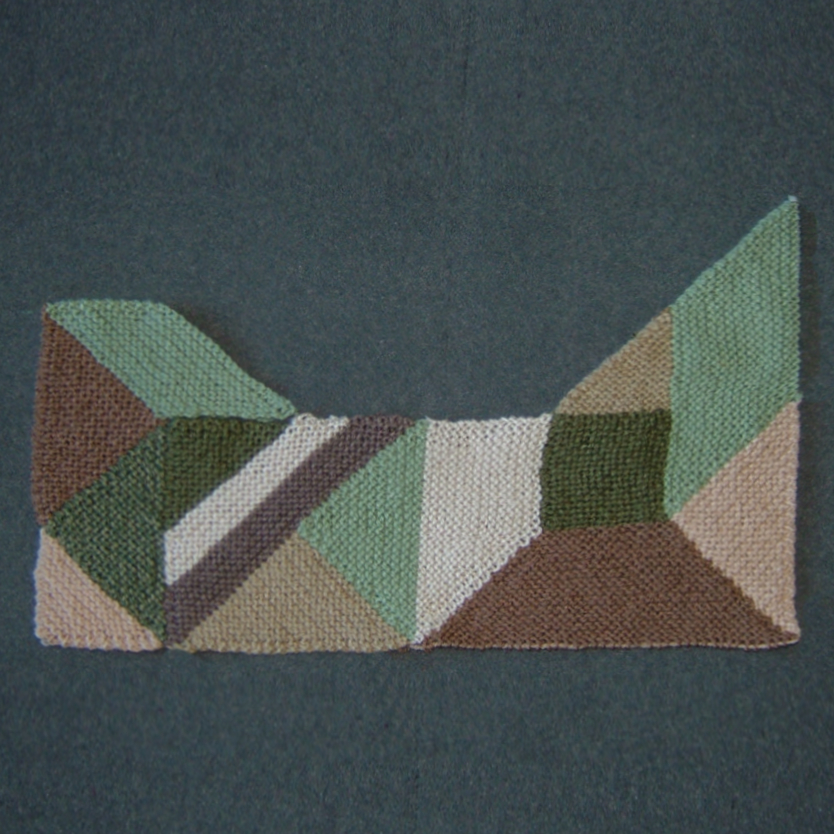
It is possible to make a sweater, jacket, hat, etc. without any extra shaping. It can be a very simple shape. My (very old) cardigan has tapered sleeves.
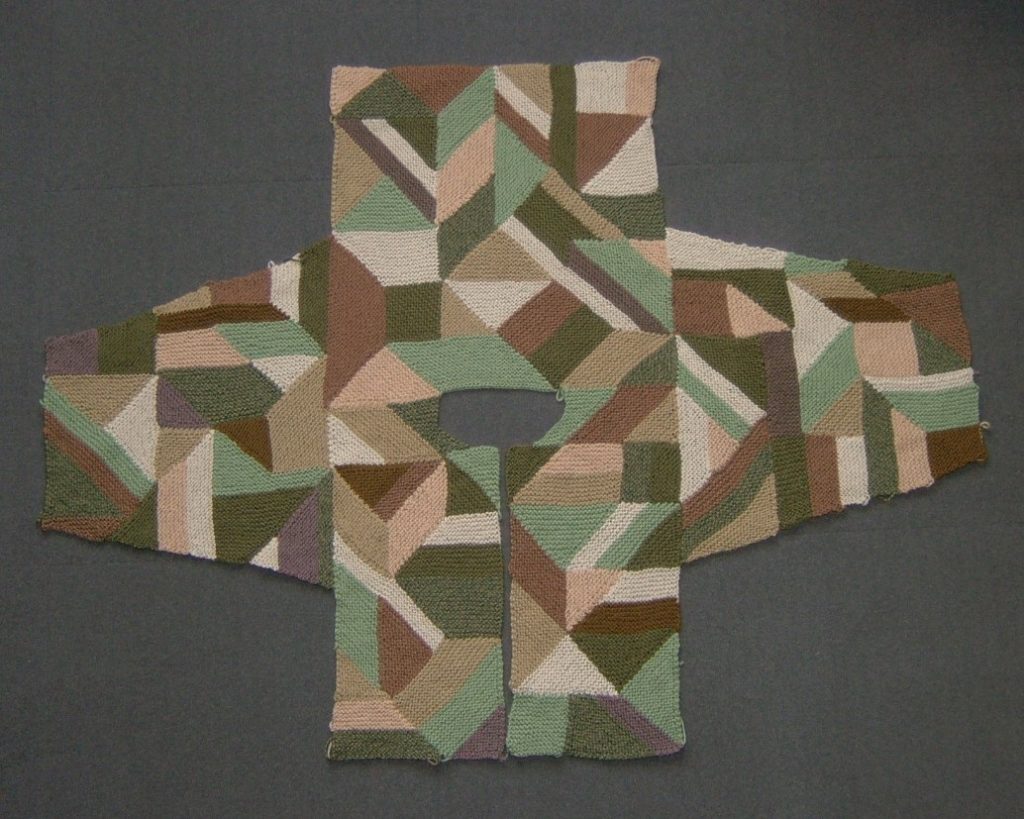
I made the cardigan entirely from scraps of leftover yarn. The second photo shows all the shapes, before the edgings were added.
To make something like this
- Decide how wide you want the back to be and divide the measurement by six.
- Draw a square with sides of the size you calculated.
- Knit a diagonal square to fit the drawing.
- Make a note of the number of stitches on the diagonal.
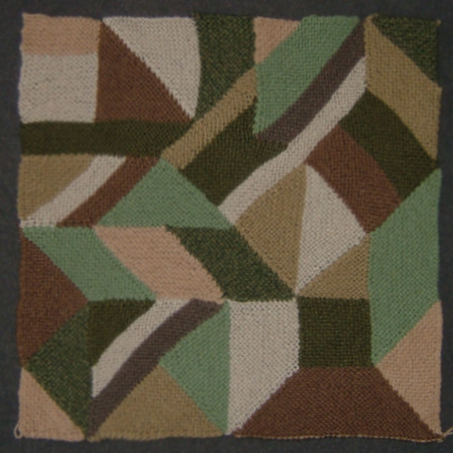
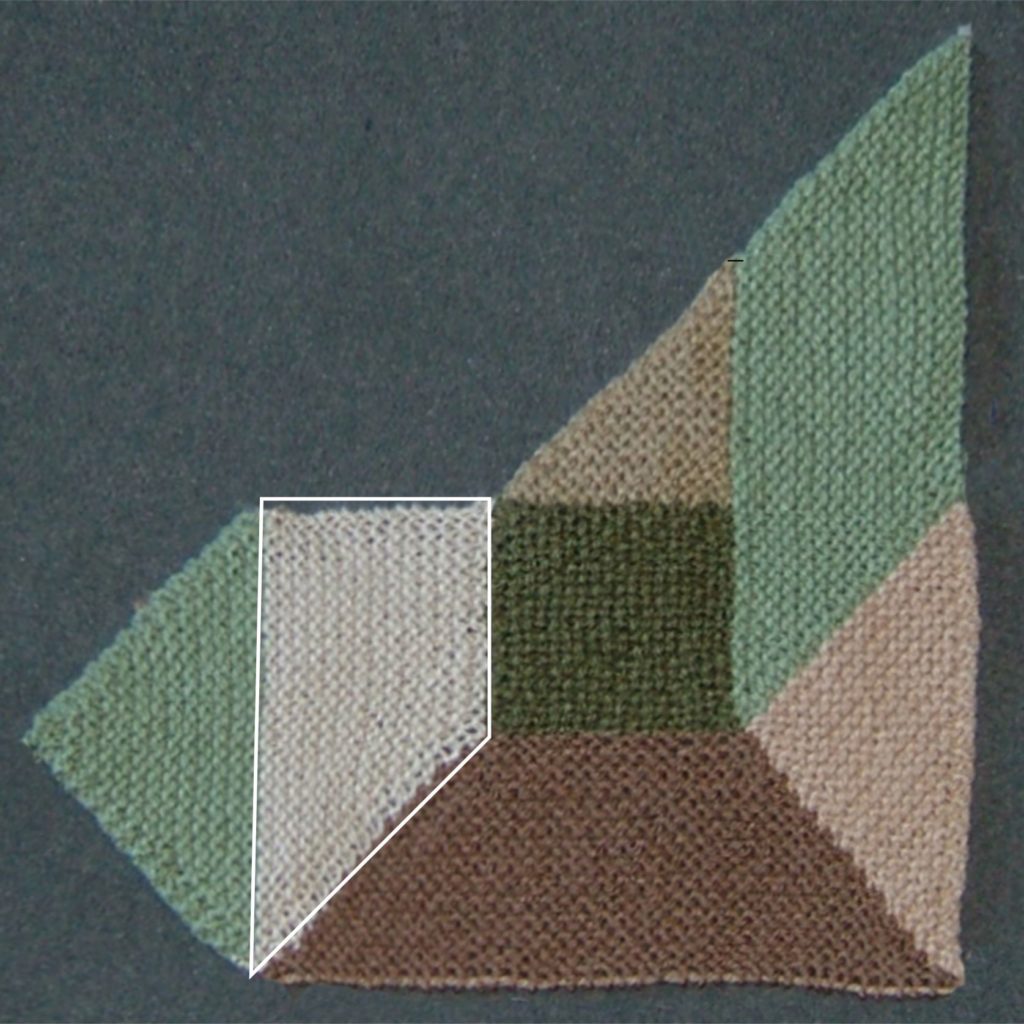
The photos below show the whole of the back and the first seven shapes that became the top corner of the back.

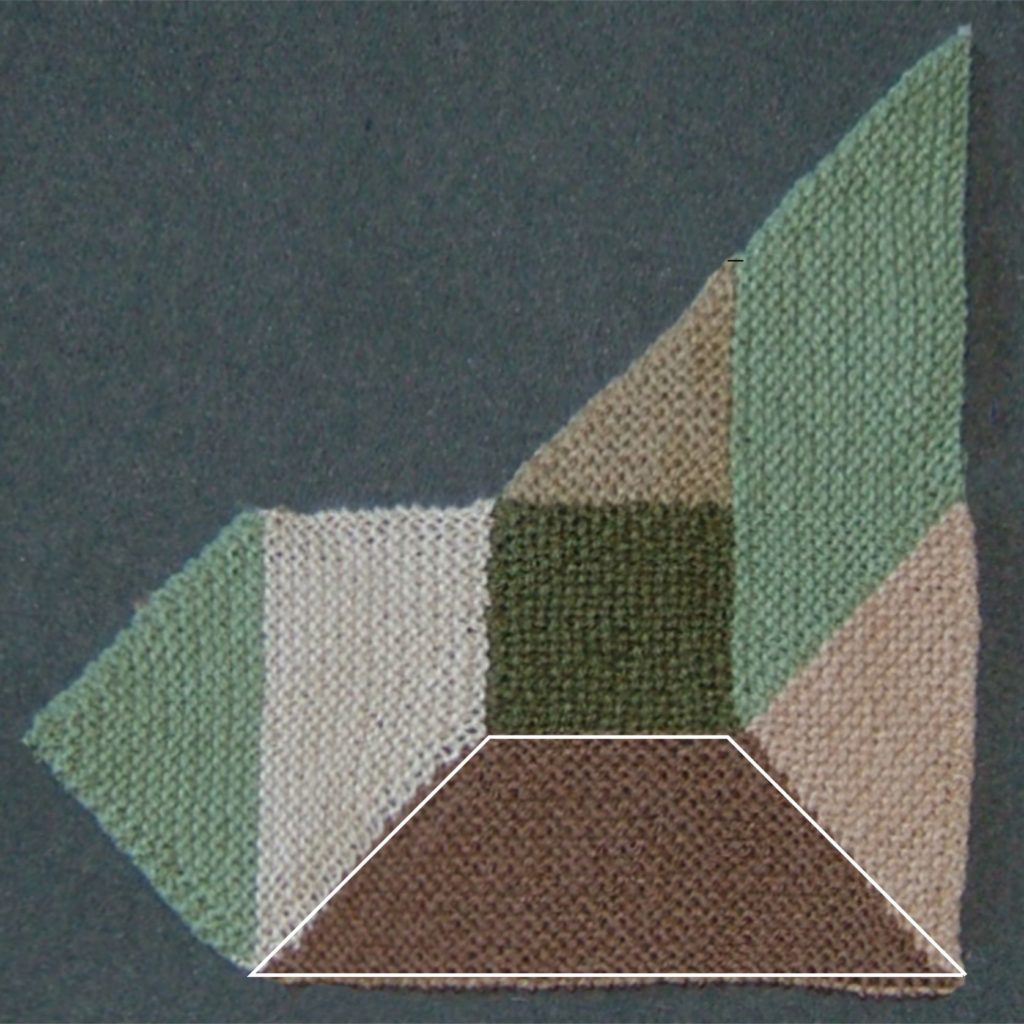
Shape 1
Width of back will be 54 cm (21″)
Divide by 6.
Square size = 7 cm (3.5″)
Knit the diagonal square.
The square in this example has 20 stitches on the diagonal.
Make a note of the number of stitches on the diagonal of your square.
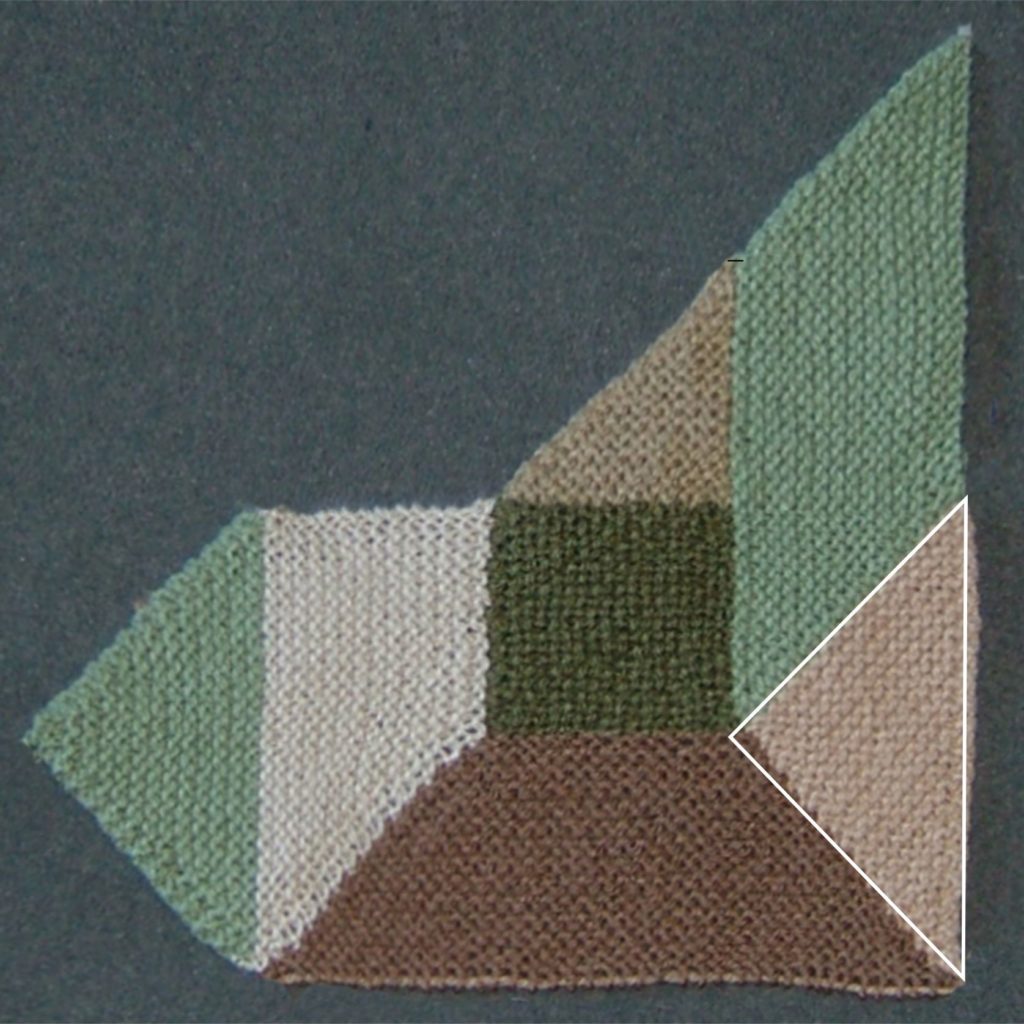
Shape 2
Divide the number of stitches on the diagonal by 1.4. I will now call this number x
Example: x = 20 / 1.4 = 14
Pick up x stitches along the edge of the square.
Knit straight on wrong side rows.
Knit two together at the end of every right side row until one remains. Fasten off.
The triangle is the same height as the original square.
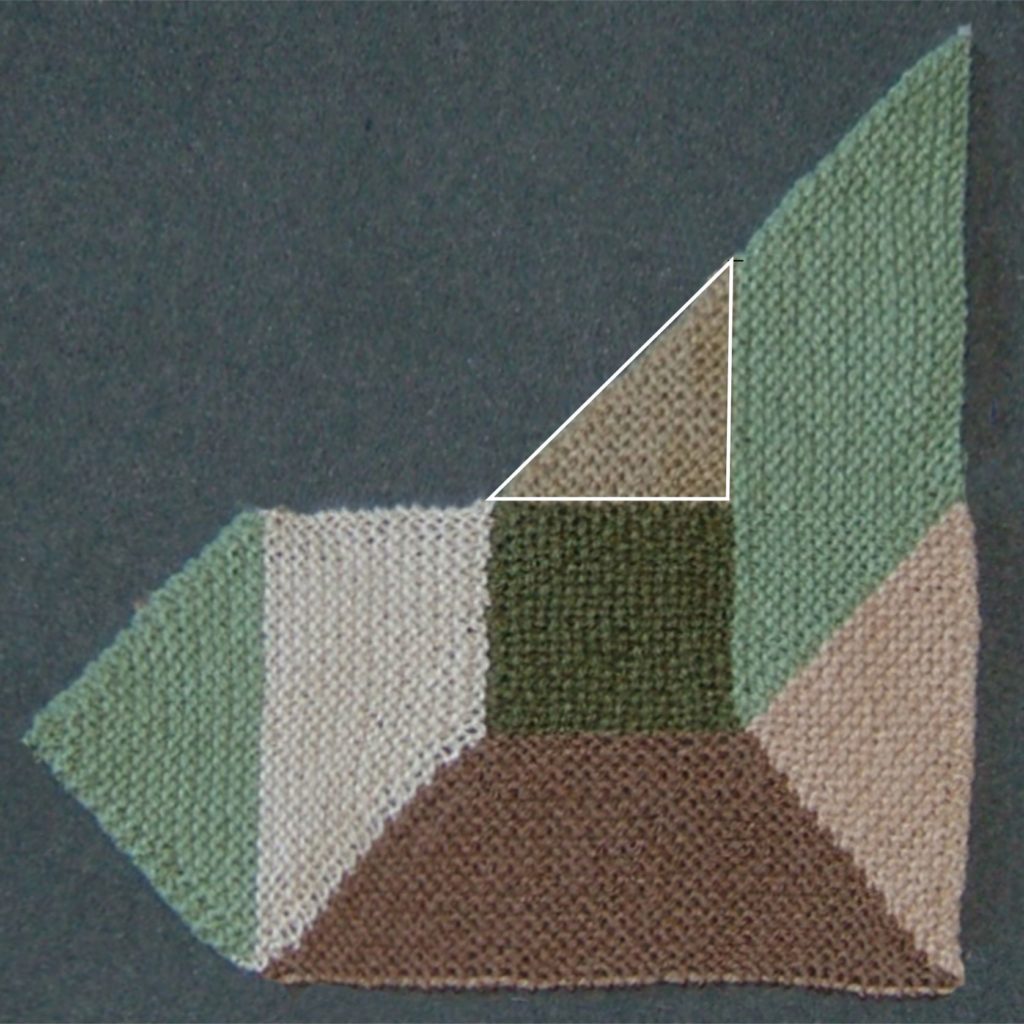
Shape 3
Pick up x stitches along the edge of the starting square and another x stitches along the edge of the triangle.
Knit two together at the end of every wrong side row.
Knit into the front and back of the last stitch of every right side row.
Continue until you have x garter ridges. Keep the stitches on a stitch holder if you think you might use them again. (Or cast off instead of working the last row.)
Shape 4
Shape 3 is the same height as the starting square so Its sloping side is exactly the same length as the diagonal of the square.
Pick up the same number of stitches you had on the diagonal.
Knit straight on wrong side rows.
Knit two together at the end of every right side row until one remains. Fasten off.
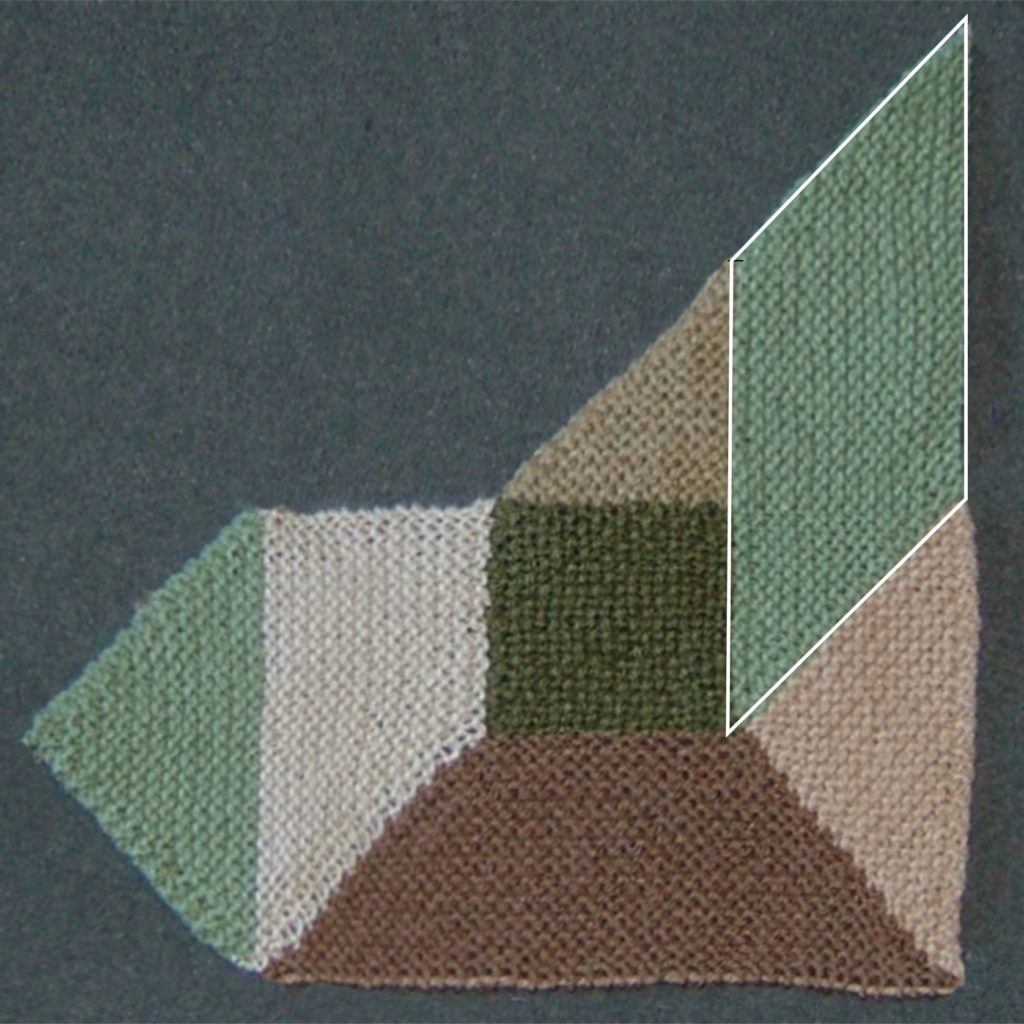
Shape 5
Pick up x stitches along the edge of the square.
Increase in the last stitch of every row.
Continue until you have x garter ridges.
Either cast off on the last row, or keep the stitches on a holder, in case you need them later.
It is easiest to stitch the join between shapes 4 and 5, as the pieces will not match ridge for ridge.
Shape 6
Pick up x stitches along the edge of the square.
Knit straight on wrong side rows.
increase at the end of every right side row.
Knit the same number of ridges as Shape 5. Do not cast off.
The ridges in this shape exactly match the ridges in Shape 5. As an alternative to your normal increase you could pick up one stitch from each ridge end of Shape 5.

Shape 7
Continue on the same stitches, with a different colour.
Decrease at the end of every row. Continue until one remains. Fasten off.
Continue adding shapes in any direction until the width of piece is equivalent to six starting squares. The length can be anything you choose.
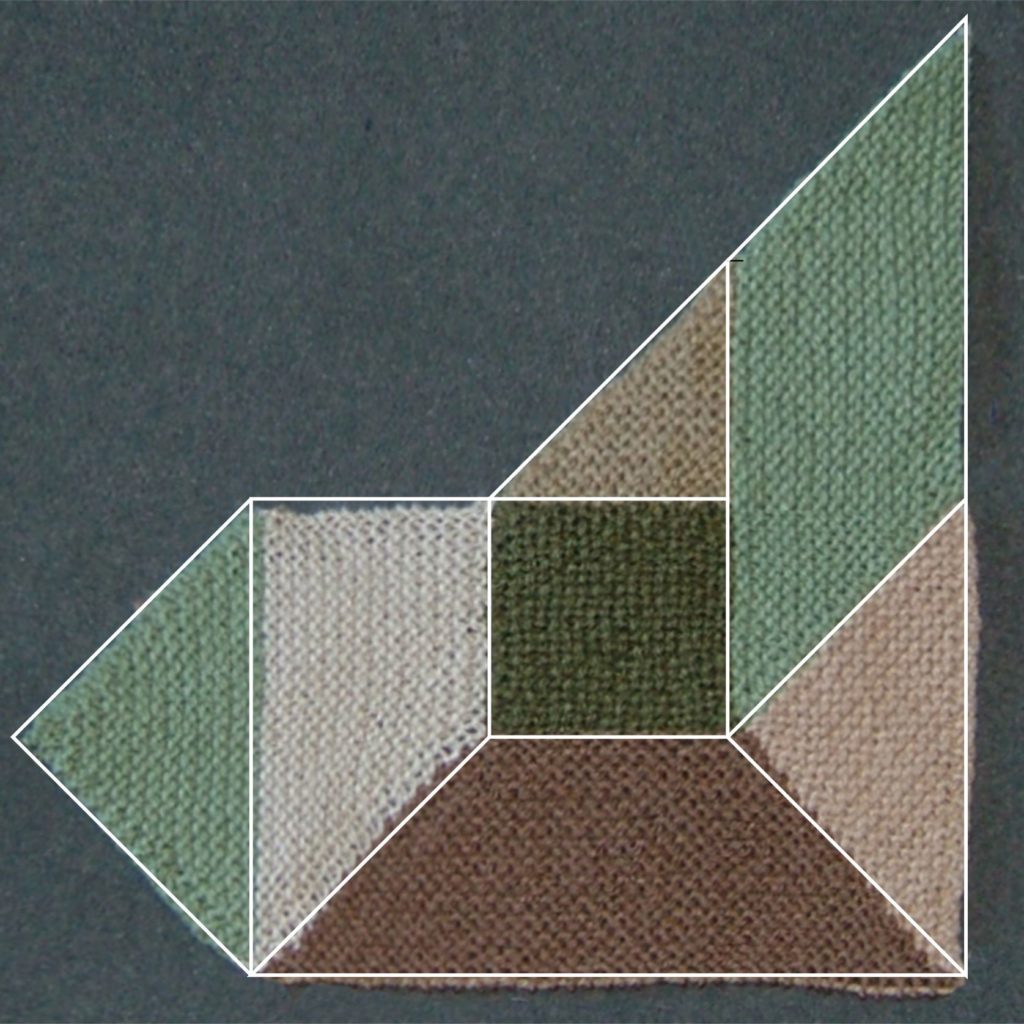
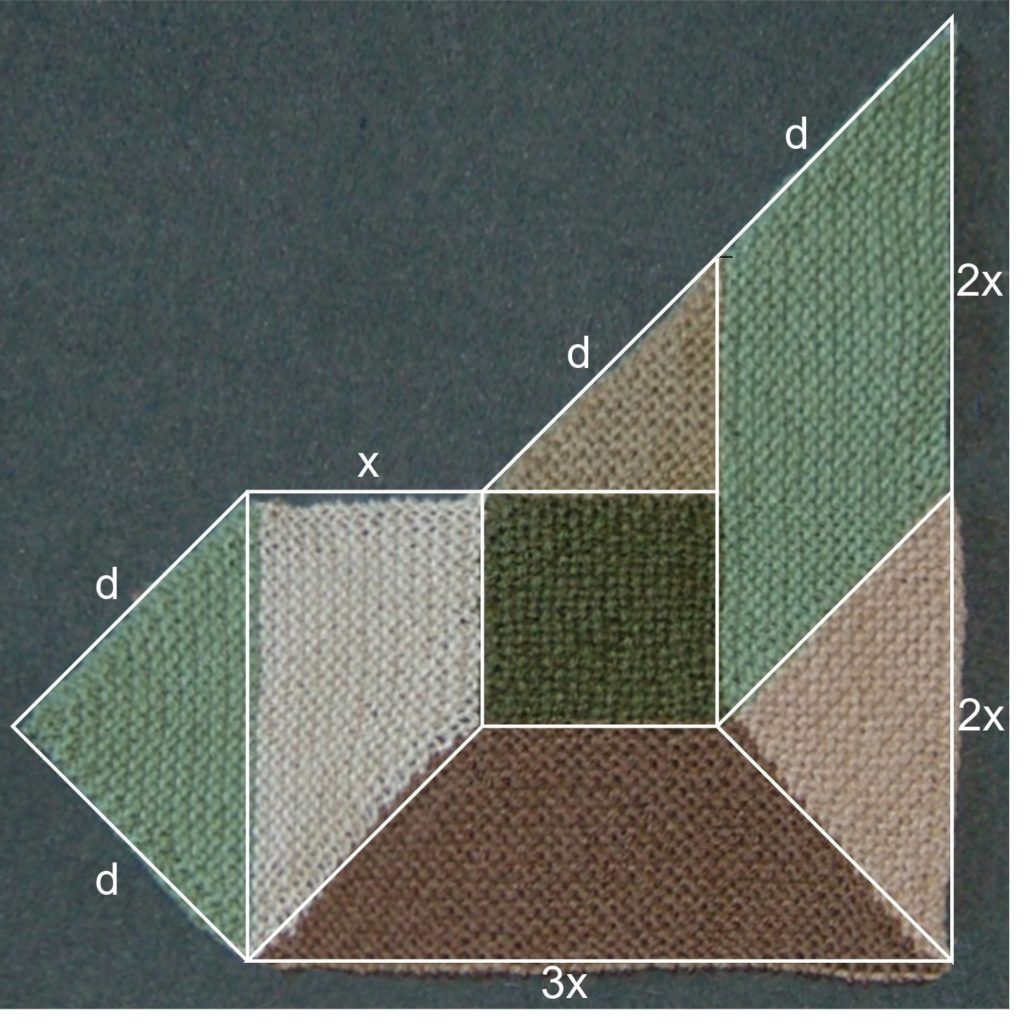
The letters in this diagram show you how many stitches to pick up from the exposed edges.
x = the number of stitches you calculated.
d = The number of stitches on the diagonal of the square,
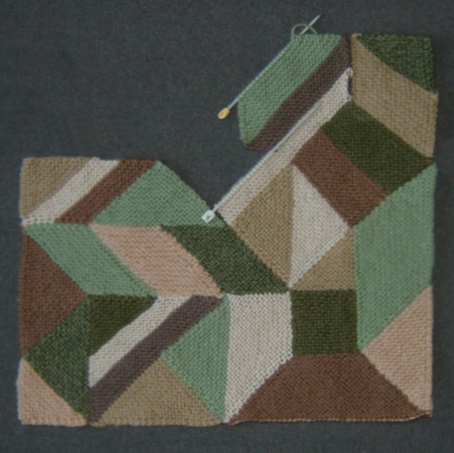
Add shapes in any direction. You can even use more than one colour in a shape. The first photo below includes shapes 8 to 13. The other photo is of an almost complete square.
These shapes are included in a pattern called Cushion Conglomeration Caper. There are two sets of instructions. The short version describes shapes for you to think about, and make, yourself. The long version gives you detailed help and, sometimes, alternative ways of making a shape.
History
CCC was published in 1998, which explains why the photos are so old.
It was originally a project for, and by, the members of the Woolly Thoughts Yahoo group, as an introduction to using Woolly Thoughts methods. The plan was for a different member of the group to add each new shape so that there was no predetermined pattern. Some might refer to this as freeform but this was all using very precise geometric shapes. The only angles allowed in the shapes were 45, 90 and 135 degrees.
The original plan broke down as some members wanted to work more quickly than others. I added the remaining shapes myself so that everyone could work at their own speed. The basic instructions for a new shape were revealed every two days but all help and advice files had to be accessed separately so as not to spoil the fun for those working more slowly.
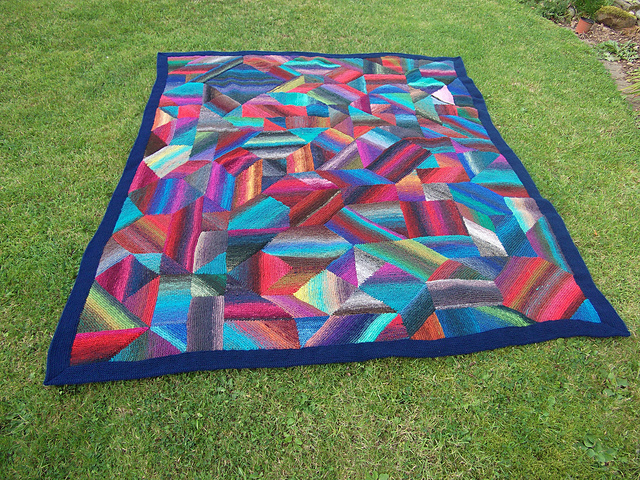
This blanket was made by two people who started with the Cushion Conglomeration pattern then took it in turns to add new shapes without the knowledge of the other person.
Hello, your cardigan is so beautiful! I’m trying to recreate the pattern and understand your calculations. Am I wrong to find that x is also the number of stitches of the side of the starting square ?
Your first square is knitted diagonally. The number of stitches on the diagonal will be 1.4 times x (but you can only calculate x when you have made that first square). Have you downloaded the pattern with more information?
Come and join us in the Woolly Thoughts Ravelry group where it is easy to get more help when you need it. https://www.ravelry.com/groups/woolly-thoughts
This is such a beautiful cardigan! The shapes and colours remind me of Bauhaus design. I wonder if they followed a similar method for a painting/design exercise?
.
❤