Several years ago, Colin Wright (mathematician/magician/juggler extraordinaire) showed me a Magician’s Chain. This is a toy made from metal rings where the rings cascade from the top of the chain. It was fascinating, fun, and quite intriguing. I have seen Colin’s chain, and others, many times since. Then, a few months ago, I was at a maths event with Colin and was idly playing with the chain. I suddenly thought it needed colour to be able to see what was really going on.
Turn on your sound to hear the chains.
There is some background noise due to the traffic outside.
My first plan was to buy some split rings and cover them in embroidery silk in shades of blue so they might look like water falling down. I have a tin full of silks from the days when I used to do embroidery so I didn’t have to buy those. There weren’t many shades of blue but I decided that some bright colours would be just as good.
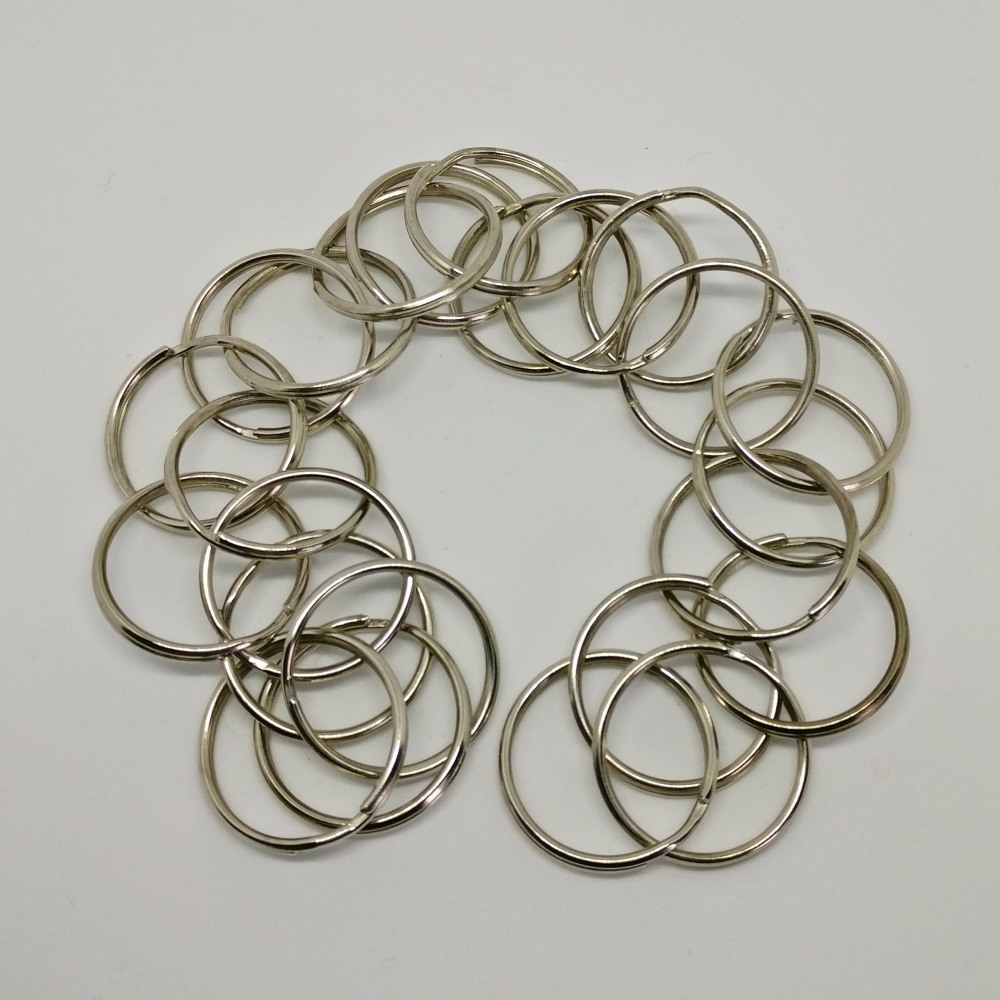
I was thwarted at every step. I ordered 100 metal rings from Ebay. They didn’t arrive when they should have but, before I got round to complaining, I got a message from Ebay to say that my order had been cancelled and my money refunded. The seller mysteriously disappeared.
I tried again and ordered some more from another seller. They didn’t arrive. This was in the run-up to Christmas so this seller asked me to wait until two weeks had elapsed. I did that then emailed him to say they had not turned up. Mysteriously, they dropped through our letterbox late that same afternoon. I have no idea where they materialised from as the normal post had already been delivered earlier in the day. Fortunately, the seller hadn’t sent any more.
Once we had the rings we joined them into a chain, following the instructions in this video. I originally thought that I could crochet round the rings but that didn’t work because it made the rings too bulky and stopped them moving properly. Another problem was that the rings could only be covered when they were already part of the chain because the split would be covered and it would be impossible to get them on or off.
Plan B was to wrap the silk round and round each ring. It was tricky, because a tiny ball of silk had to be passed through the ring so many times – and it didn’t work! We had more ideas for what might work, such as binding the joint with plumber’s tape first or filling the gap with Fimo. Nothing worked.
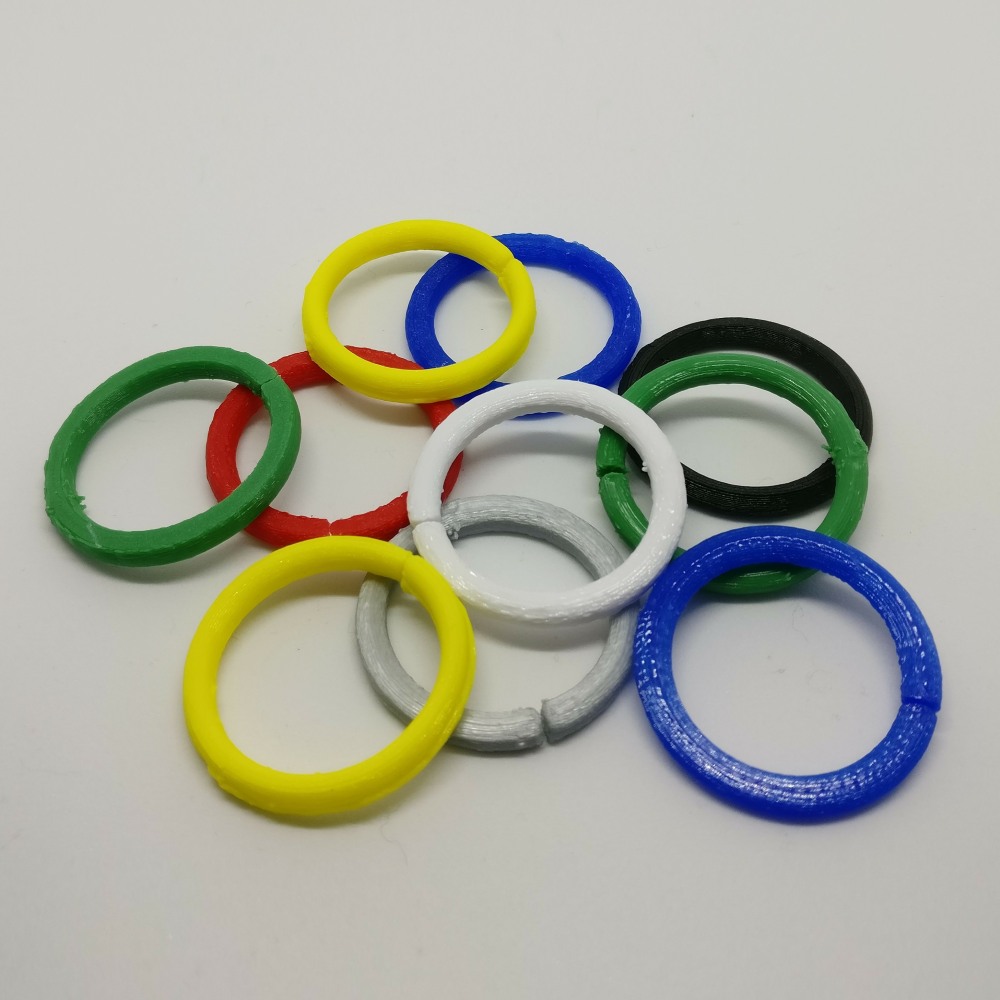
3D printer to the rescue. We could print the rings except that we only had the two colours of filament that came with the printer and wanted lots of colours so had to buy more. It is possible to buy small amounts of filament but 500 grams costs almost the same as 1 kg. We now have 7 kg. Making the rings took a while. We used 28 for the long chains and printed six at a time although more would probably have fitted on the printer bed.
The rings are approximately 30 mm in diameter and have a gap of 2 degrees in the circumference.
As you can see in the video we made a silver and black chain, then the multi-coloured version. (We also tried a chain with square ‘rings’ just to see what would happen but they hardly moved without shaking the chain repeatedly.)
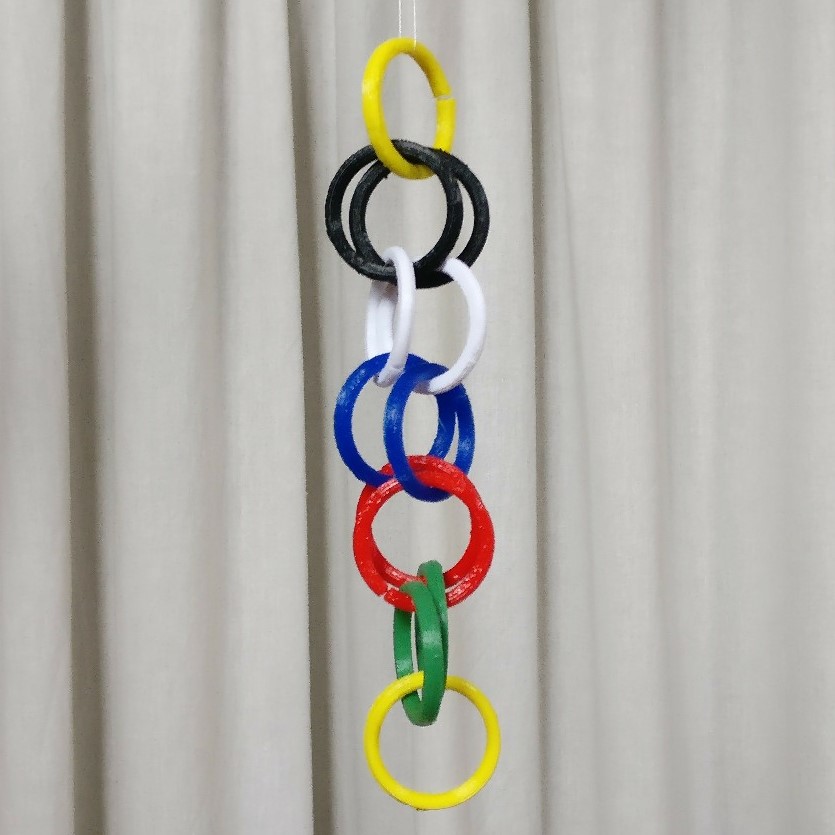
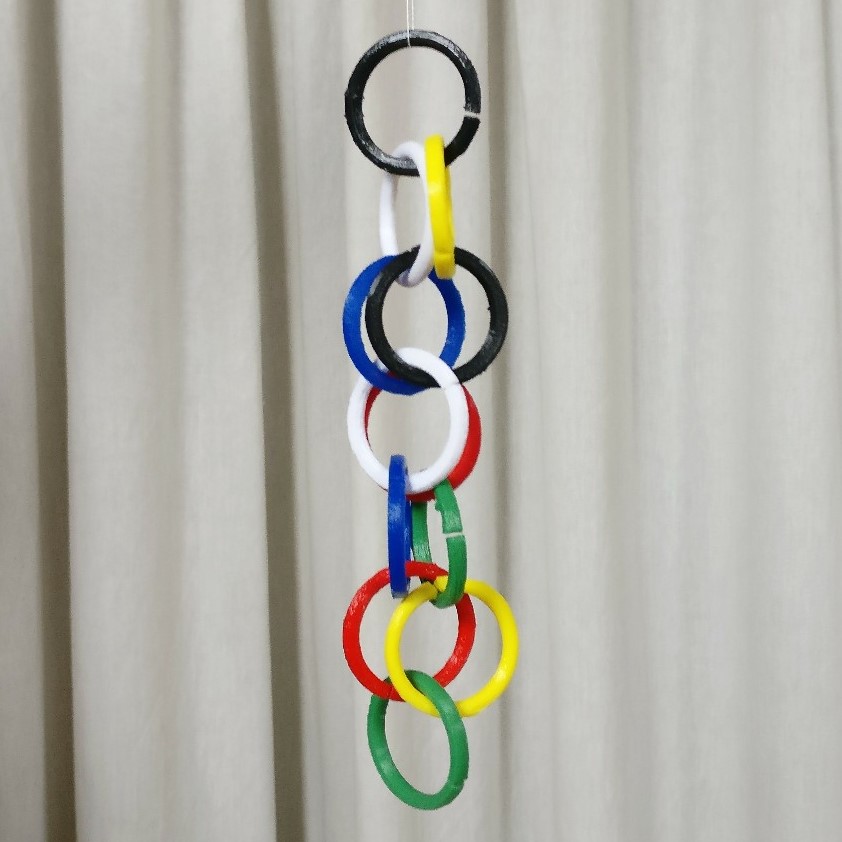
Whatever your eyes may be telling you, there are only two positions for the rings in the chain.
The file for printing rings is available on Pinshape.
This reminds me of the “Jacob’s Ladder” toy, which I think is based on the same principle.
Somewhere we have several Jacob’s Ladders but I don’t think any of the pictures are online. We made them out of fabric, card, CD boxes and rattly ones from TicTac boxes filled with sweets.
We have got pictures of a Milkman’s Wallet which is the same principle as a Jacob’s Ladder http://www.woollythoughts.com/fundraising.html