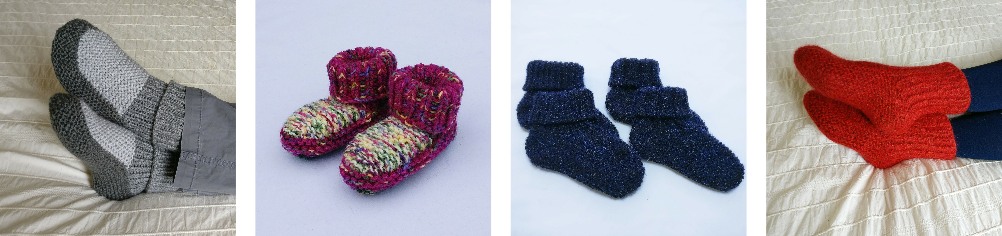
I am not really a sock knitter but I recently wrote a pattern for mathematical slippers and made several pairs in a few weeks. The front, sides and sole of the slippers are knitted flat; the cuffs can be knitted flat or in the round.
Things with a small circumference, such as socks, can be knitted in the round, using four (or more) double-pointed needles, or with a long circular needle, using a method known as ‘magic loop’. Magic loop involves folding the work in half, pulling the ends of the needle through and knitting as though you were knitting flat then repeating this process after every half round. I decided I didn’t want to do either of these. I wanted to just knit round and round without having to stop.

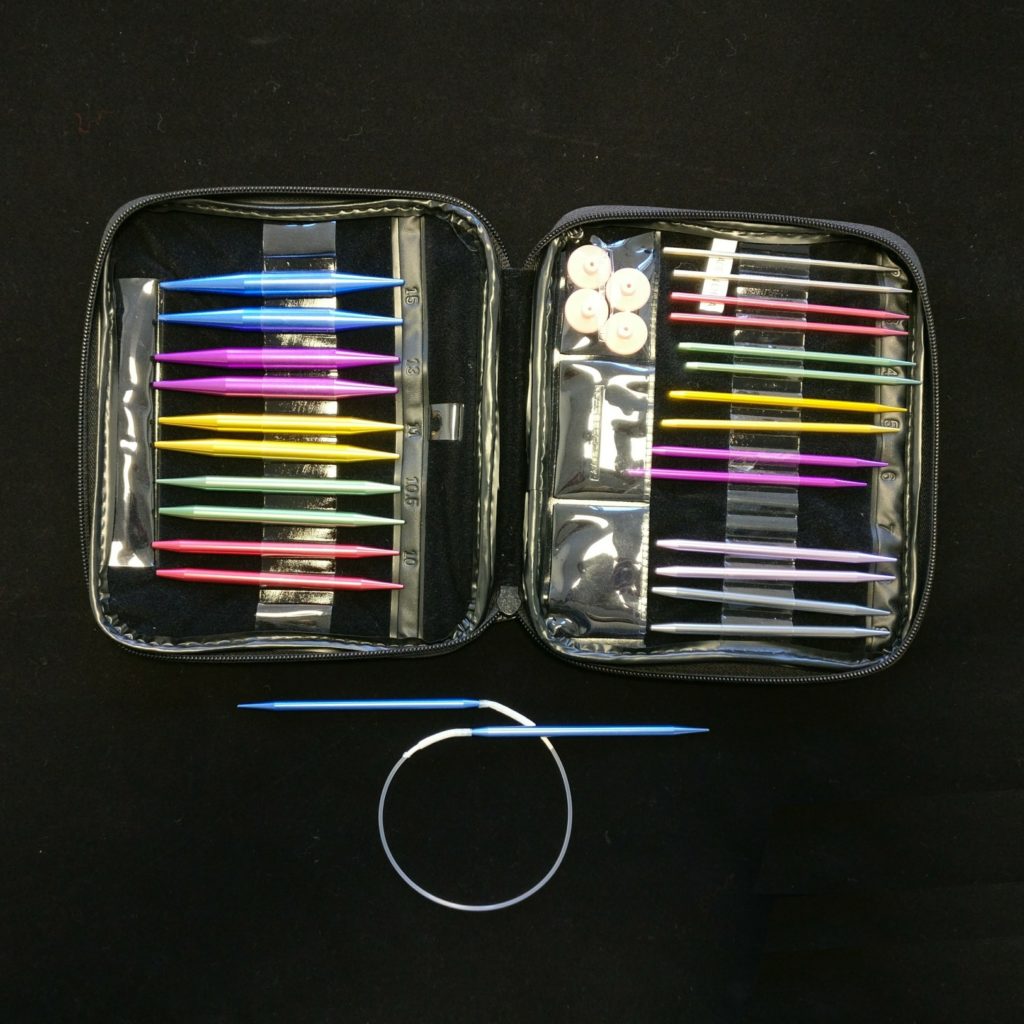
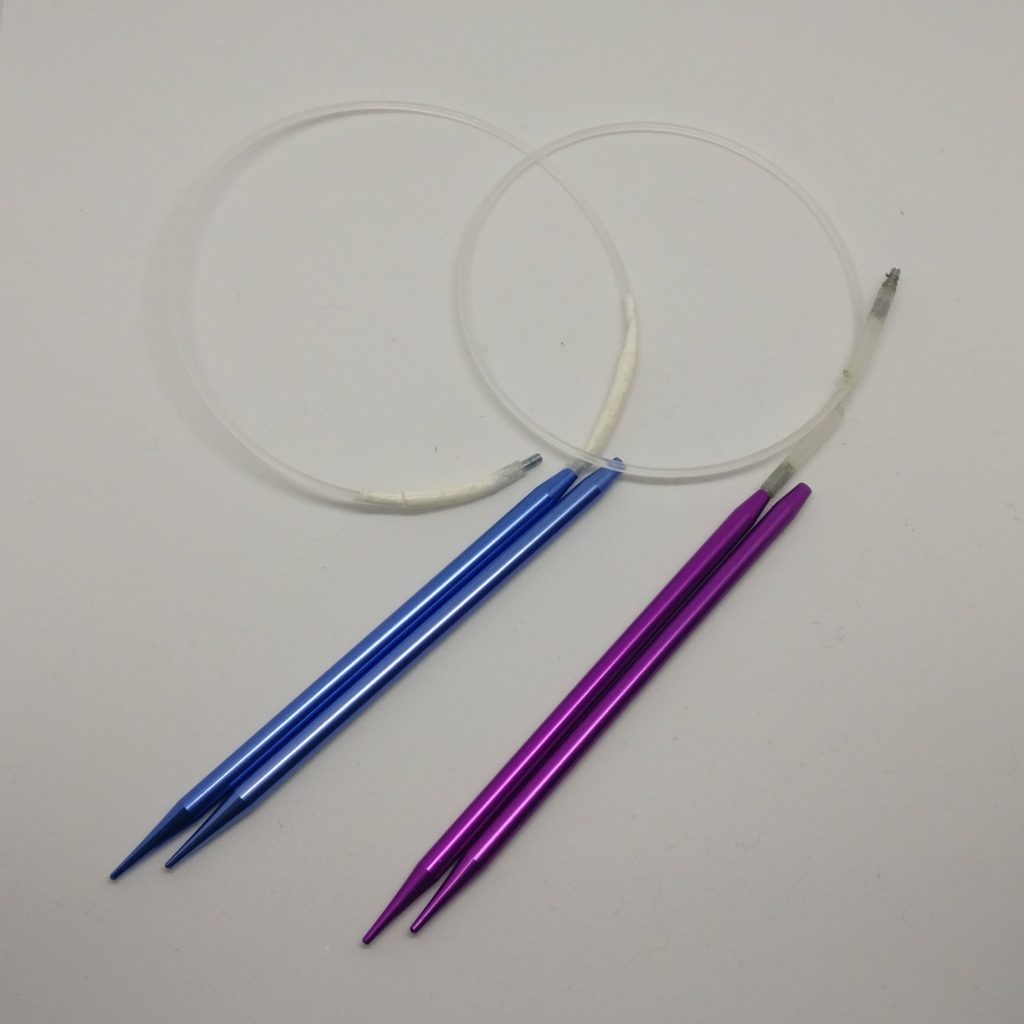
I have many sets of interchangeable circular needles. The tips of the needles can be swapped from one length of cable to another depending on what you want to knit. The shortest cables in most sets of interchangeables make a length (including the needle tips) of about 40 cm (16″) which is far too long for a slipper. It is possible to buy very short fixed circulars but they are quite expensive and I needed various thicknesses. The photo shows 4.5 mm needles from all the sets I have. As you can see two are shorter than the rest but not short enough.
After searching on the internet I came across this tutorial for how to use a set of Boye needles and add your own cables. It just so happened that the shorter pink needles, in the photo, are from a set of Boye needles I have never used. I bought them when I was in US about 12 years ago – because they were pretty. I didn’t like them because the cables are too stiff and they have a very strange bend in them. The hack in the tutorial was perfect – and cheap.

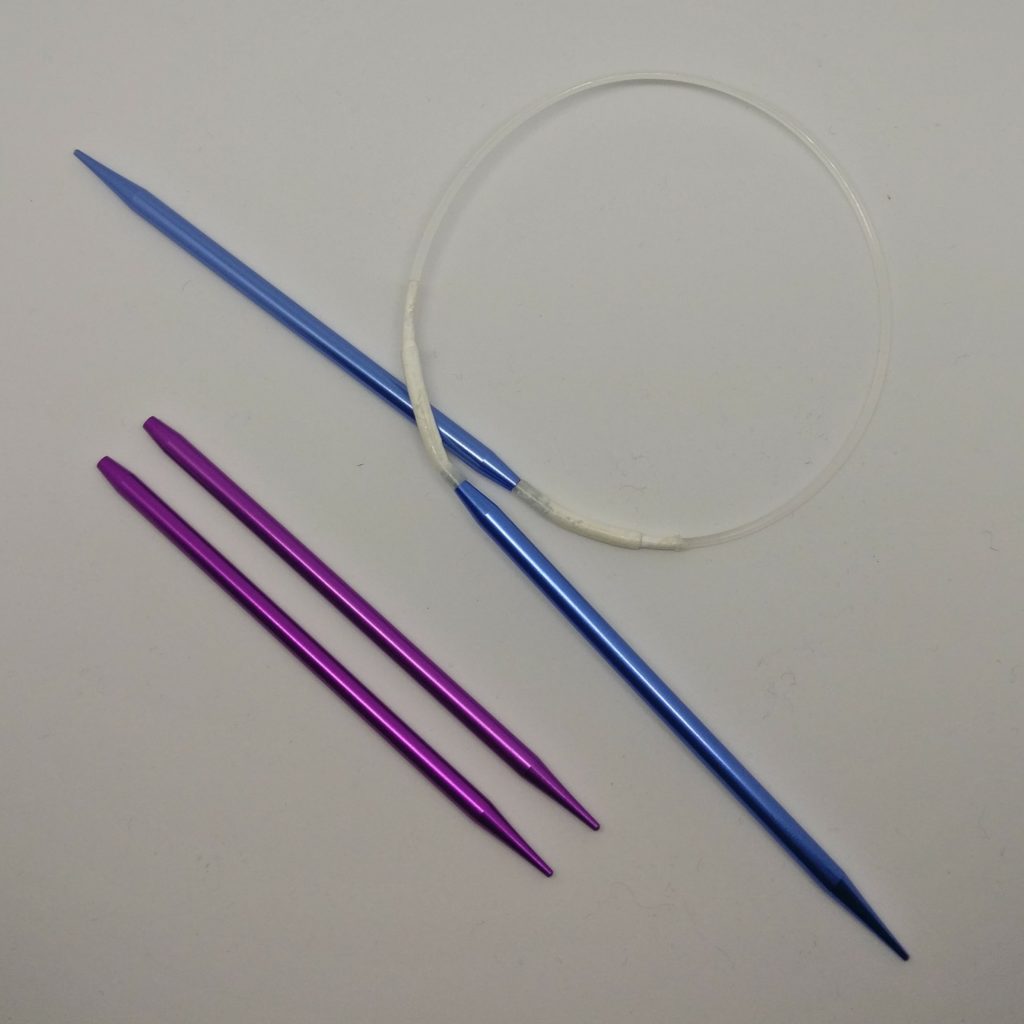
We followed the instructions almost as they are given. WeedEater Line is called strimmer cord in UK. A long roll costs less than £2. The US size for the scews is given as 2-56, which is also known as M2. We took the needle tips to our local family-run ironmongery shop, where they hadn’t heard of these sizes. Their guess was that we needed 2 mm screws. They tried some in the needles and they seemed to fit. They weren’t as long as we wanted but were the only option. The shop owner chopped the heads off the screws so we wouldn’t have to do that at home. The screws cost 5p each so it wasn’t going to be a big loss if they didn’t work.
The most tricky bit was finding narrow tube to fit over the screws and cord. We tried various things we had lying around and discovered that the tube in a pump make-up dispenser was just right. We followed the instructions more-or-less as given, making the cords as short as we possibly could and still allow them to make a circle. We finished off by binding the joins with plumber’s tape.
Knitting the first couple of rounds wasn’t easy but, once the stitches started to spread out a bit, they worked well. I wouldn’t recommend them for fine yarns as the joins are not as slick as other needles but they did the job without too much frustration.
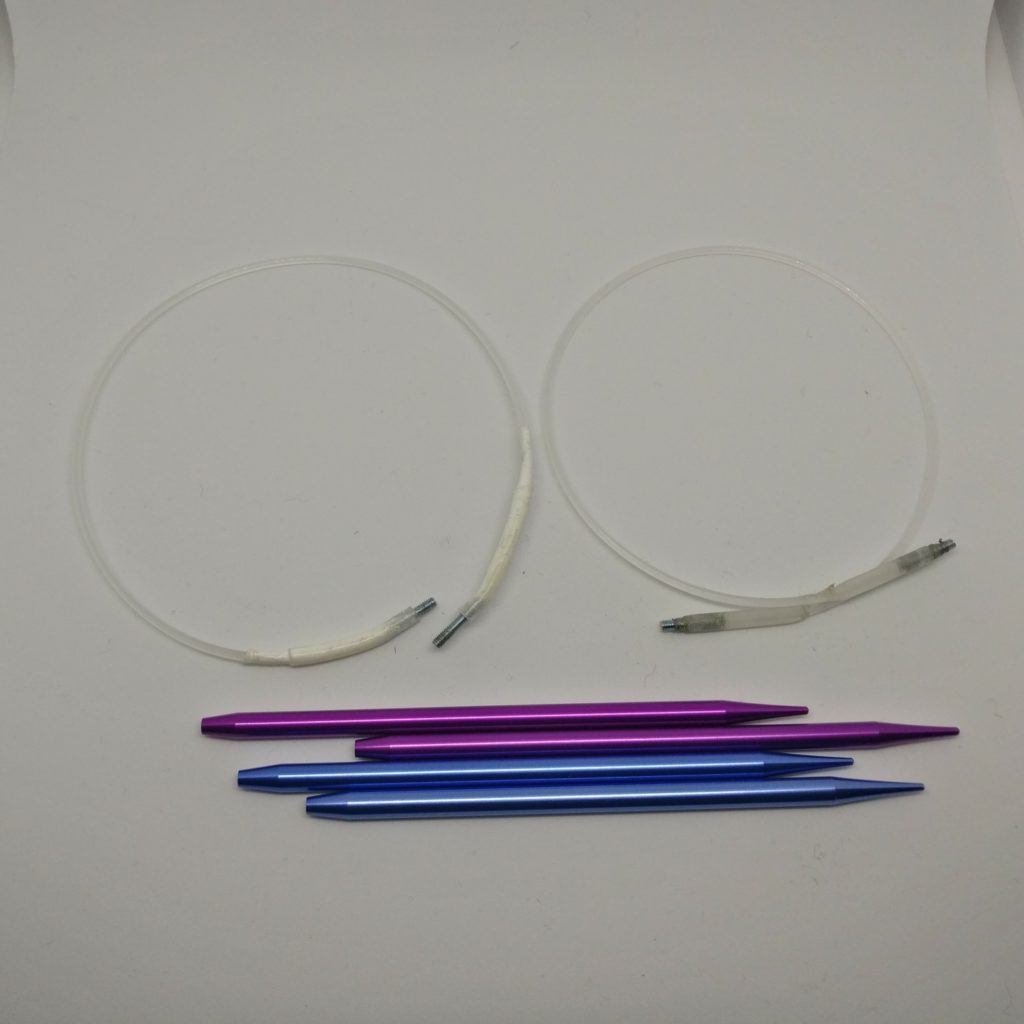
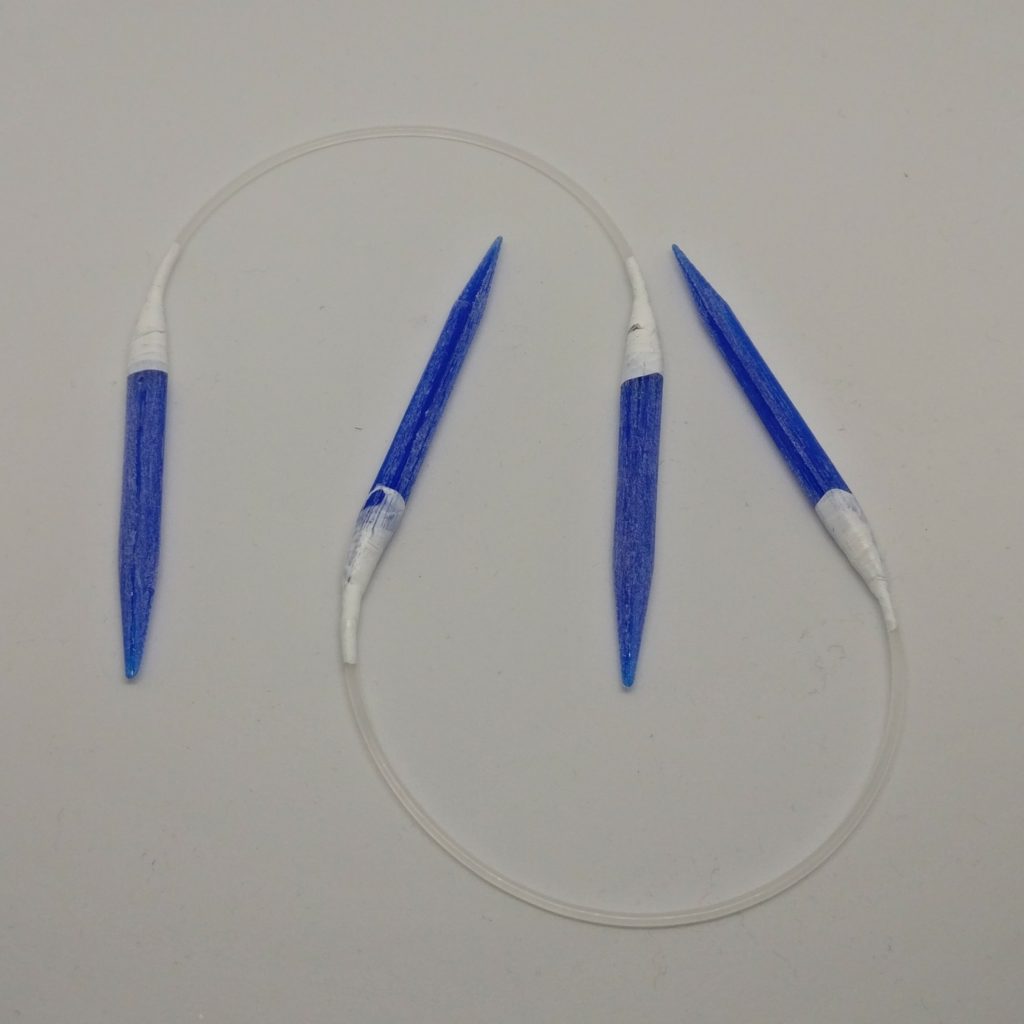
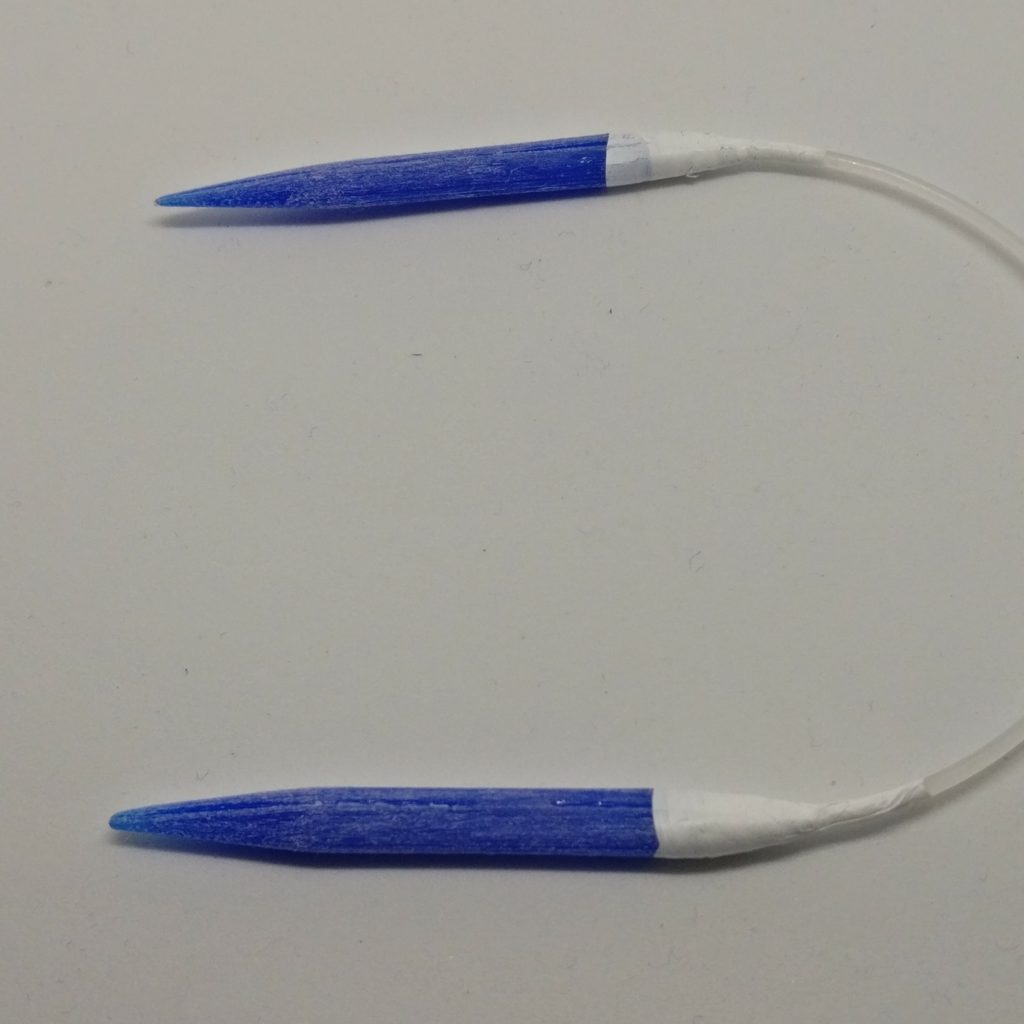
In the meantime we had bought the 3D printer and decided to experiment with more strimmer cord to make fixed circulars with a very small circumference. Each needle tip was basically made from a cylinder with a tall pointed cone on each end. The tip was made in two halves, the cord was glued in the channel, the two halves were glued together and the joint wrapped with plumber’s tape.
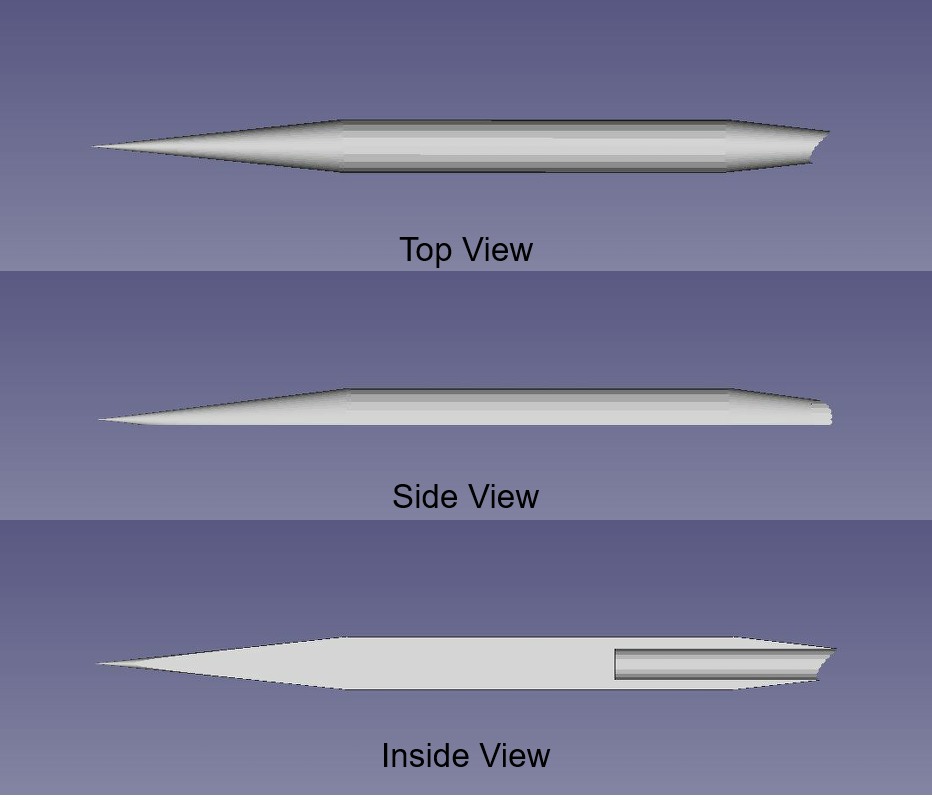
In principle these needles work well although we didn’t go on to polish them properly because the tips we made were too short. They were about 6 cm long. The needle was about 24 cm from end to end. I have problems with my hands and the tips were really not long enough for me to manage. Anyone more dexterous would not have the same problem They would need to be about 1 cm longer for me to manage which would still make the whole needle considerably shorter than the hacked Boye needles. We didn’t make any more but probably will in the future.
It is very easy to change the length and diameter of the needles from the original 3D printing files.
Pros of 3D printed needles
- Very cheap
- If you have strimmer cord you can make them whenever you need them
- Tips can be any length
- Tips can be any diameter (provided the cord will fit inside)
- Cables can be any length
Cons of 3D printed needles
- Need polishing to be smooth enough to use
- Points need smoothing so they are not too sharp
- The sizing might not be as accurate as shop-bought needles

Comparison of size of tips.
I had been honored to obtain a call from a friend when he found
the important recommendations shared on the site. Browsing your blog publication is a
real great experience. Many thanks for taking into account readers
at all like me, and I wish you the best of success for a professional in this domain.